| Check Out The Pics Of The Finished Car Below. Check Back Soon For My Next Camaro Project Car. 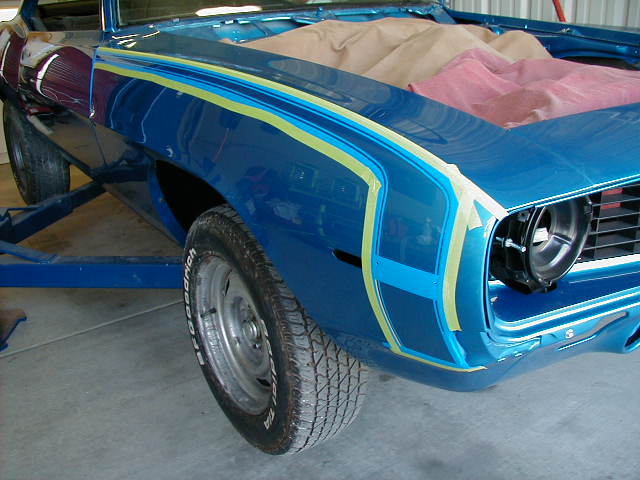 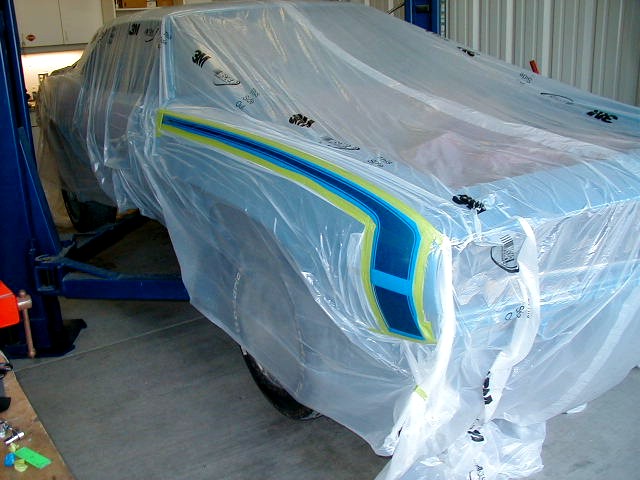 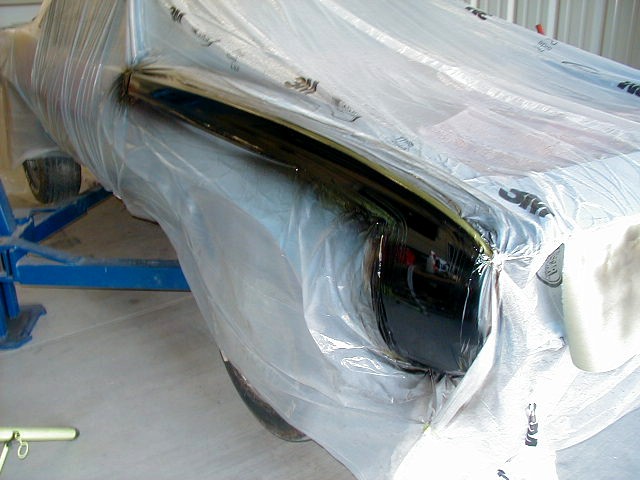 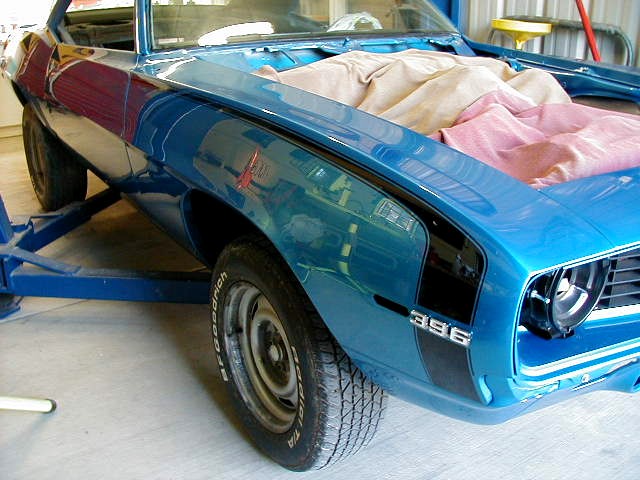 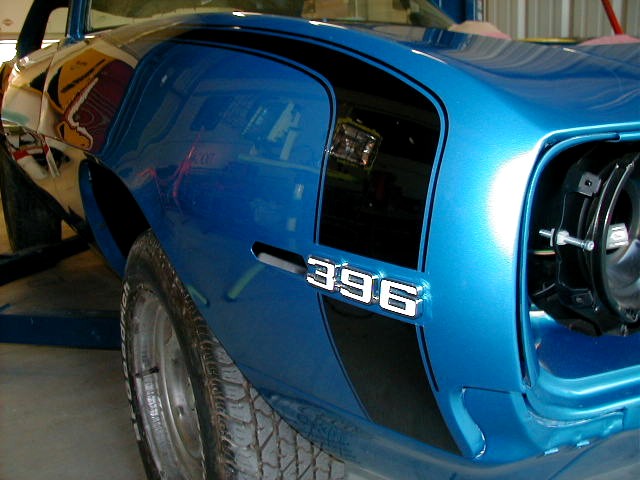  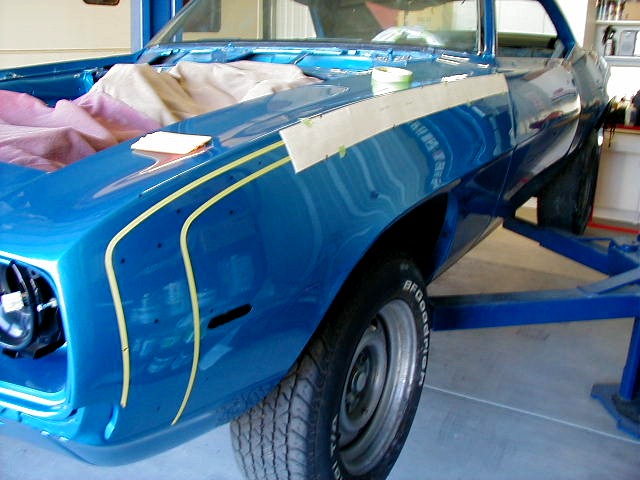 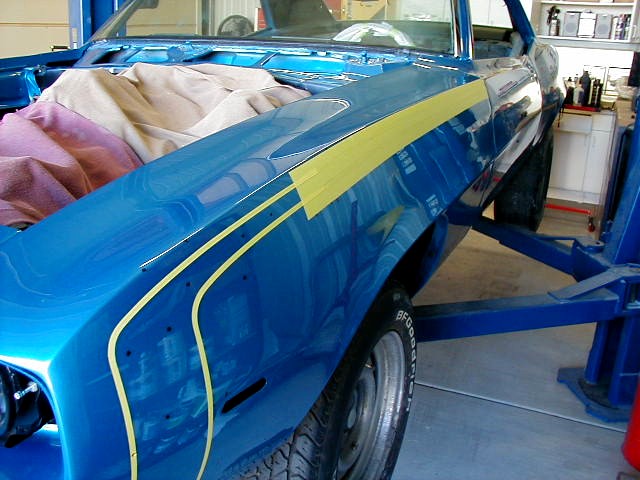 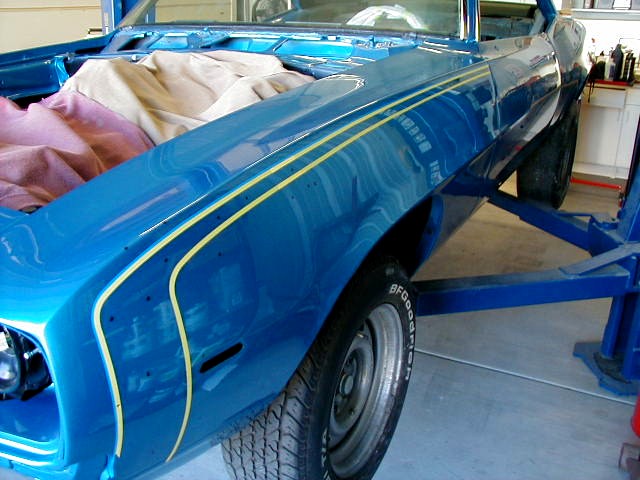 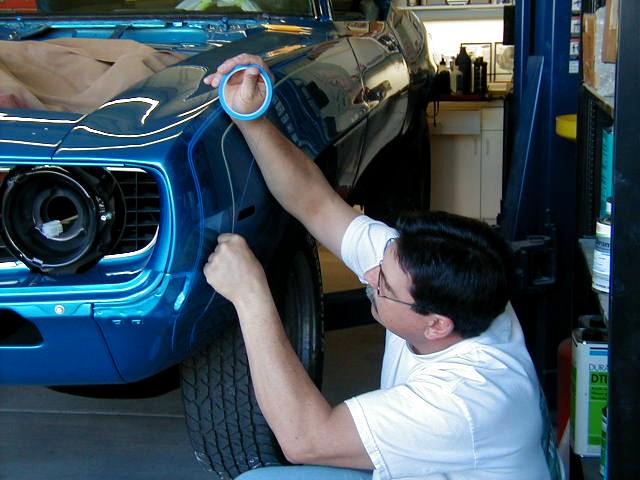  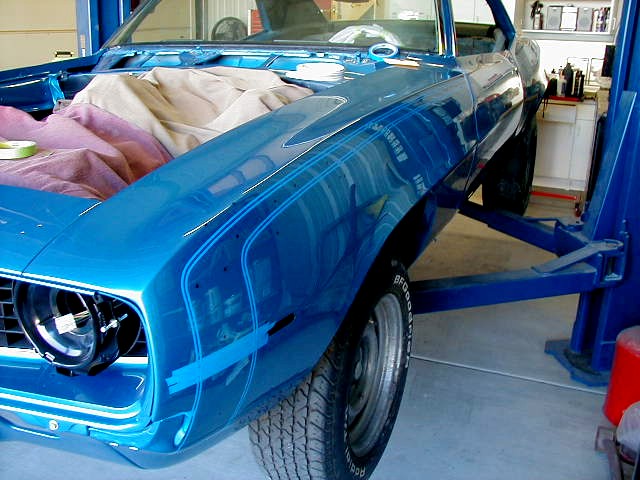  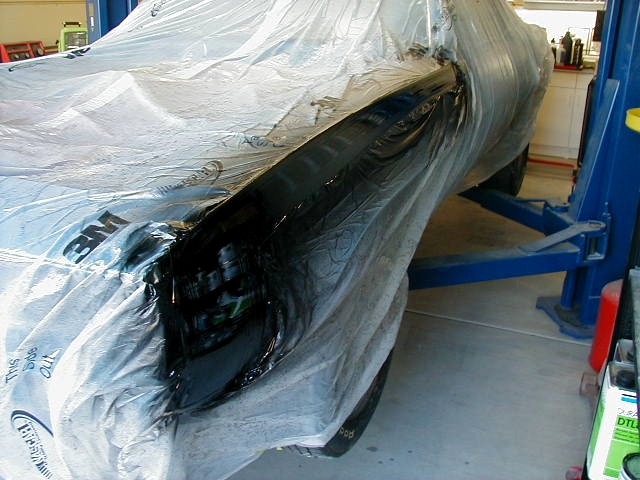 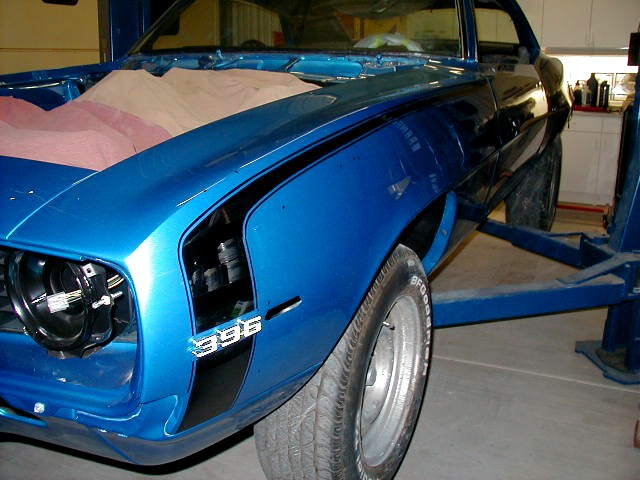
  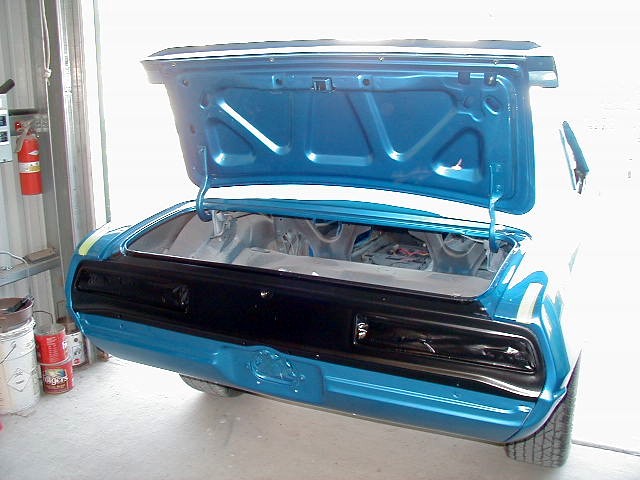 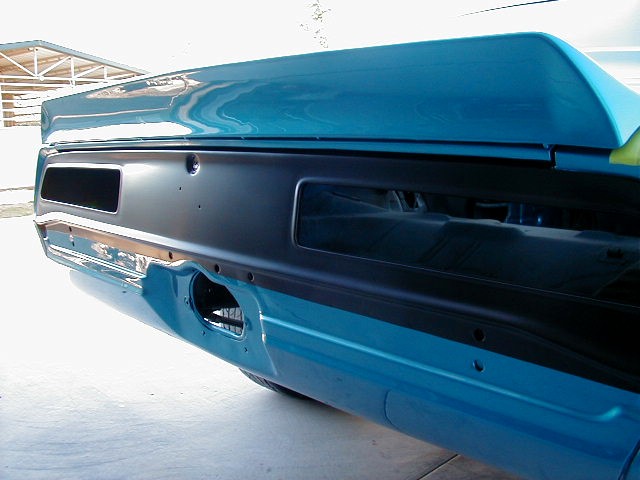
       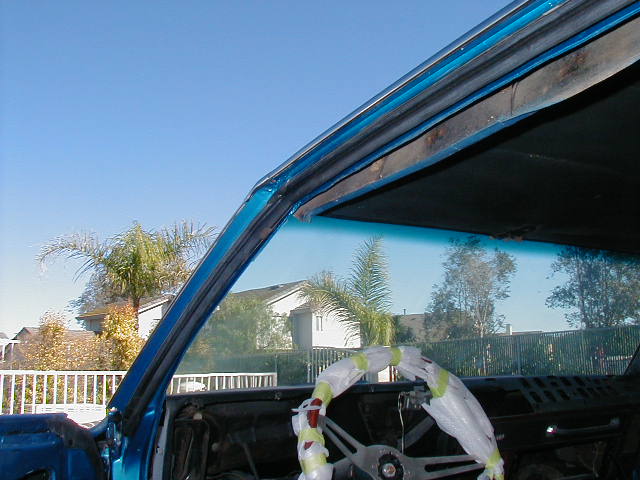   
Today I focused on installing the roof rail weather strip and retainer, quarter glass, door regulators, door glass, and outer window fuzzies. After installing the weather strip, I cleaned and installed the quarter glass and fuzzies, lubed and adjusted the regulators on both sides. Then I cleaned both door glass pieces. Then I installed both door regulators, installed the door glass, and did the final ajustmemts so the glass fits snug and there are no gaps. This whole part of the project took 6 hours. I'll install new quarter vertical rubber strips when they arrive.  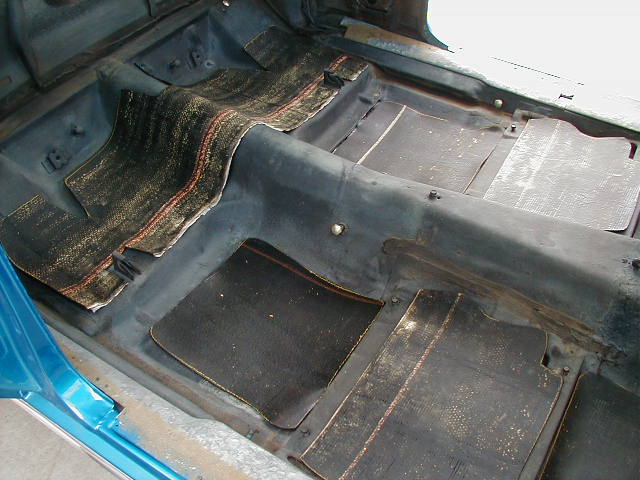 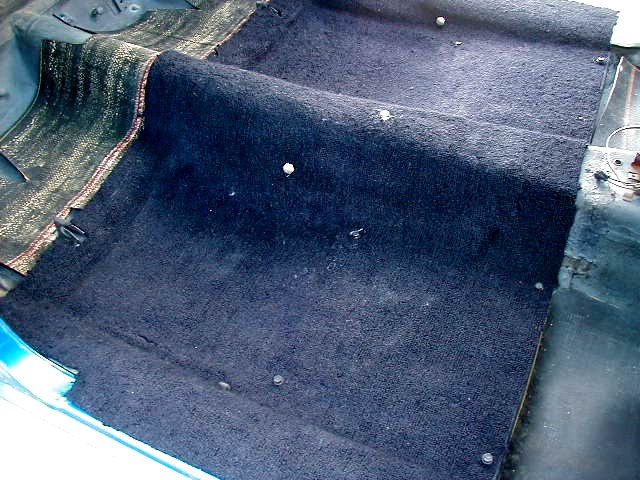 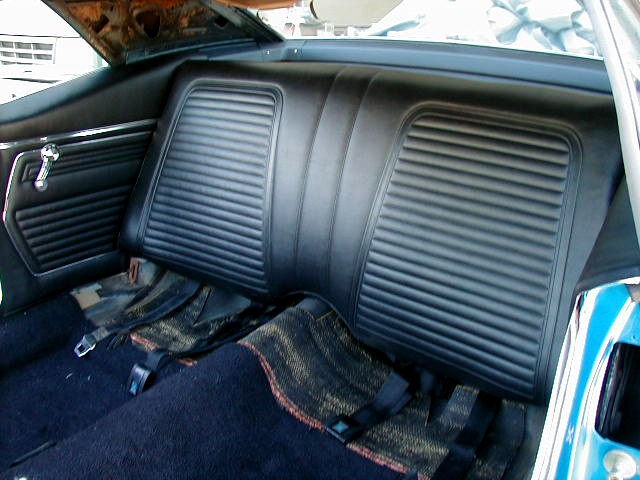  Now that the weatherstripping is done and the windows are in, it's time to start on the interior. While laying in the underlayment I noticed two small pinholes that I missed when I was patching the floor, so I had to stop and cut out the bad area and weld in a small patch. I took the patch from an original floor pan that I had laying around. Notice how well the patch fits. It almost looks like I just welded a bead on top of the floor it fits so well. This is why I try to use original sheetmetal for floor patches. It just fits so much better than after market patch panels. Reproduction full floor panels are fine. Now I can put in the underlayment and carpeting. Notice the bolts sticking up through the carpet. I installed all the floor bolts (seatbelt, seat mount and console bolts) and layed the carpet down and fitted it where I wanted it. Then I used a razor and cut around each bolt. This is a good tip I picked up. Now I didn't have go searching for all the bolt holes. I just removed each bolt as I installed each seat belt and will do the same for the front seats and console. I then installed the new package tray, rear side door panels, and recovered and installed the rear seats. This is my first time with upholstery and the seats came out nice. Next, it's on to the front seats, console, kick panels, and dash. Check back soon. Now that the weatherstripping is done and the windows are in, it's time to start on the interior. While laying in the underlayment I noticed two small pinholes that I missed when I was patching the floor, so I had to stop and cut out the bad area and weld in a small patch. I took the patch from an original floor pan that I had laying around. Notice how well the patch fits. It almost looks like I just welded a bead on top of the floor it fits so well. This is why I try to use original sheetmetal for floor patches. It just fits so much better than after market patch panels. Reproduction full floor panels are fine. Now I can put in the underlayment and carpeting. Notice the bolts sticking up through the carpet. I installed all the floor bolts (seatbelt, seat mount and console bolts) and layed the carpet down and fitted it where I wanted it. Then I used a razor and cut around each bolt. This is a good tip I picked up. Now I didn't have go searching for all the bolt holes. I just removed each bolt as I installed each seat belt and will do the same for the front seats and console. I then installed the new package tray, rear side door panels, and recovered and installed the rear seats. This is my first time with upholstery and the seats came out nice. Next, it's on to the front seats, console, kick panels, and dash. Check back soon. 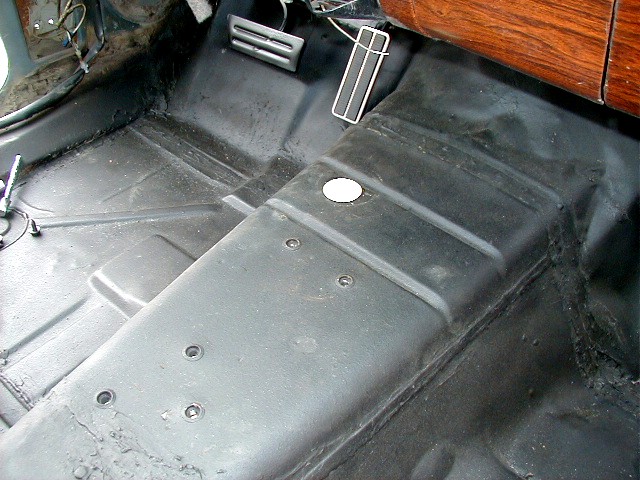 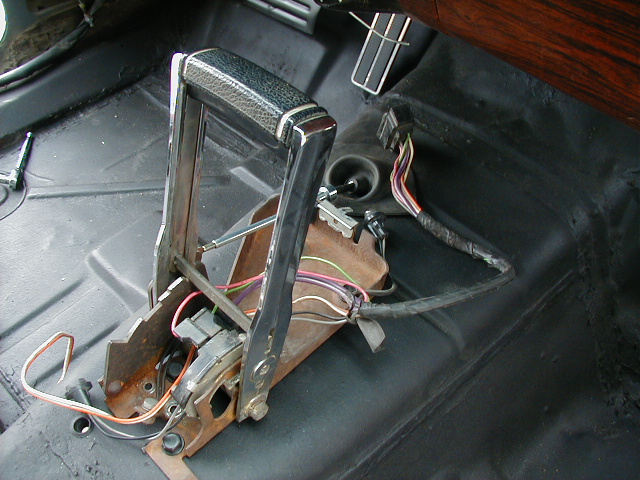 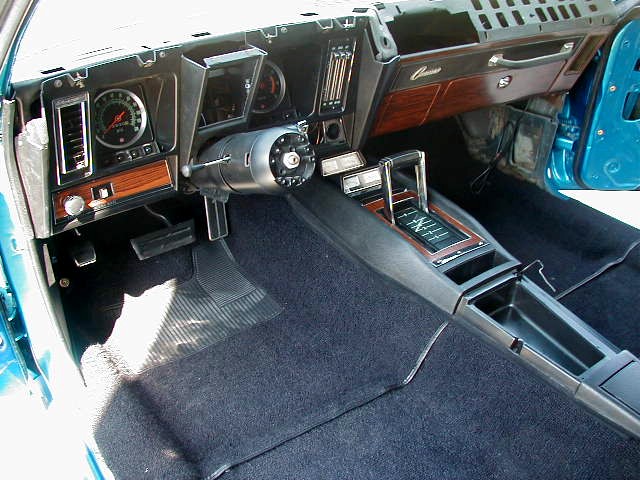 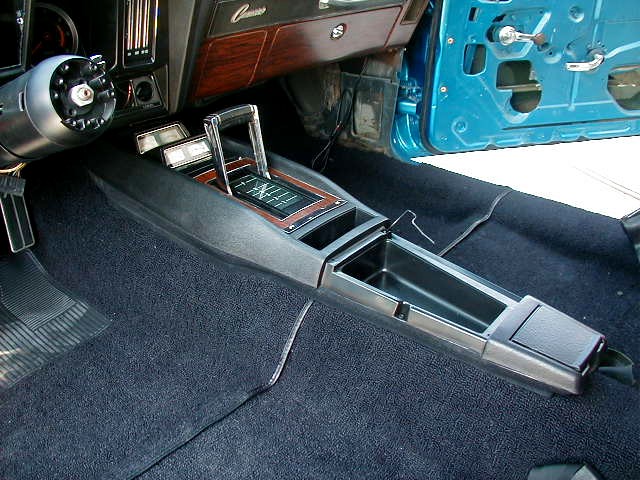 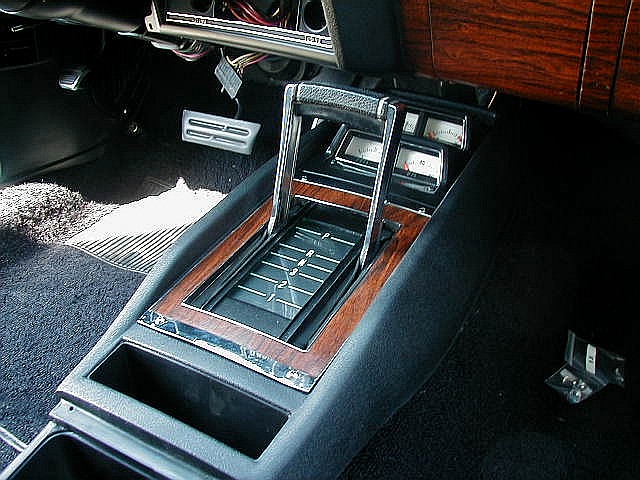 Now, I got started on the front part of the interior by first installing the shifter on the bare tunnel, then set the underlayment in place and installed the front section of carpeting in the same manner as the rear section. With the carpet down, I then installed the driver's kick panel, parking brake mechanism, dimmer switch, and hung the dash harness so it was ready to connect to the dash bezel. On the bench, I transferred all the necessary parts over to the new dash bezel. This was very time consuming. Those parts included the speedo, tach, headlight switch, wiper switch, driver's vent, and all the new clips and J nuts needed to install the bezel to the dash. The most time consuming part was cutting out the holes for the clock and the tachometer. Once the bezel was together, I installed it connecting all the wiring, courstesy lights, speedo cable, and heater assembly. This is an abreviated description since it took all day to install the dash bezel, console, and gauges. I then tackled the console which is installed in two pieces and it can only go in ONE WAY. That is to install the bottom portion to the floor first. Then the upper portion must be completely assembled on the bench before installation. Those componoents include, the complete gauge set up, the console and gauge wiring harness, the rear console courtesy light assembly, ashtray lid, console lid spring, and the seatbelt holder plate. Now for the tricky part. Once the upper portion is set over shifter onto bottom piece, I had to connect the oil pressure line to the oil gauge with about an inch of space to deal with. Then I connected the dash harness connector to the console wire connector. I was now able to secure the top section to the bottom with the screws that came with the new console. Then the shift indicator and bezel could be installed. The final touch will be a new console lid to finish it off. Now, I got started on the front part of the interior by first installing the shifter on the bare tunnel, then set the underlayment in place and installed the front section of carpeting in the same manner as the rear section. With the carpet down, I then installed the driver's kick panel, parking brake mechanism, dimmer switch, and hung the dash harness so it was ready to connect to the dash bezel. On the bench, I transferred all the necessary parts over to the new dash bezel. This was very time consuming. Those parts included the speedo, tach, headlight switch, wiper switch, driver's vent, and all the new clips and J nuts needed to install the bezel to the dash. The most time consuming part was cutting out the holes for the clock and the tachometer. Once the bezel was together, I installed it connecting all the wiring, courstesy lights, speedo cable, and heater assembly. This is an abreviated description since it took all day to install the dash bezel, console, and gauges. I then tackled the console which is installed in two pieces and it can only go in ONE WAY. That is to install the bottom portion to the floor first. Then the upper portion must be completely assembled on the bench before installation. Those componoents include, the complete gauge set up, the console and gauge wiring harness, the rear console courtesy light assembly, ashtray lid, console lid spring, and the seatbelt holder plate. Now for the tricky part. Once the upper portion is set over shifter onto bottom piece, I had to connect the oil pressure line to the oil gauge with about an inch of space to deal with. Then I connected the dash harness connector to the console wire connector. I was now able to secure the top section to the bottom with the screws that came with the new console. Then the shift indicator and bezel could be installed. The final touch will be a new console lid to finish it off. 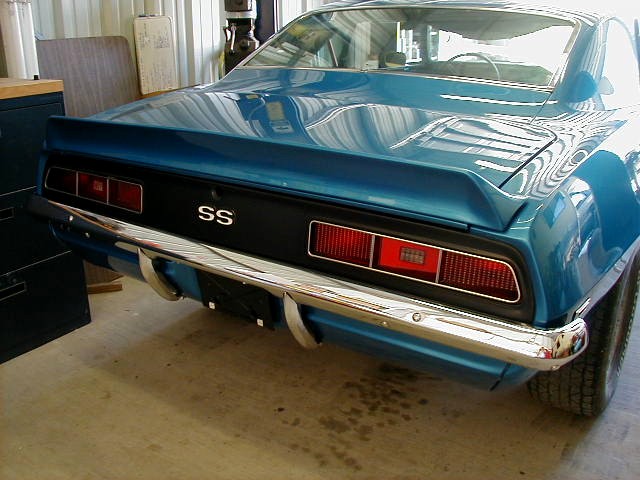 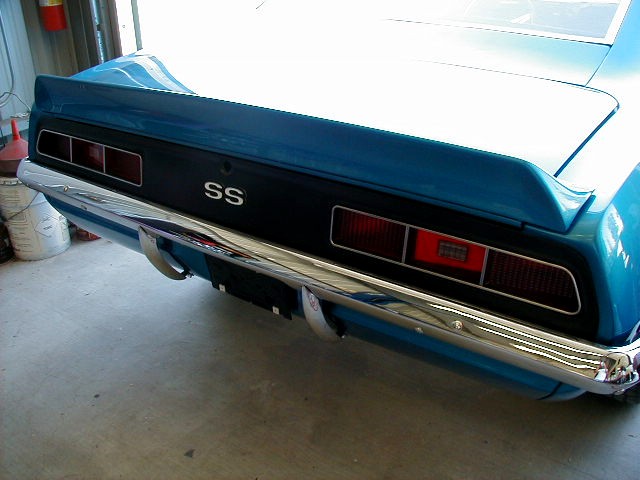 I needed a break from the perils of wiring the dash and gauges so I switched over to the back of the car and finished up the tailights and rear bumper. The bumper was fairly straightforward to install. I did put in a new license plate light. Then I went to install the tail lights and to my dismay the tail light housings did not fit correctly over the mounting studs. During the bodywork portion of the resto I installed a reproduction tail panel but didn't think to mock up the tail lights to make sure they would fit. I just assumed they would. Another lesson learned about repo parts. Fortunately, the tailight lenses fit into the openings. I had to do some tweaking to get the housings to line up with the studs. I then hooked up the tail light harness with all new bulbs. I have been working to get the Fun Car finished, but I had a few setbacks. The interior is finally finished and I still have to install the hood, do some final polish work and work out a few bugs. 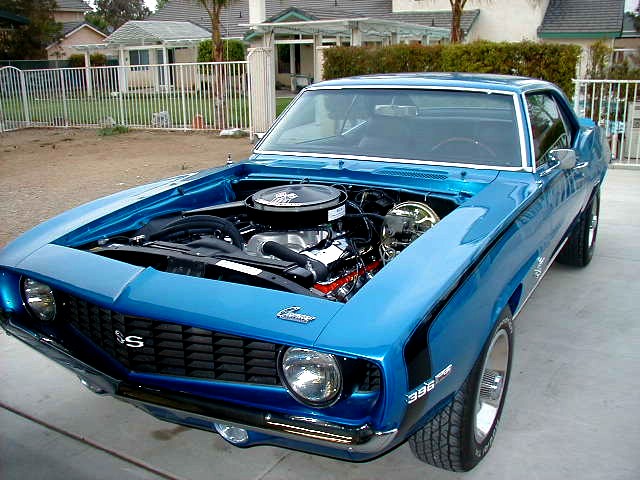 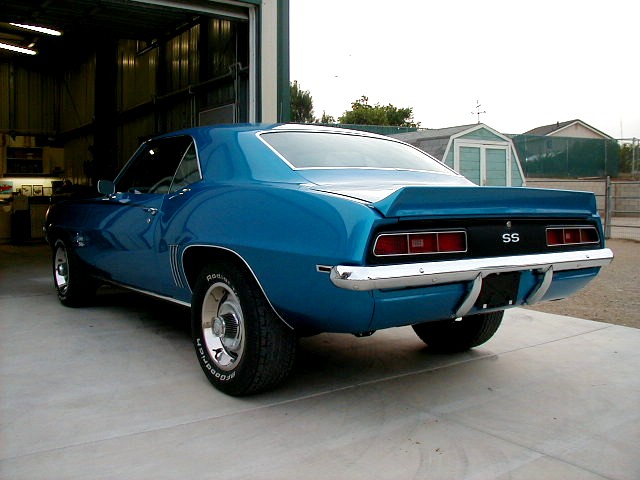 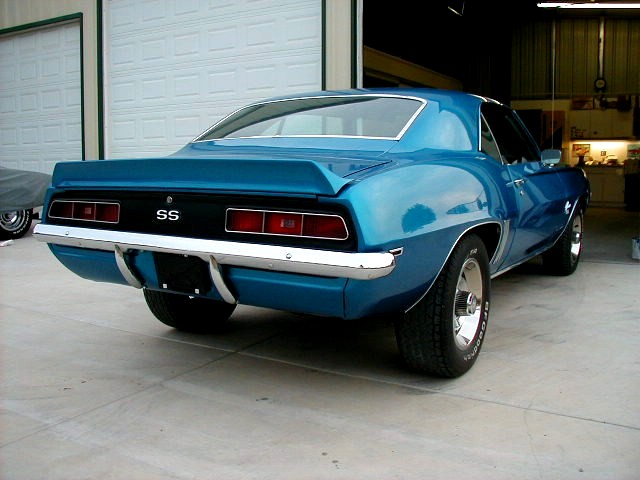  I definitely love the blacked out tail panel on the big block Camaros. Final assembly is almost complete. This week I will perform the front end alignment and then I'll take it to the exhaust shop for a trick dual Flowmaster exhaust system. I definitely love the blacked out tail panel on the big block Camaros. Final assembly is almost complete. This week I will perform the front end alignment and then I'll take it to the exhaust shop for a trick dual Flowmaster exhaust system. 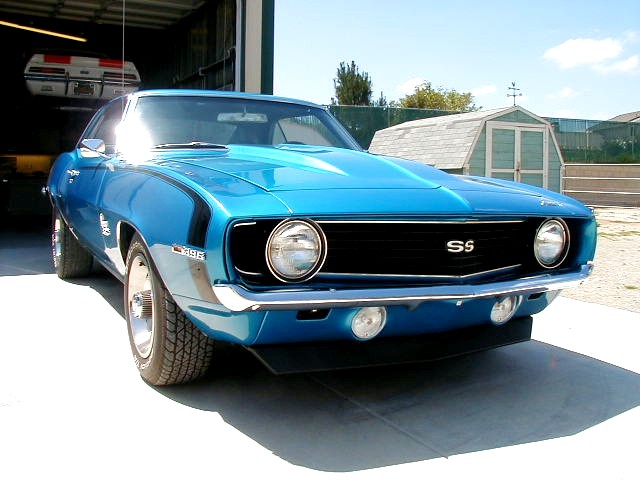 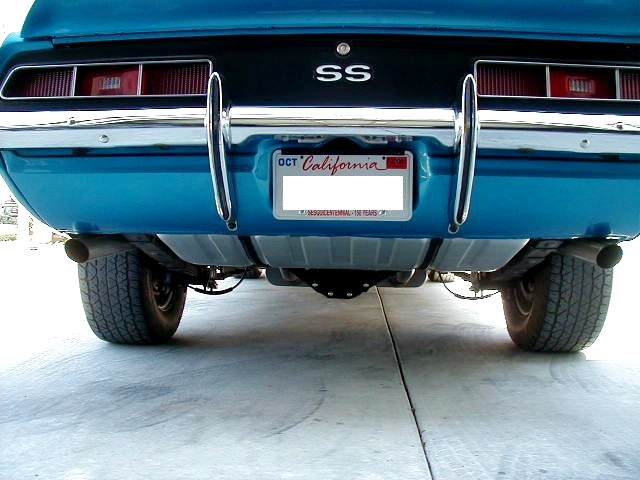 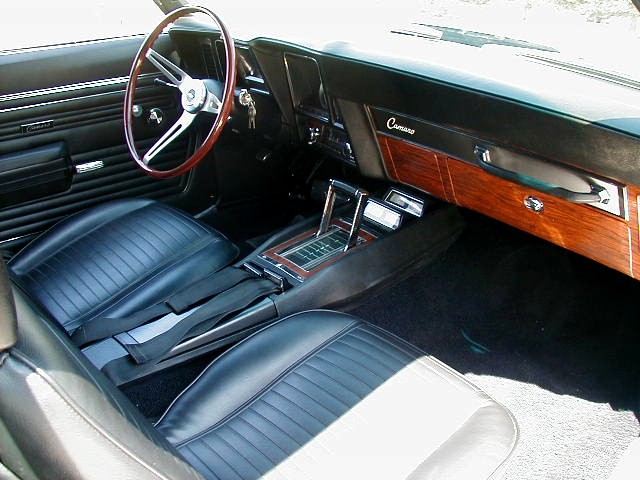 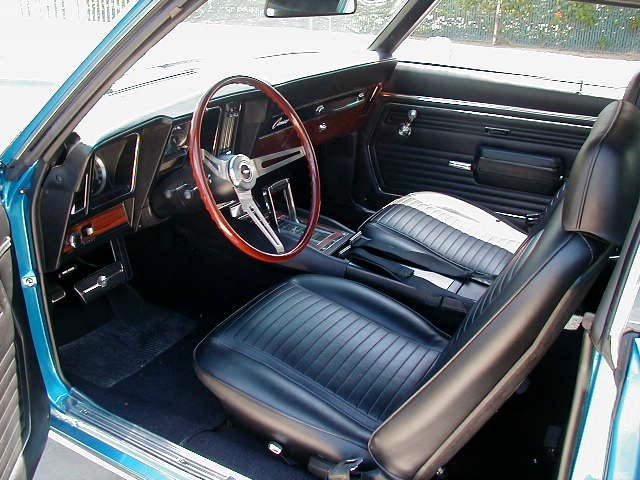  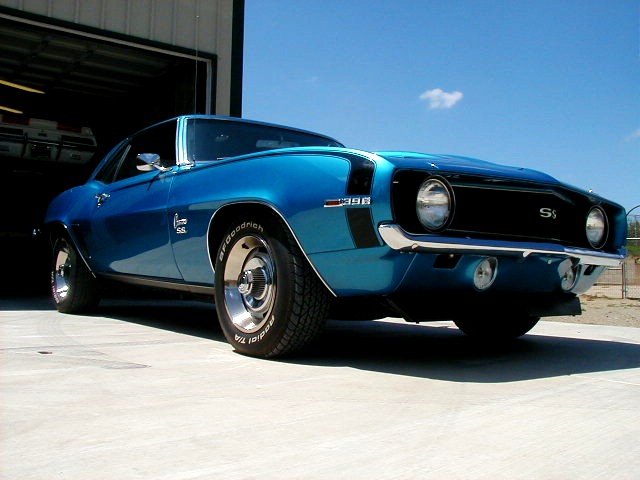 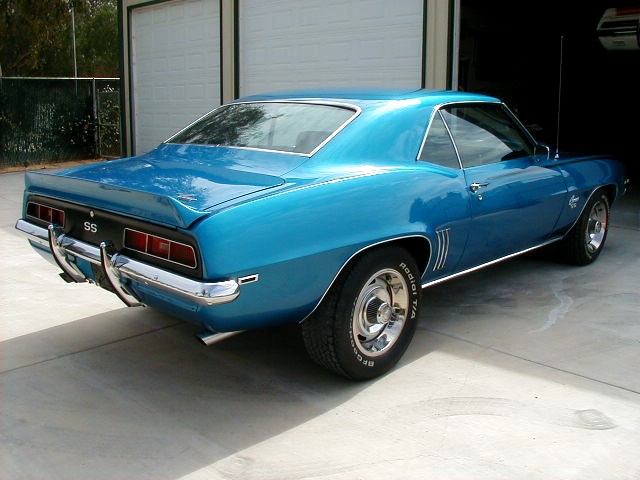 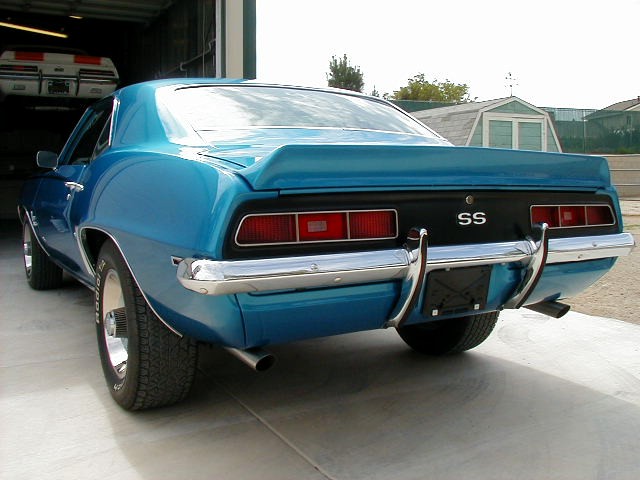 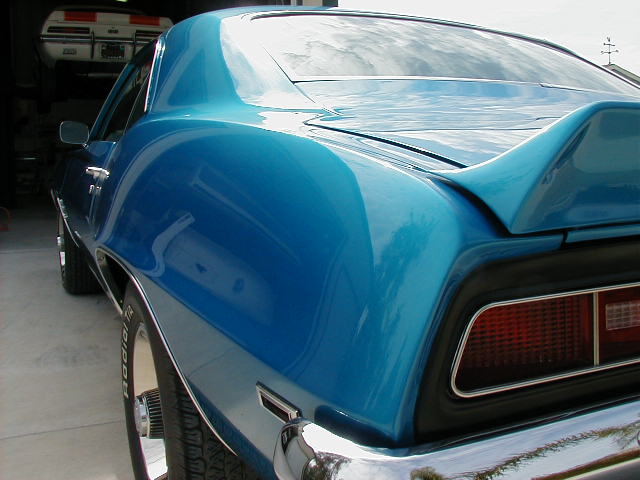 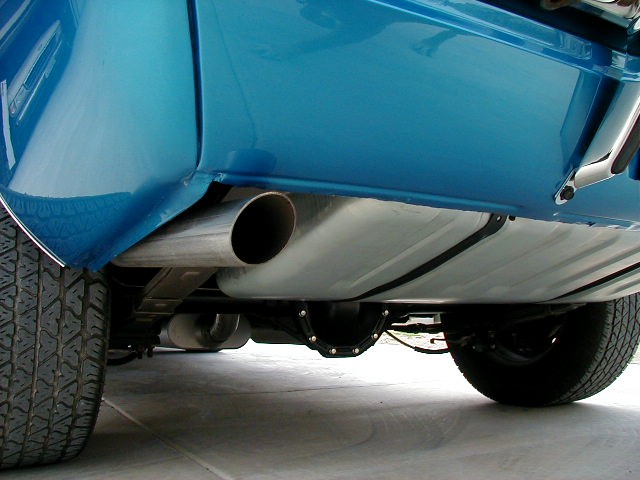  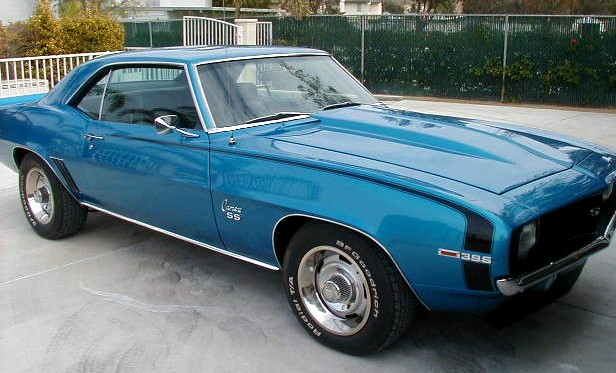 Check Back Soon For The Next Camaros Unlimted Big Block Camaro Project Check Back Soon For The Next Camaros Unlimted Big Block Camaro Project
|
Final Assembly And Finish Work Continues
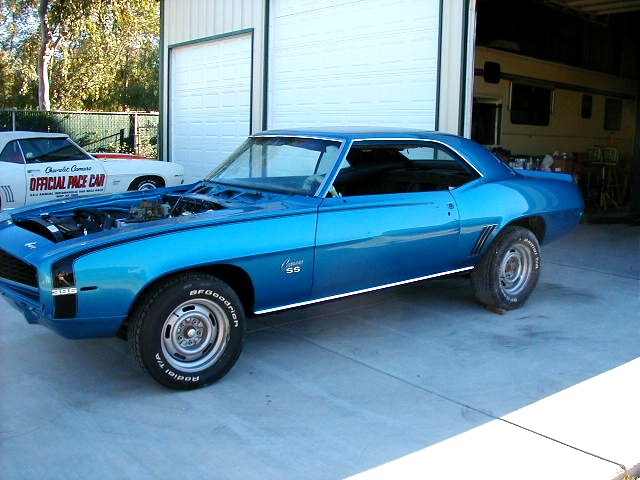
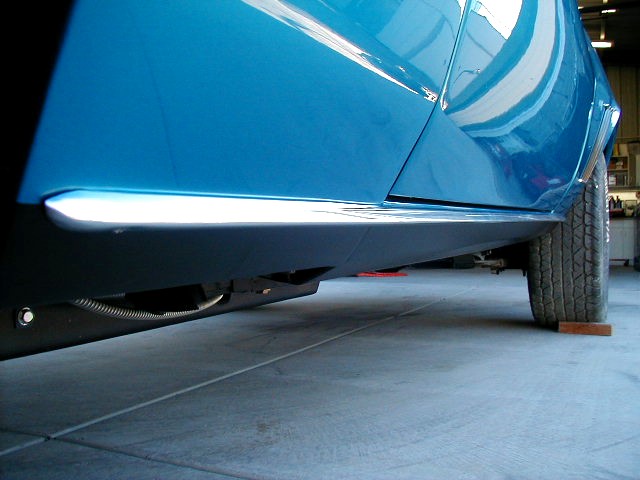
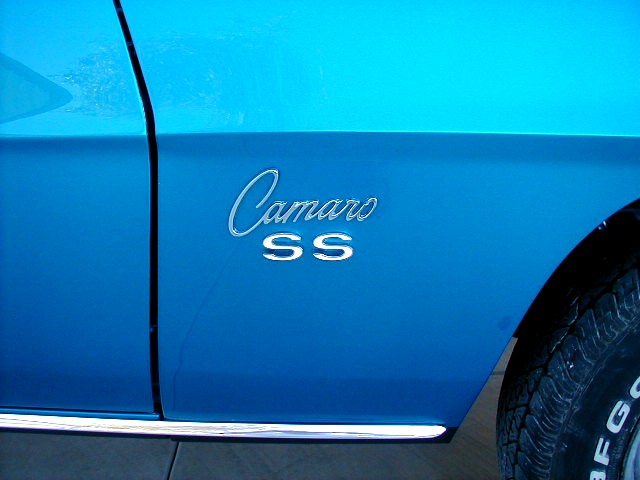
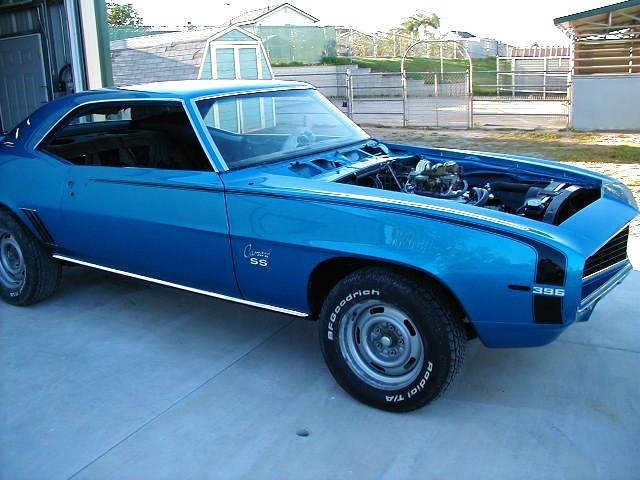
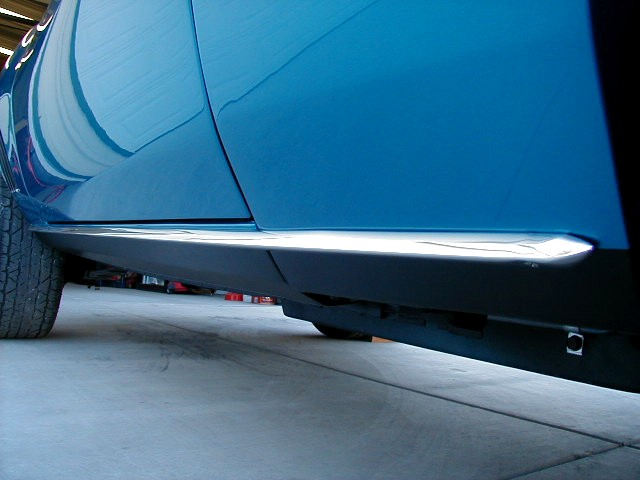
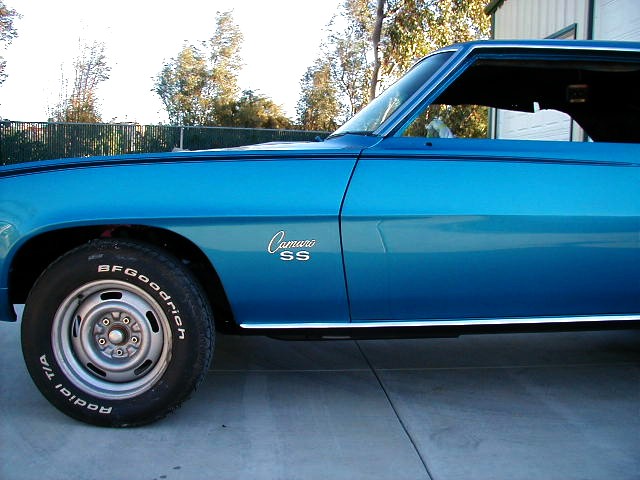
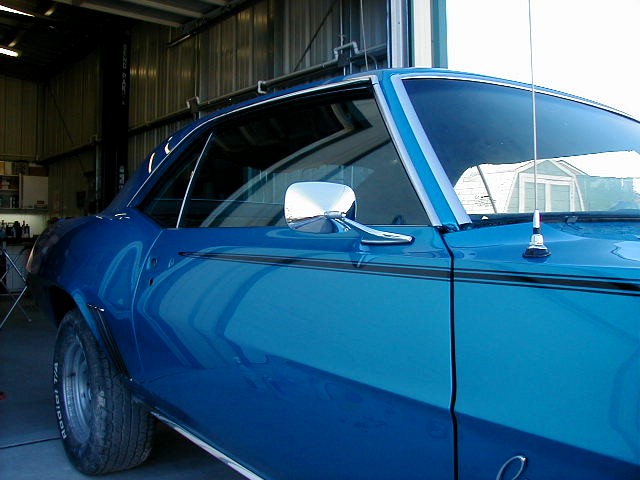
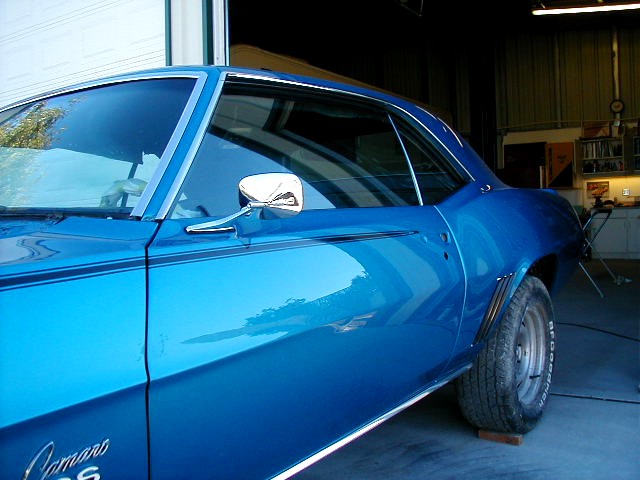
Hockey stick stripes are definitely a challenge to apply because the stripes came from the factory painted on the fender and the door portion was a decal. As you can see, I am painting the fender stripes and the doors will have the factory style decals. I used Dupont Chroma System Black for the stripes. Notice there is almost no orange peel. I will do a final polishing for a mirror finish. One of the more diffilcult aspects of laying out the stripes was the fact that the fender stencil came in 3 pieces. So, there is a break in the stencil about half way up the fender. The problem with this is when the stencil overlaps itself it will create an imperfection in the paint once the stencil is removed. I didn't want the imperfection even though there were imperfections from the factory due to the 3 piece stencil. If you look at the pics you will notice that I am laying a continuous line of one eighth inch tape and removing the stencil as I go. Then I have a single piece of tape with no breaks so there is a nice smooth line with no imperfections after the tape is removed. The next pics show the stripes with the door decals. The decals were easy to apply and came out nice. I also finished blacking out the tail panel and rocker panels with low gloss paint. The tail panel came out nice with no orange peel. The black from the factory had a fair amount of orange peel. I then started mounting the exterior trim. The Goodmark Rocker Spears are very nice pieces and come with new mounting strips. I had to hand drill all the holes for all the emblems including the Camaro emblems. There is no template that is accurate since all reproduction emblems have slight variations in how the studs are attached to the emblem. So, I had to measure each hole and drill it. I have about 5 hours just in drilling the holes alone. This was one of the more difficult things to do because if one emblem is off it is very noticable. If you remember, this car has come a long way from the day I brought it home. The car was a total basket case and everything was missing. I still have a ways to go. I have to finish up the trunk, and the total interior. There is still some exterior trim also, but I'm starting to see the light at the end of the tunnel. Check Back Soon As Final Assembly Continues... The Assembly Is Complete And The Car Is Finished. I'm Extremely Happy With The Results. The Last Thing To Finish Was The Installation Of The Two And A Half Inch FlowMaster Exhaust System By Street Rod Muffler Shop In Corona, CA.
|


