|
1969 L-78 Big Block Project Camaro | |
|
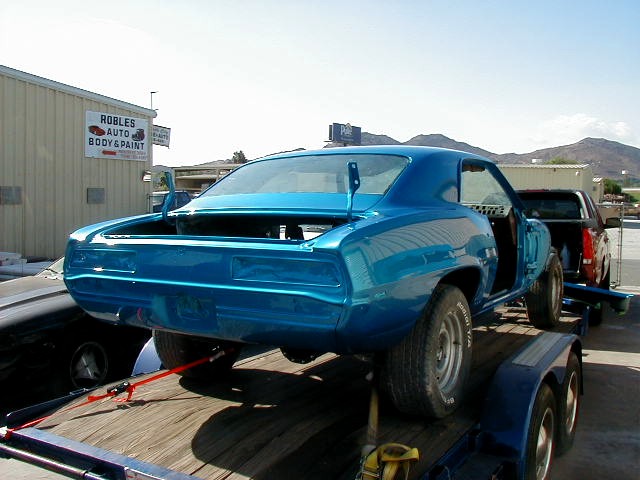
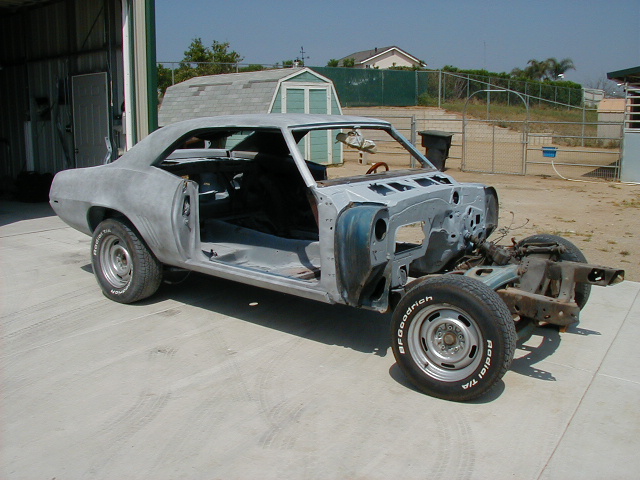
Original '69 SS Big Block Project Car We are calling this project the Fun Car
|
|
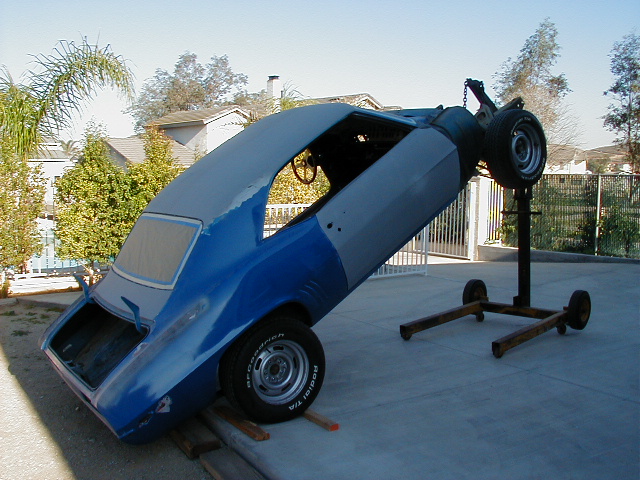
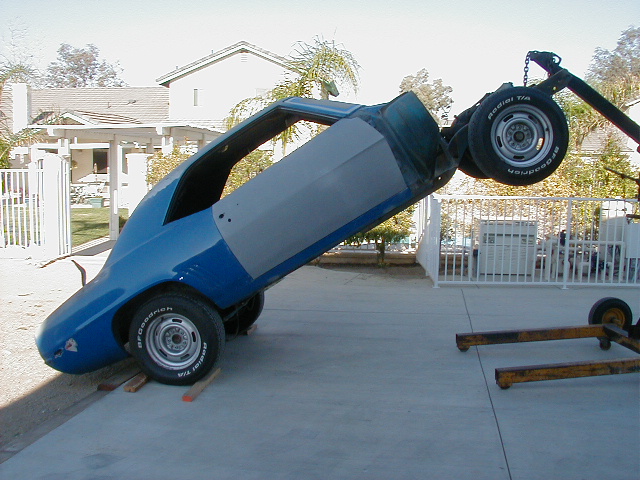
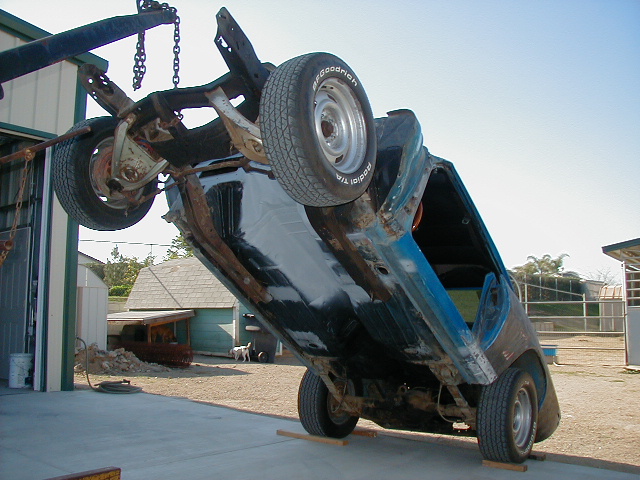
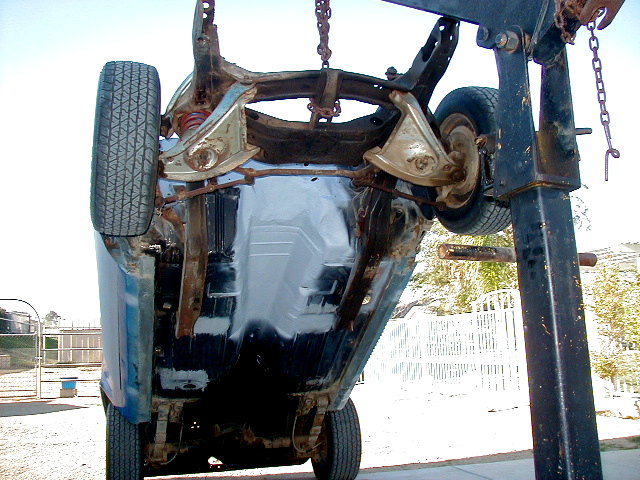
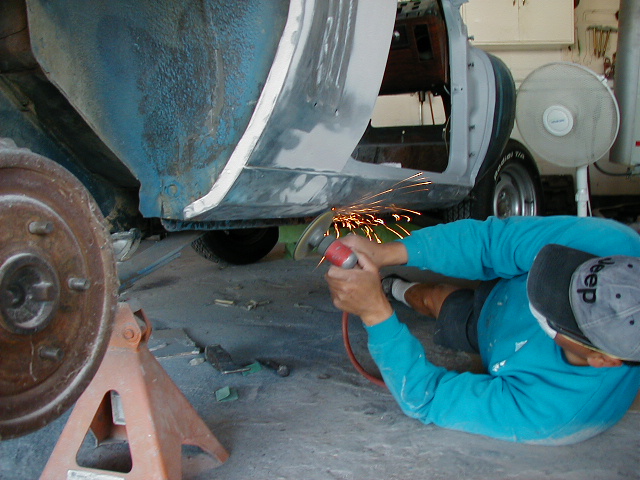
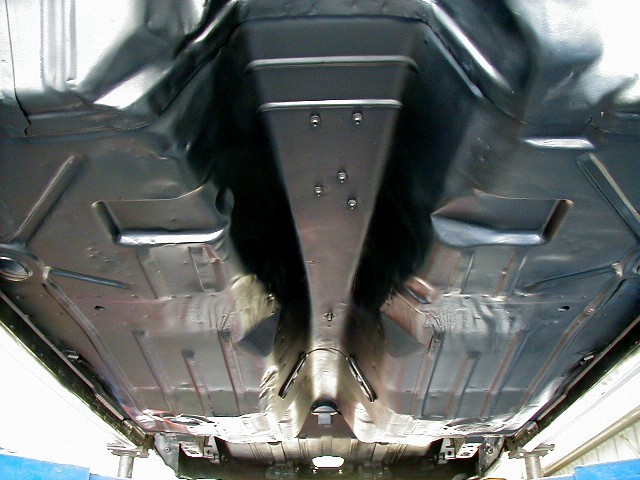
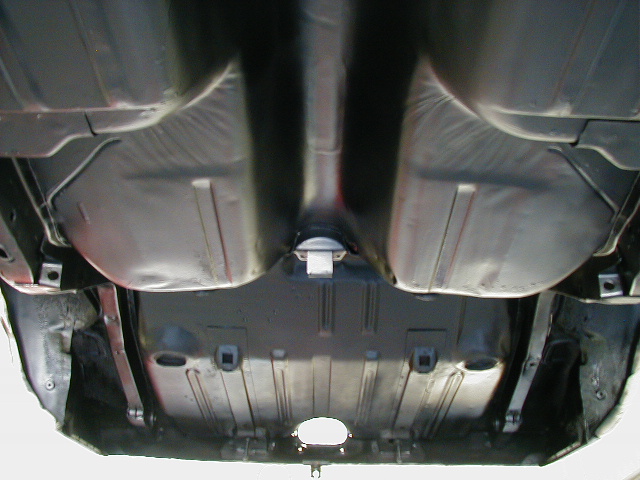
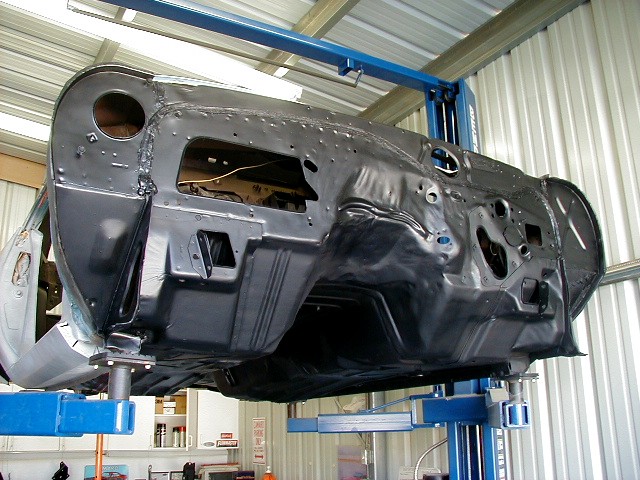
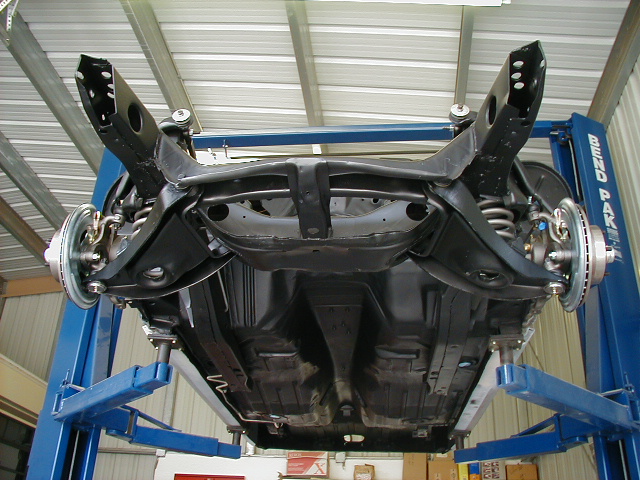
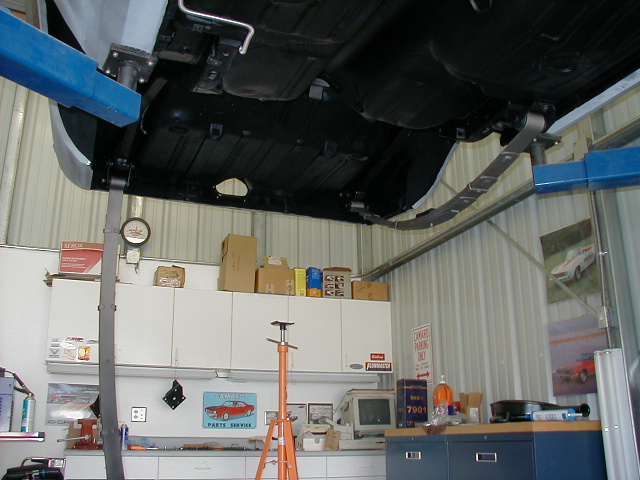
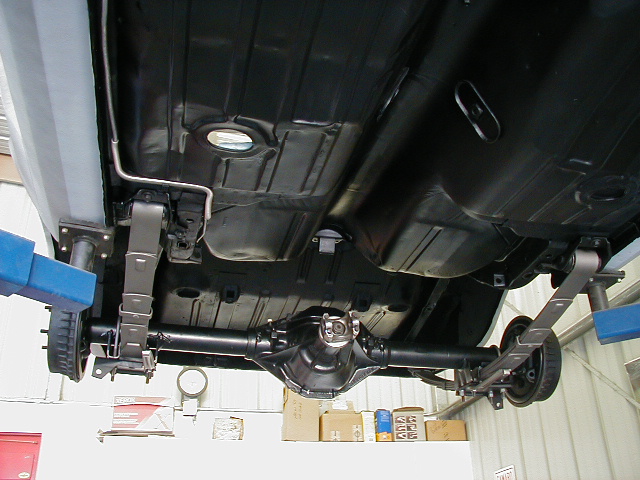
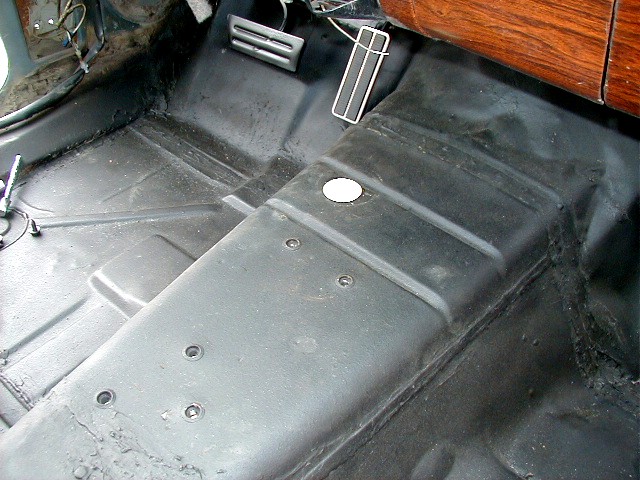
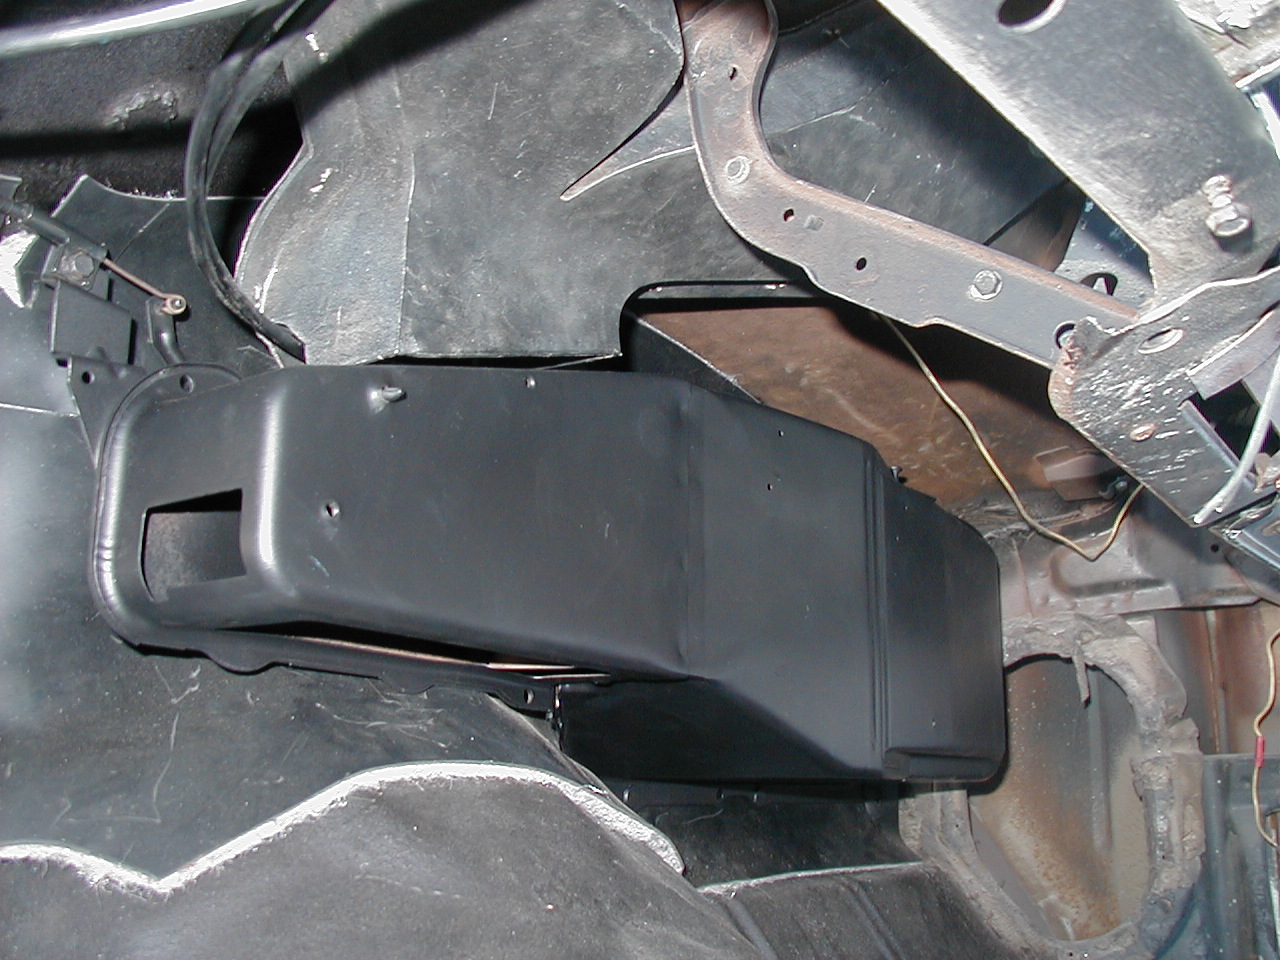
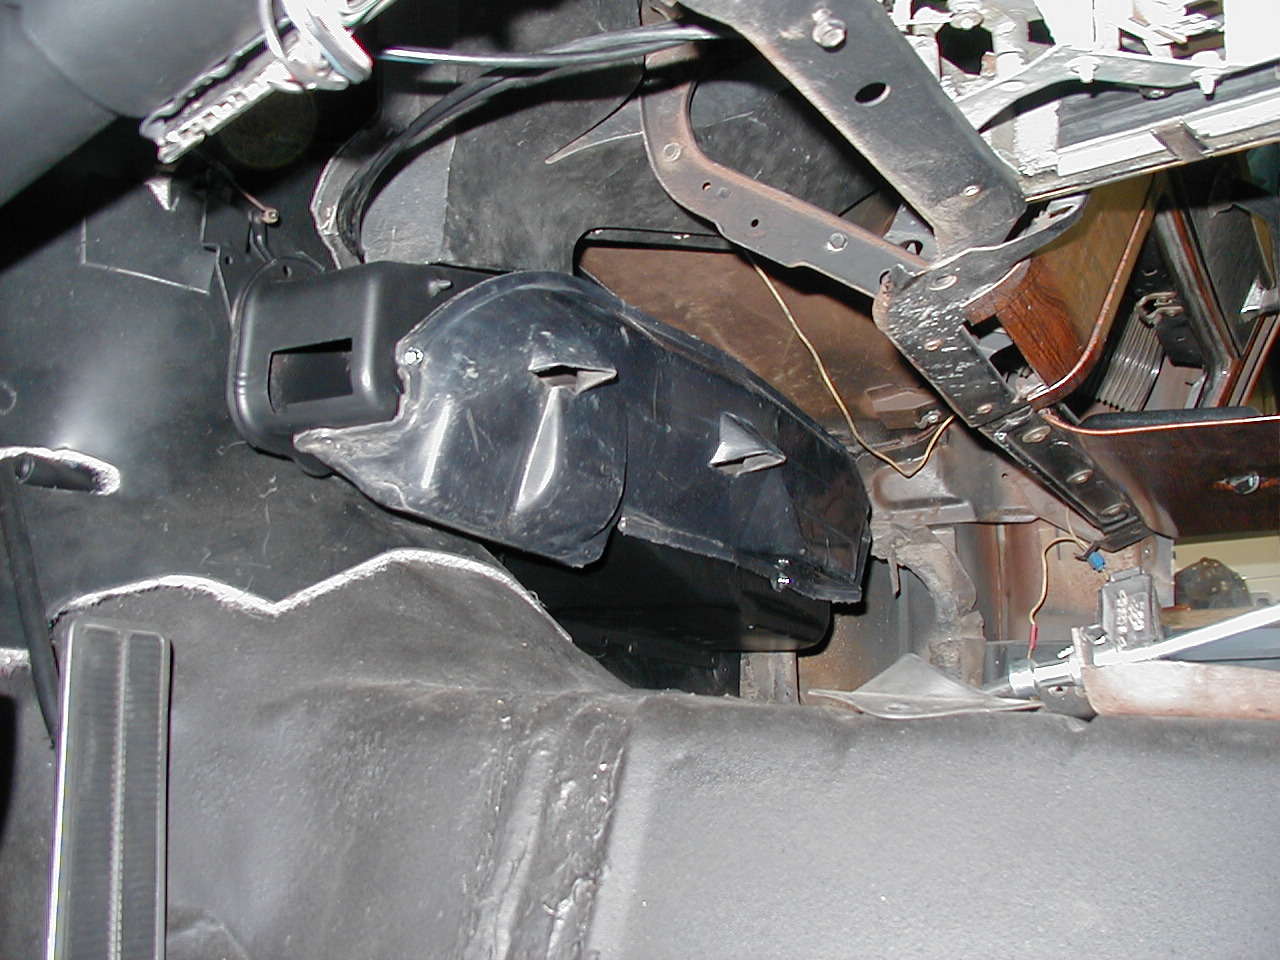
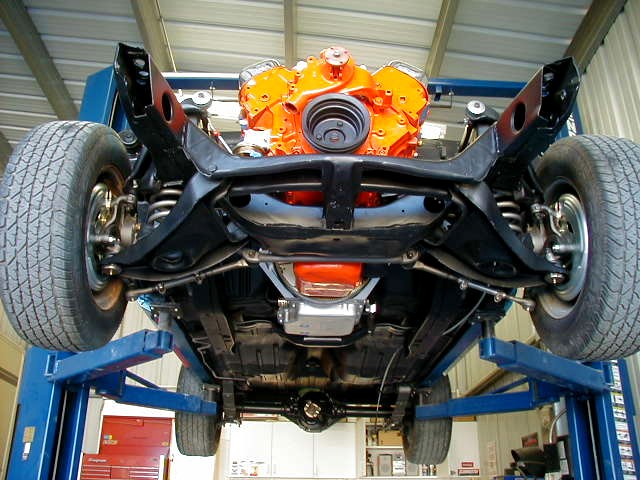
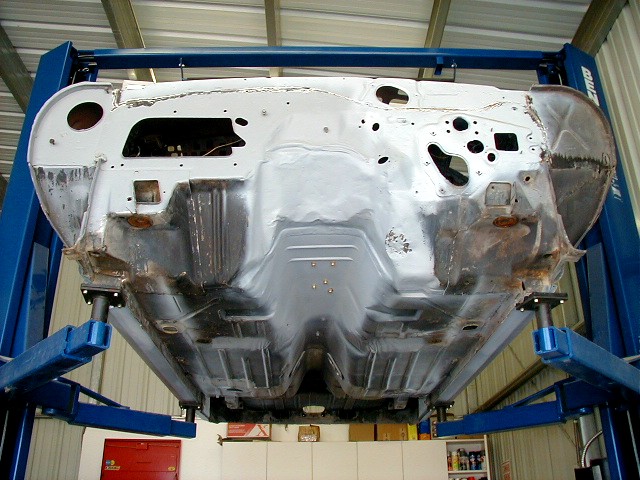
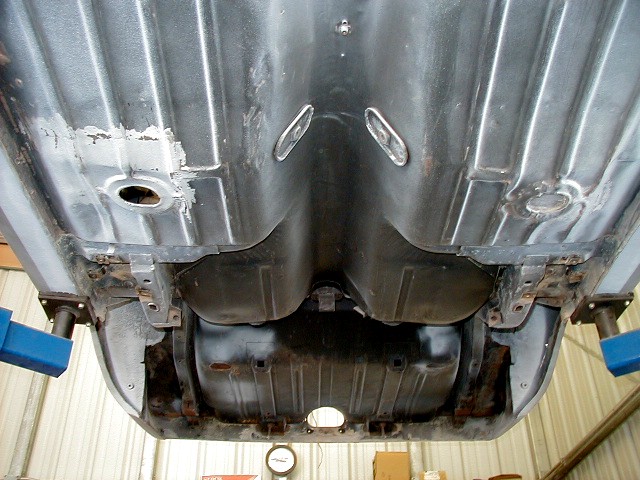
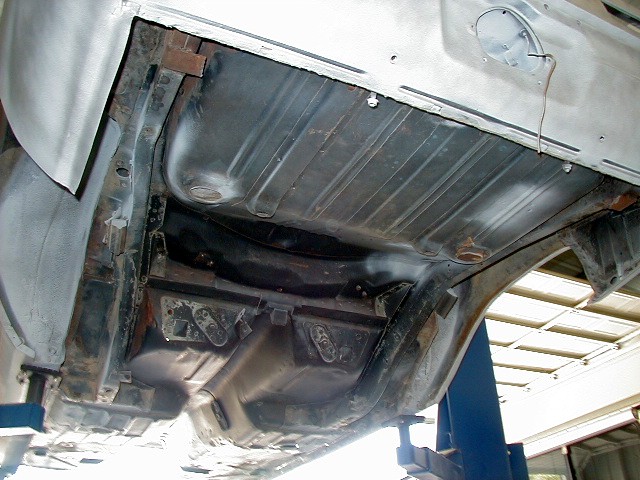
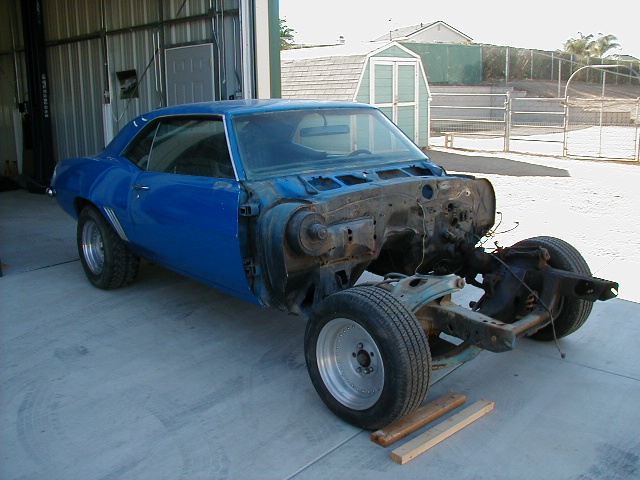 Work is progressing slow, but steady. Check out the floor pan and trans tunnel patch in pics below. 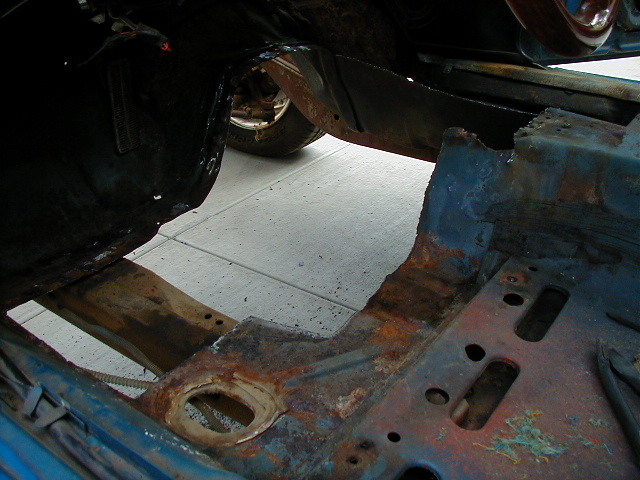 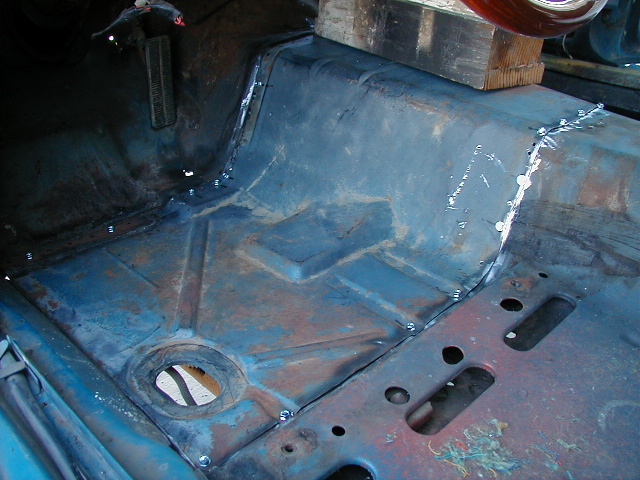 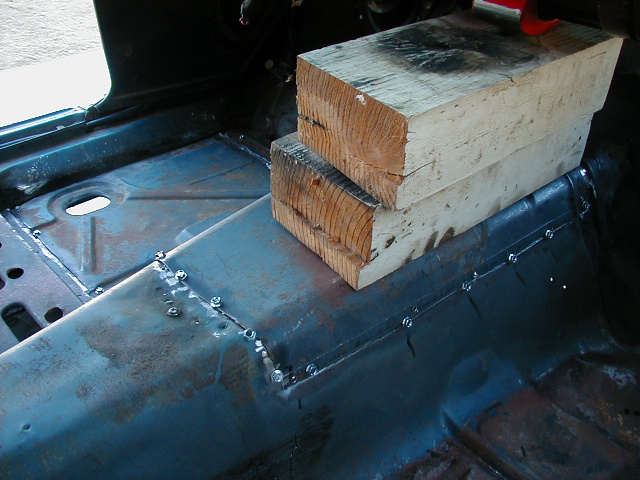 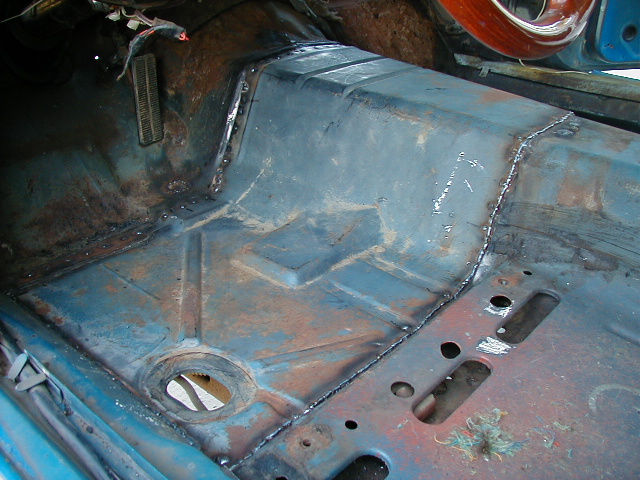 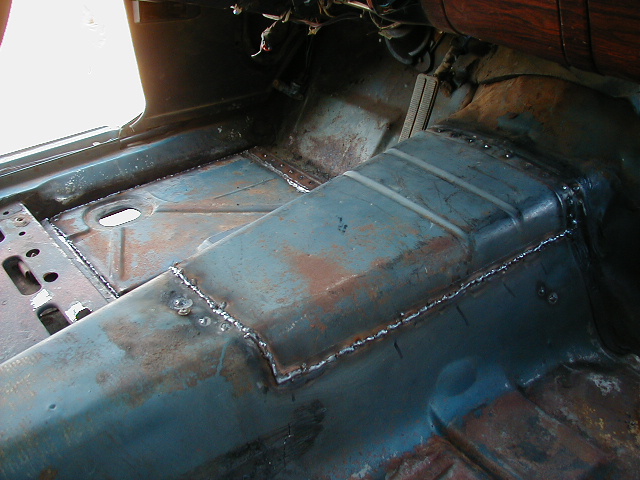 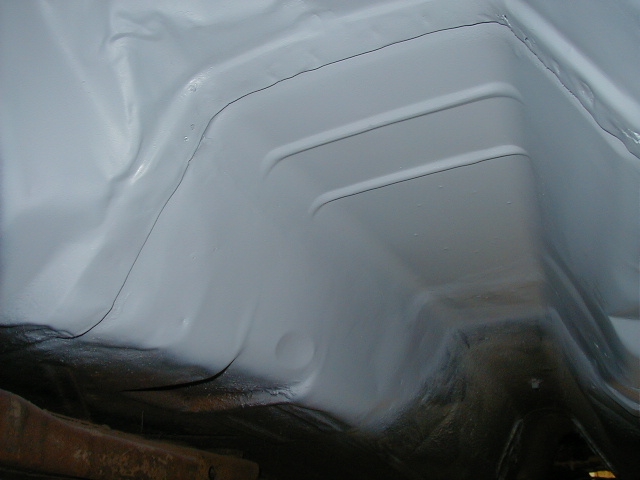 Floor pan replacement is extremely time consuming. I have over 20 hours into this alone. Notice that I was fortunate to optain a floor patch from an original LeMans Blue car. The color matches perfectly. After removing the old floor, grinding, cutting, and fitting the patch, it was finally ready to weld into place. I used self tapping screws to tightly hold the patch to the floor while I welded it in place. Also note the blocks of wood wedged against the dash to help hold the new panel tight against the floor while I screwed the patch into place. Once the welds were complete, I removed the screws and filled the holes with the welder. It was finally time to clean the underside. I got the floorpans repaired to the point where I could pressure wash all the old crud off the bottom and get it ready for paint. There is actually good metal under 30 years of grease, dirt and grime. The engine hoist worked great for gaining access to the underside. Notice that I didn't clean the sub-frame or rear axle since they are both being replaced. |
|
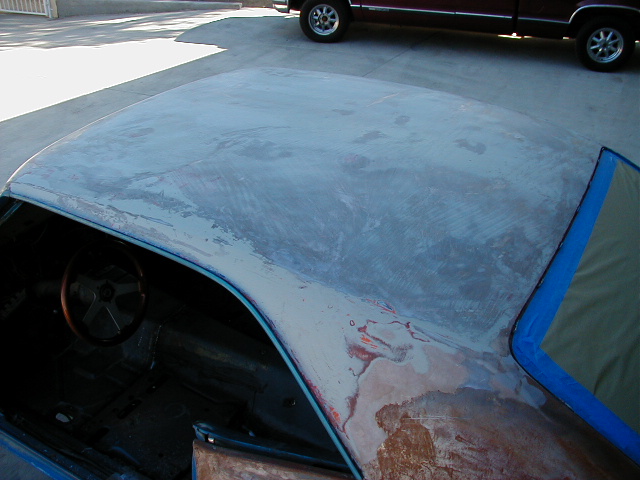
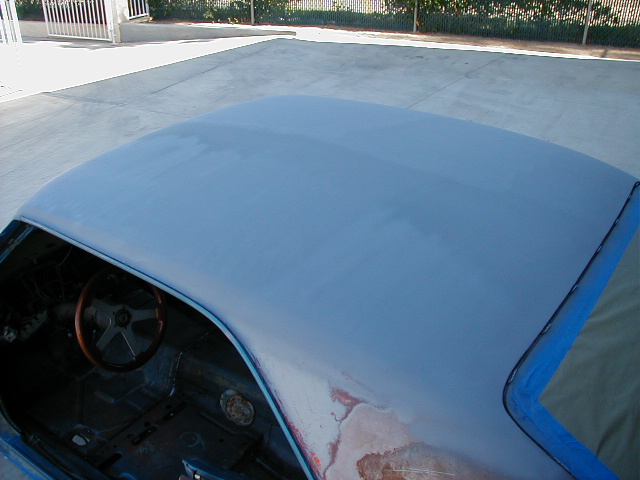
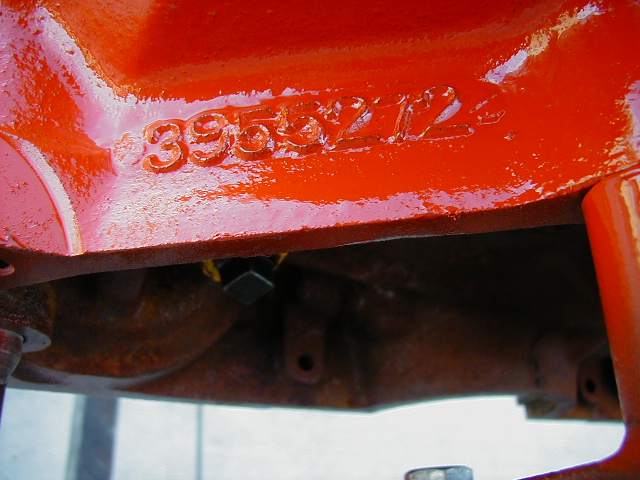
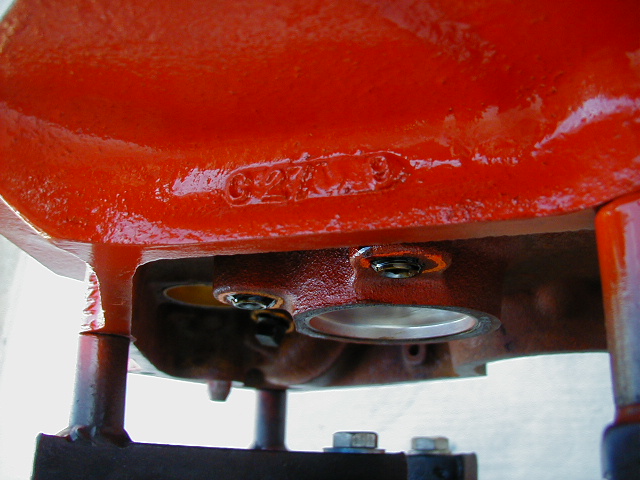
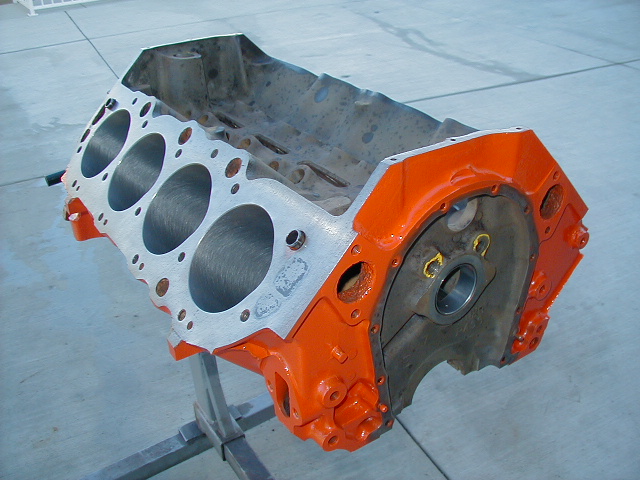
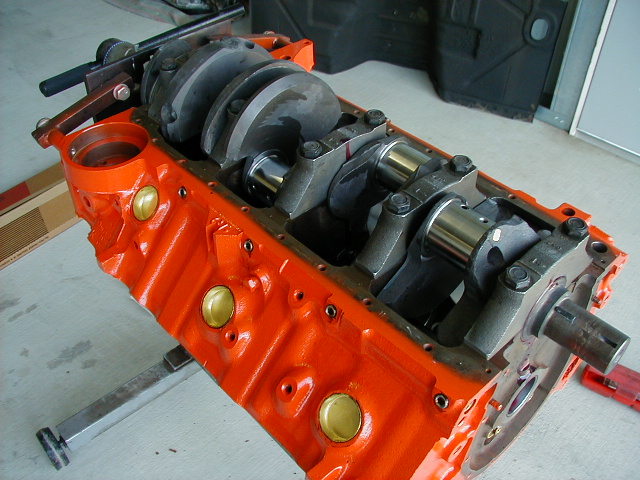
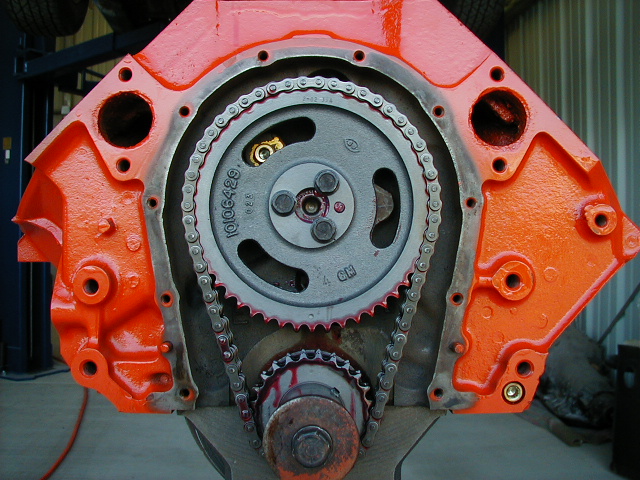
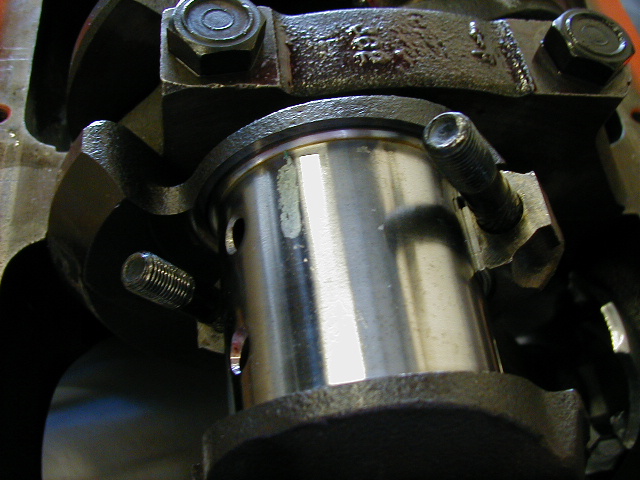
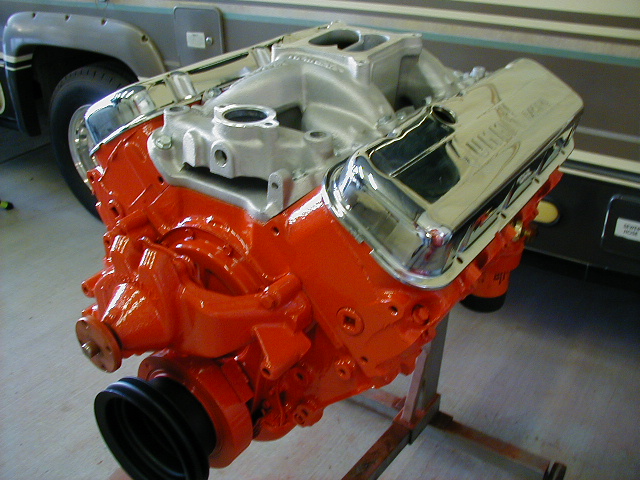
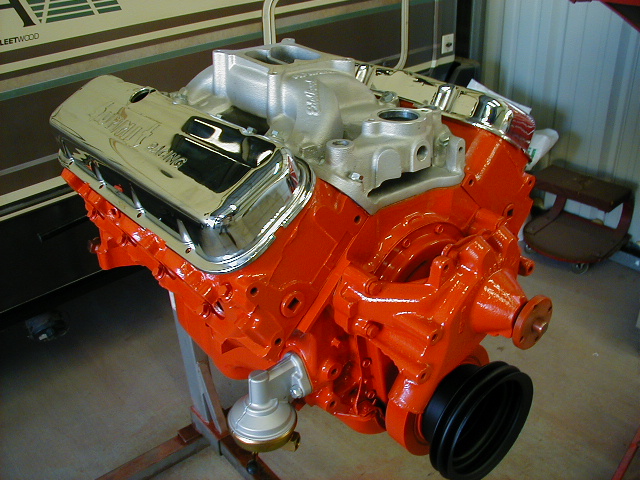
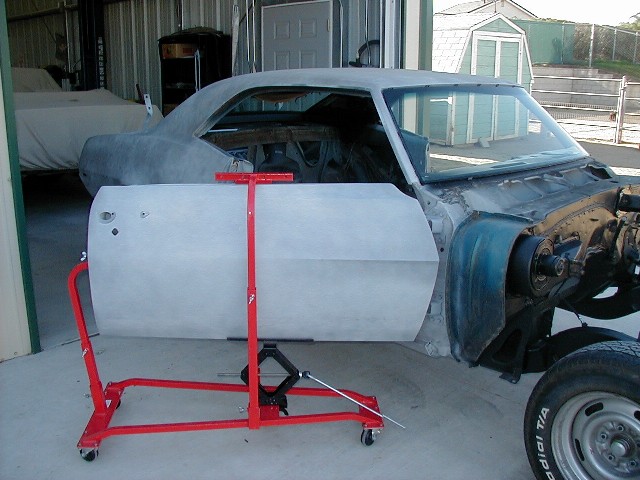
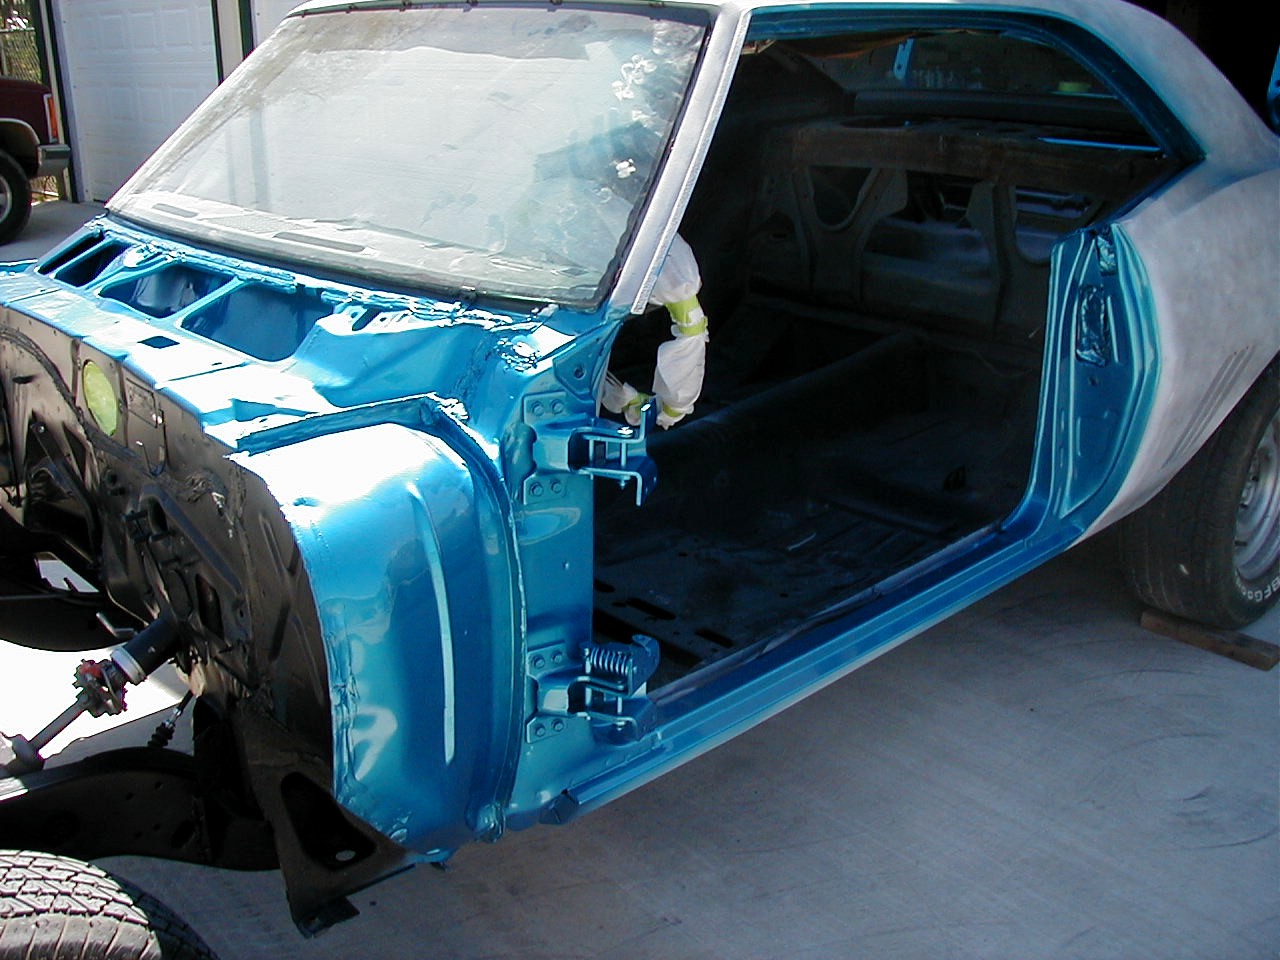
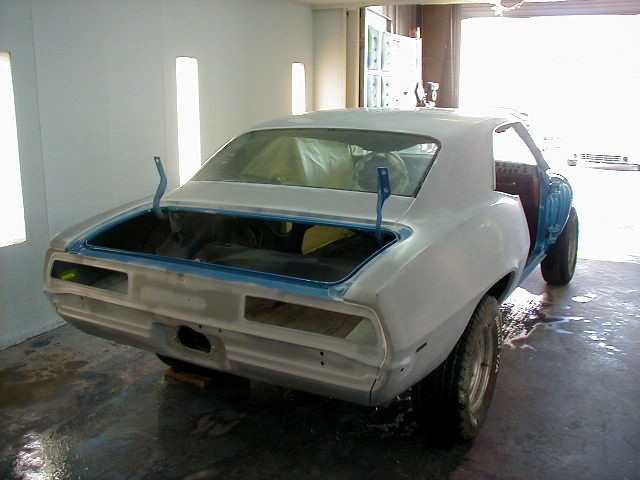
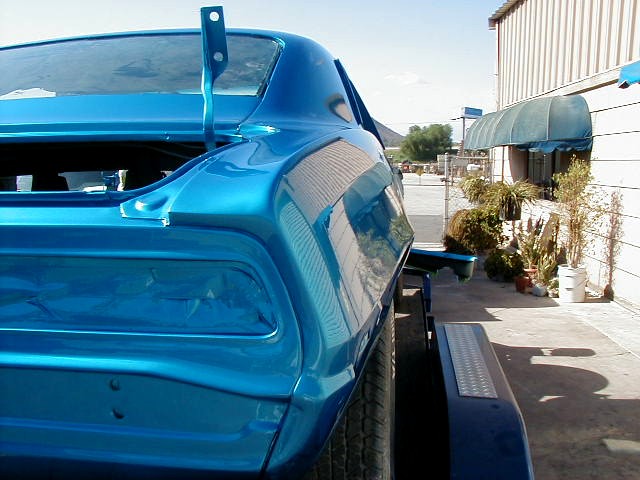
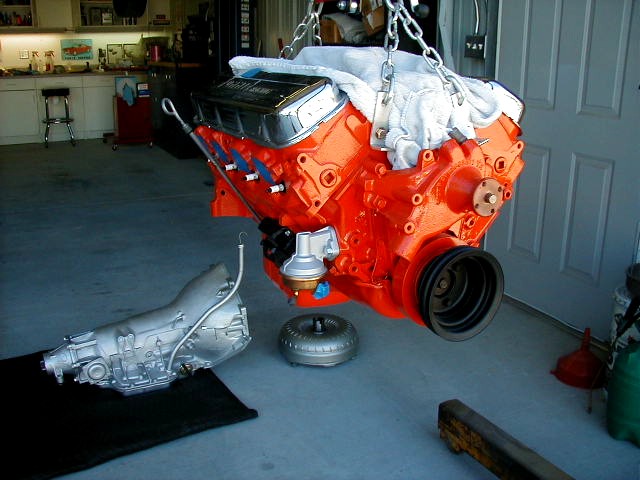
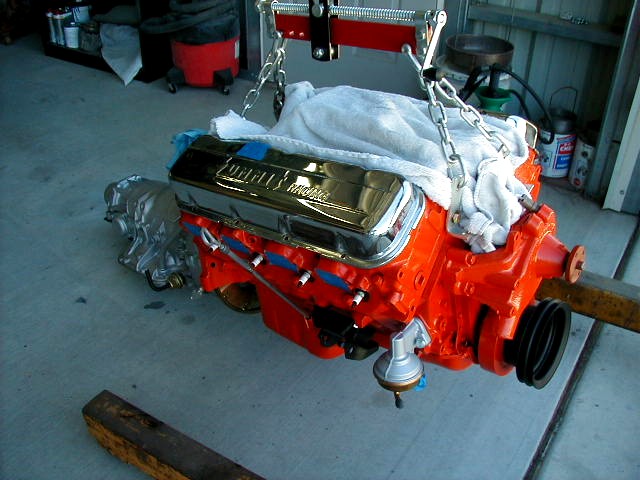
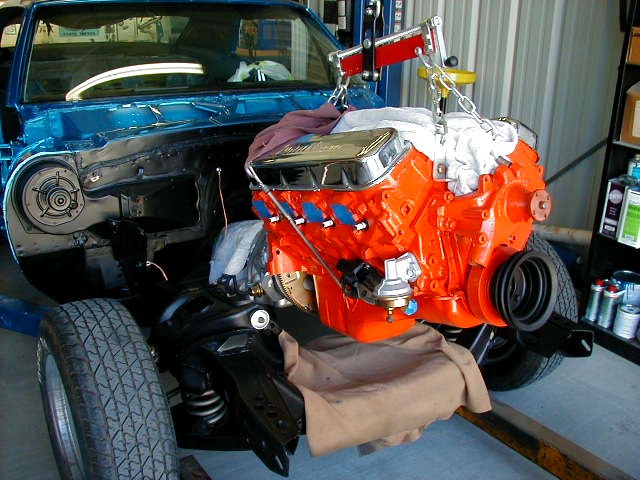
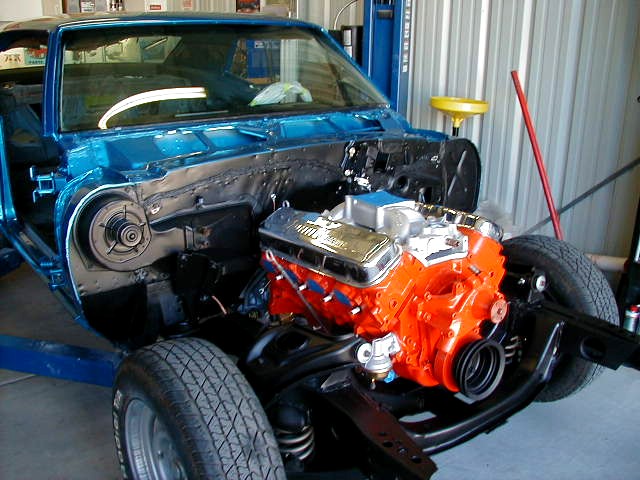
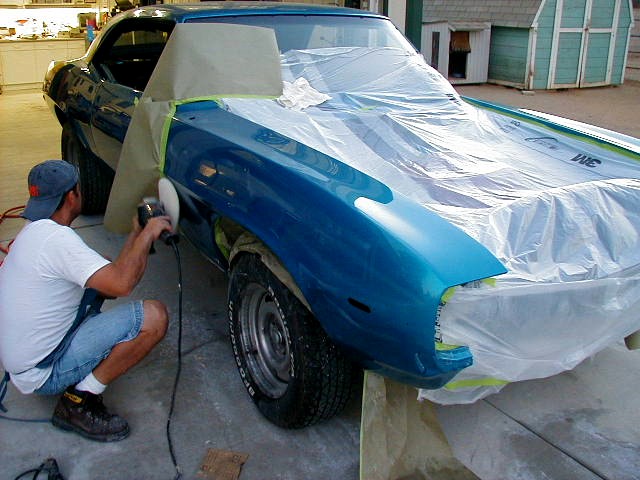
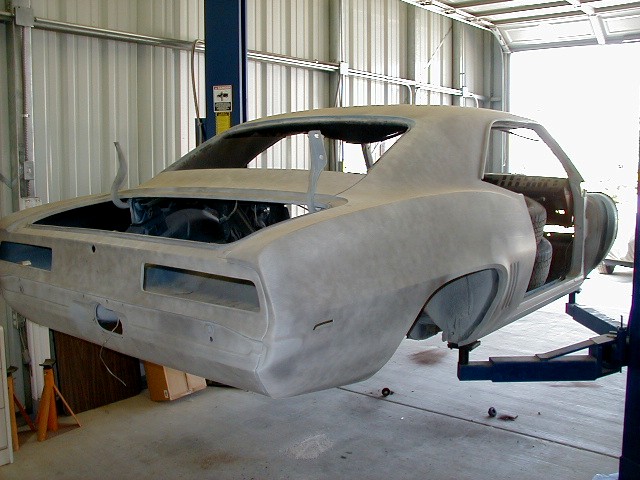
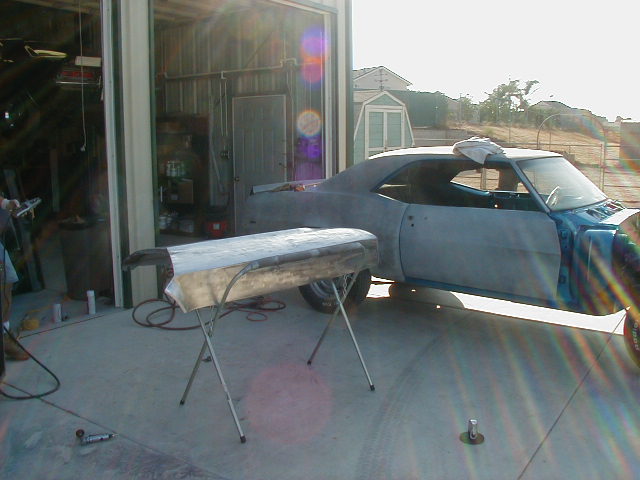
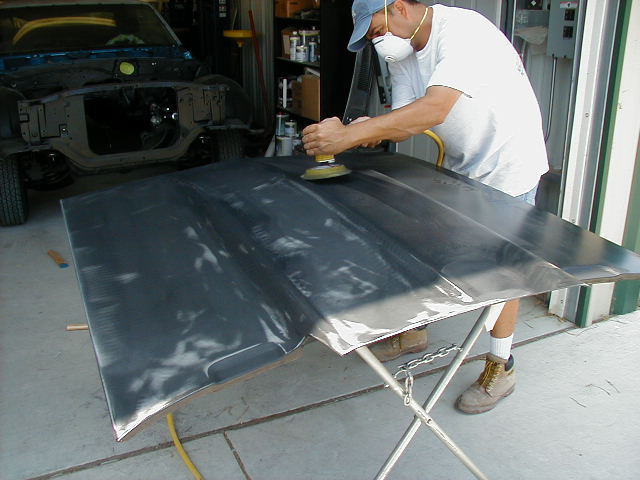
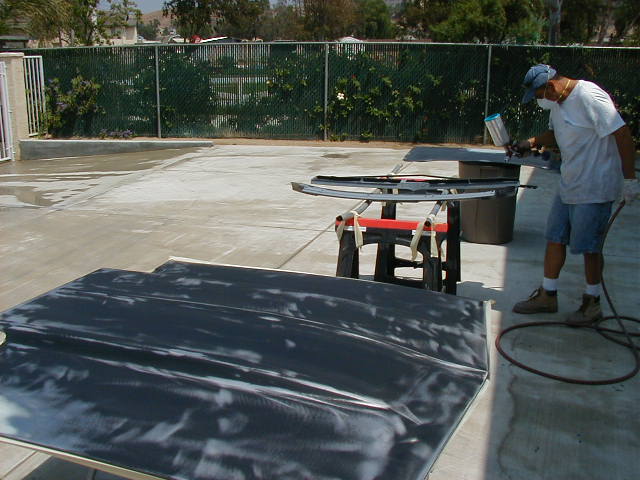
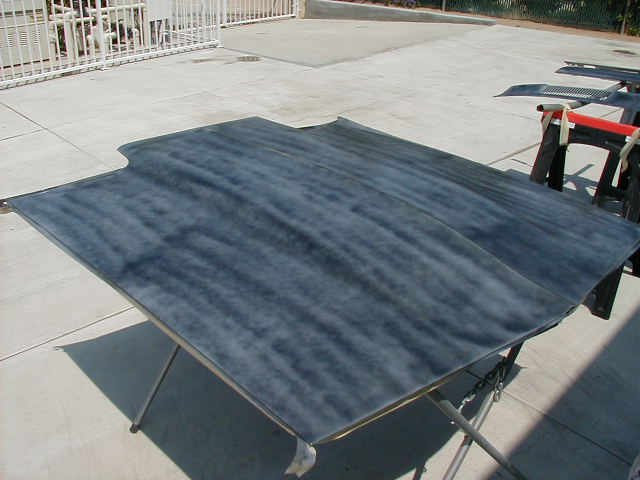
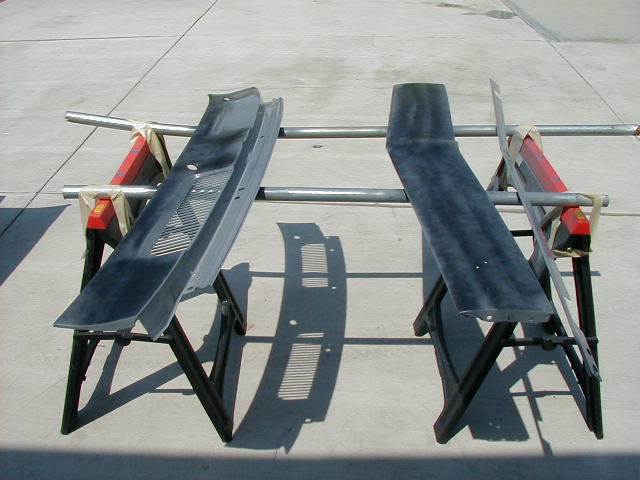
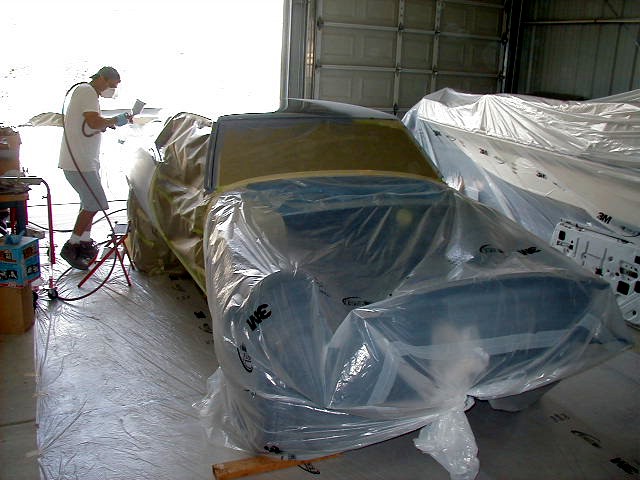
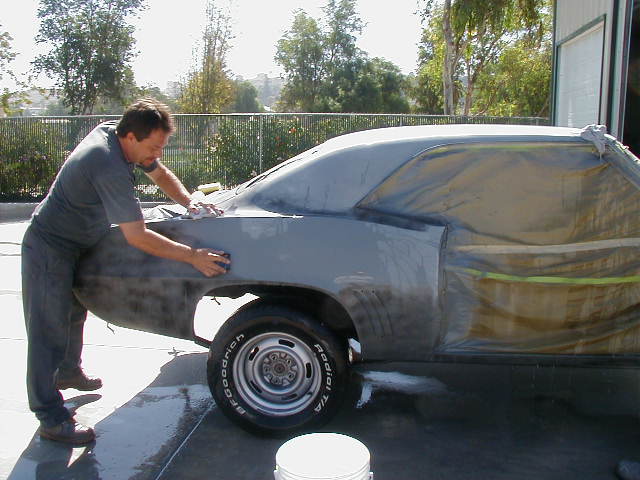
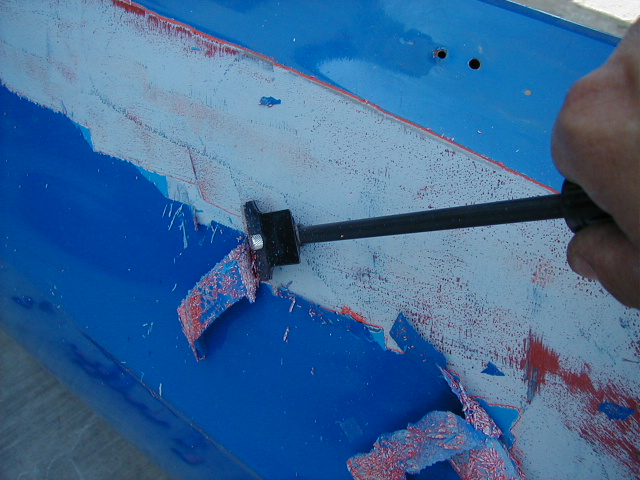 As with any restoration, the bodywork is the most time consuming. Finishing the interior, the engine compartment, and drive train will take a fraction of the time compared to the time spent on the body and paint. This car had been painted at least 3 times including 3 color coats and 3 coats of primer in between each color coat. This paint is thick! It almost looked like a rainbow with all the colors! I started by stripping the roof. When it was stripped, I hit it with a DA sander and 80 grit paper. When the metal was bare it got a quick coat of etching primer. The passenger door is next... It's best to strip one panel at a time, then the panel can be sanded and etched before it has a chance to flash rust. When the entire car is stripped and etched, then the body work and block sanding can begin. It's Engine Time I purchased this motor from a friend and found it to have 11 to 1 pistons, a stock cam, open chamber oval ports heads and two bolt mains with a cast crank. I realize L-78 engines had 4 bolt mains and steel crank, but I'm going to build this motor so it will be more street friendly and achieve at least 400+ horsepower. 396ci motors are a rare find as it is, and to find a 4 bolt block with steel crank is even more rare. So, when the rebuild is done, it will have new 10 to 1 hypereutectic pistons and open chamber oval port heads, but to get the horsepower I'm going with an Edlebrock Performer RPM hydraulic cam, Performer RPM Air Gap intake manifold and original Holley 750 carb. According to Edlebrock, this combination with the 750 Holley carb and headers will produce upwards of 420 horsepower. With the block and internal components ready to be picked up from the machine shop, I'm going to take a break from the body work to clean and assemble the block. Even though the build date on the car is October, 1968, I was fortunate to find a 1969 block. I scrubbed the block with soap and water and blew it dry with compressed air. I also coated the cylinders with trans fliud to prevent flash rusting. So far, I have cleaned the block, painted it, and installed the freeze plugs and oil gallery plugs. Note the casting number 3955272 and date cast of C 27 9. The best I can figure is this motor came out of a Chevelle, Impala, or Caprice. It's possible it came out of a Camaro, but I doubt it. Today I was able to measure and install the main bearings, crank, and rear main seal. I also installed the cam and timing set. I'm using a high performance double roller timing chain which is required for the Edlebrock Performer RPM cam. After getting the crank, cam, and timing gears installed, it was time to install the rods and bearings, rings, and pistons. Note the excellent bearing clearance of .0015 with the plastigauge. All ring gap, piston to cylinder wall, and rod bearing clearances were all within the required range. Note the cool oil screen pick up installation tool I made from a piece of three quarter EMT and a hose clamp. With the heads bolted in place, it was time to install the lifters, pushrods, and rocker arms. I then set all the valves to the Edlebrock specifications. Then I installed the harmonic balancer, crank pulley, water pump, fuel pump, oil filter adapter and filter, and finally the new Performer RPM Air Gap manifold. Oh, those valve covers are temporary. Original style chrome covers will be used. Now the motor is completely done and ready to install. |
|
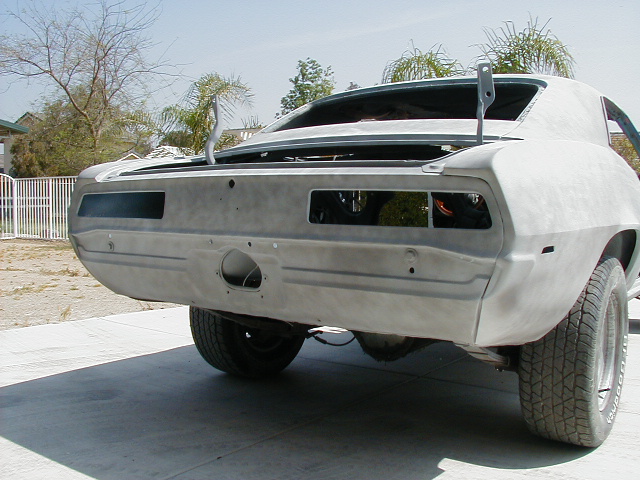
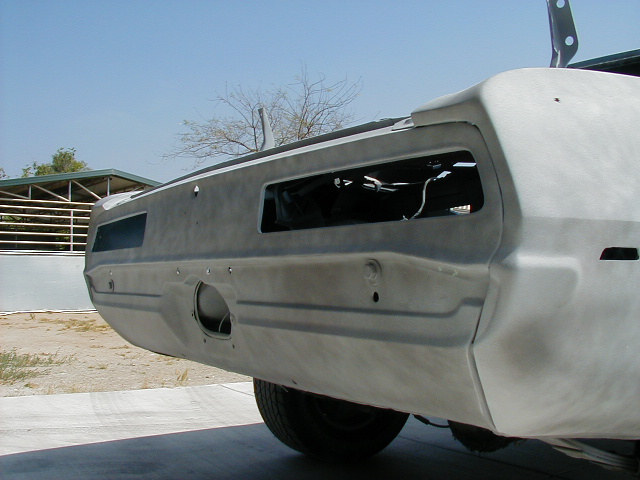
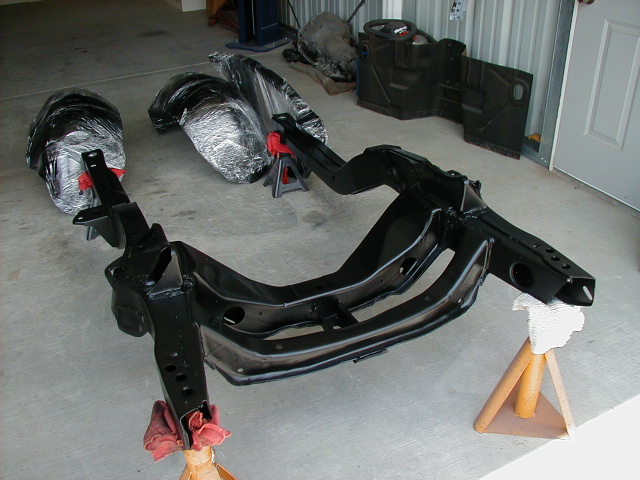
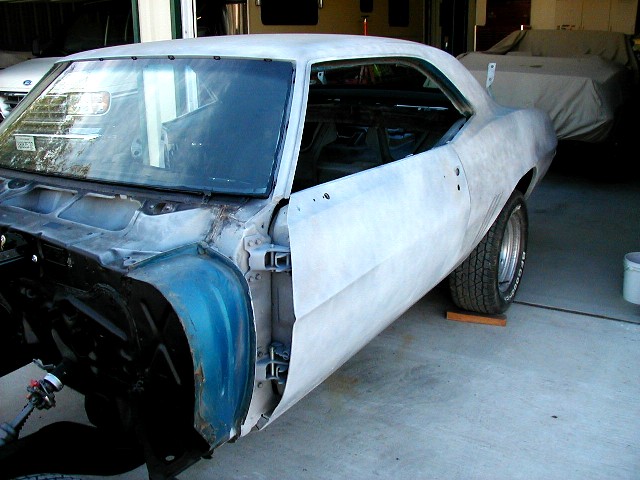
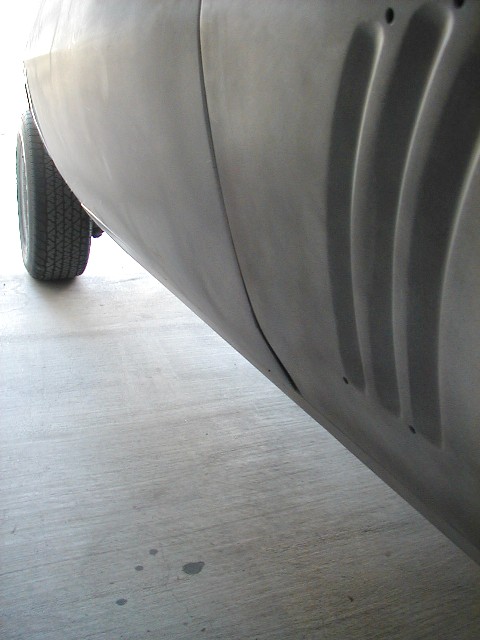
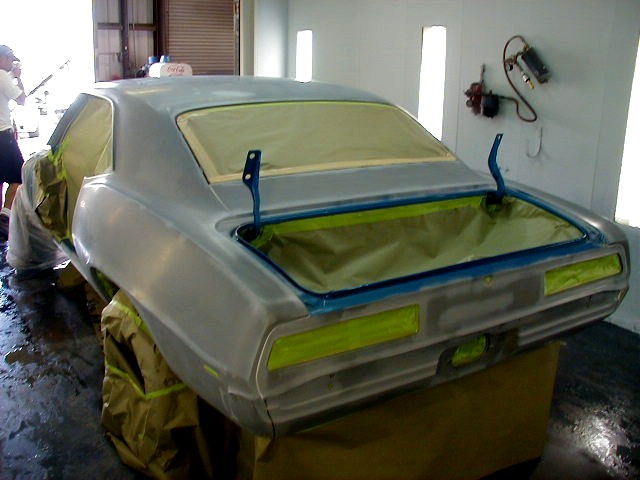
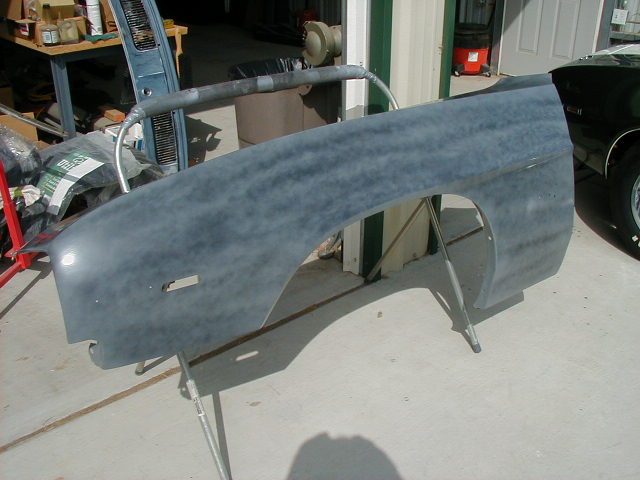
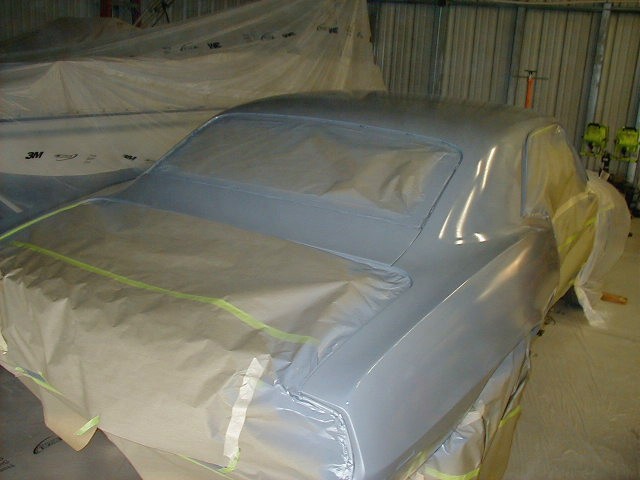
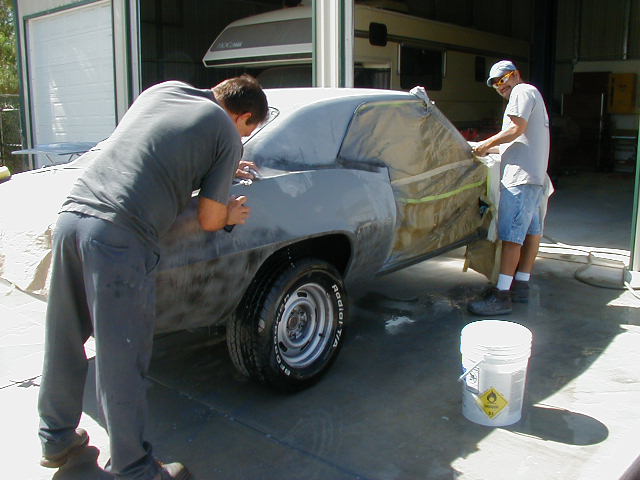
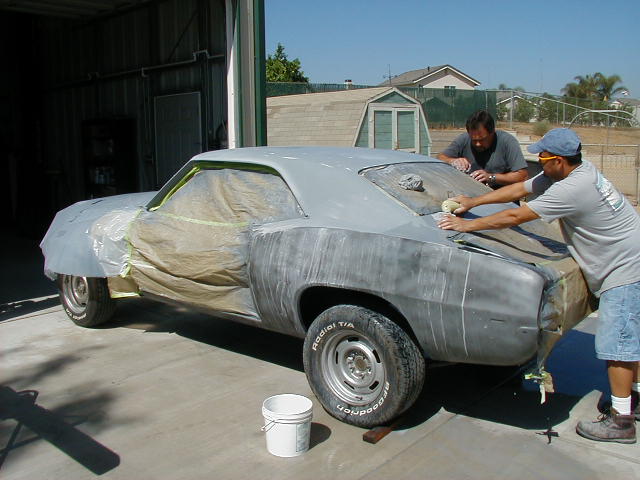
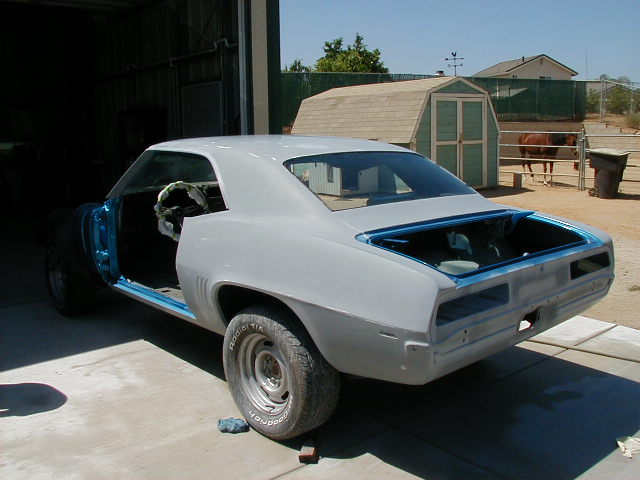
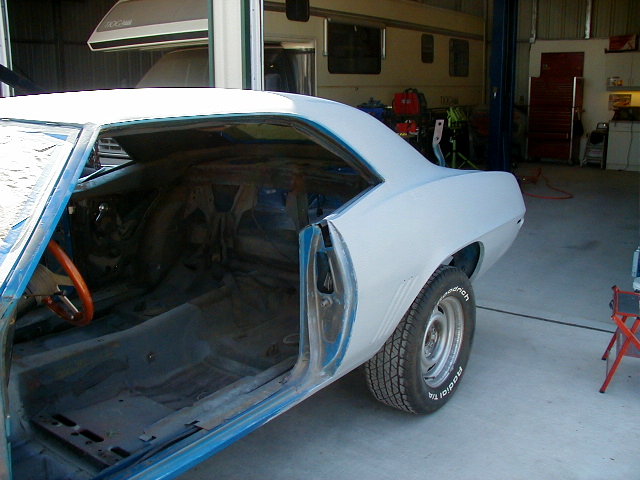 Back To Stripping, Sanding, And Etch Priming... 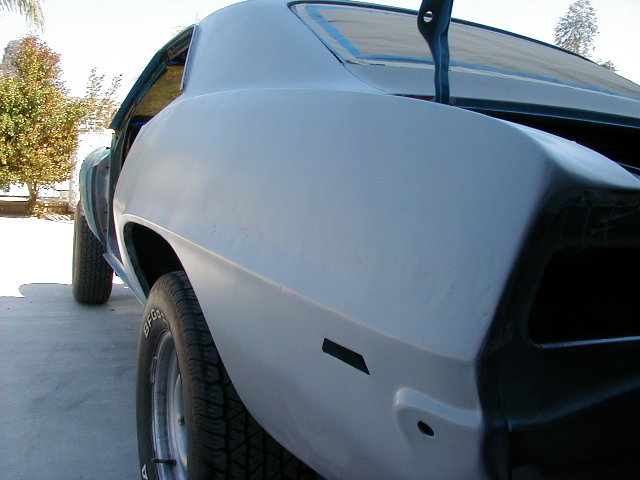  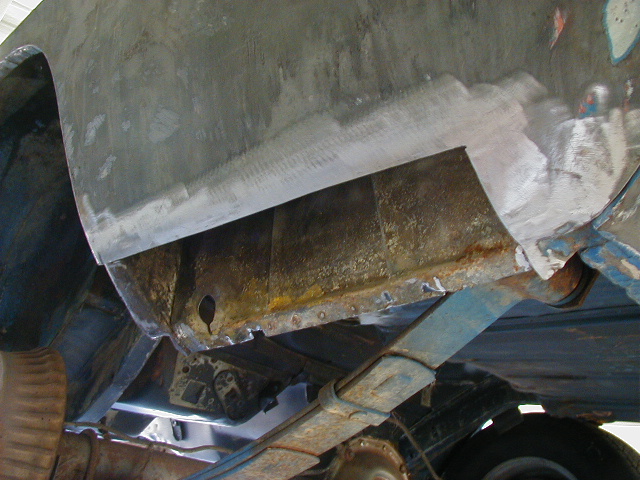 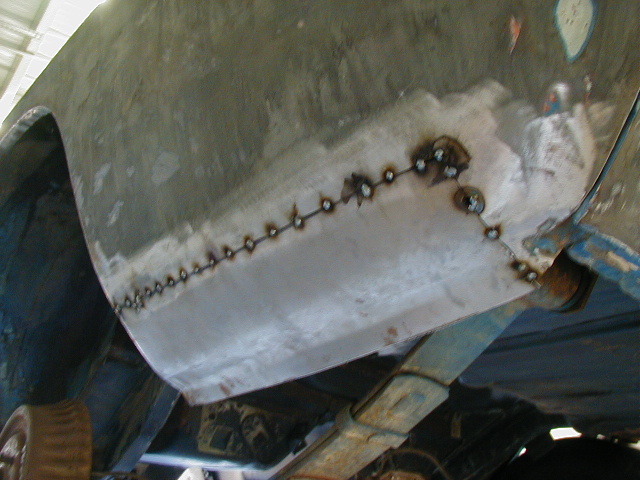  I almost have the entire car stripped, sanded, and primered. I have to finish stripping the tail panel and the door jambs. As soon as the stripping is complete, I can concentrate on the body work and block sanding. As you can see, I've already repaired some rust on the lower, left rear quarter panel. After stripping the tail panel, I found the lower valance looked like someone took a shotgun to it. There were dents and holes all over it. I also found more rust on the right rear lower quarter. So, it's off to the body shop to have the tail panel replaced, and some other work done. The rockers needed attention too since at one time this old race car had side pipes on it and needed those holes filled with the welder and primed and blocked, so Al at TR Paint and Body in Norco, CA is taking care of that. He will be doing the paint as well. Since the car is at the body shop, I'm starting to prep the sub-frame and other front end components so they will be ready to install when the Fun Car comes back from the body shop. Well, as you can see, the fun car is back from the body shop. All repairs have been made and it has been blocked with 220 grit and another coat of primer is on it now. It will be blocked to 600 wet just before paint. The sub-frame, firewall, underside, and rear axle need to be finished. Then it's back to the paint booth. The sub-frame, inner fenderwells, and radiator support are finished and ready to install. Included will be total restoration of the front suspension, brakes, and steering. |
|
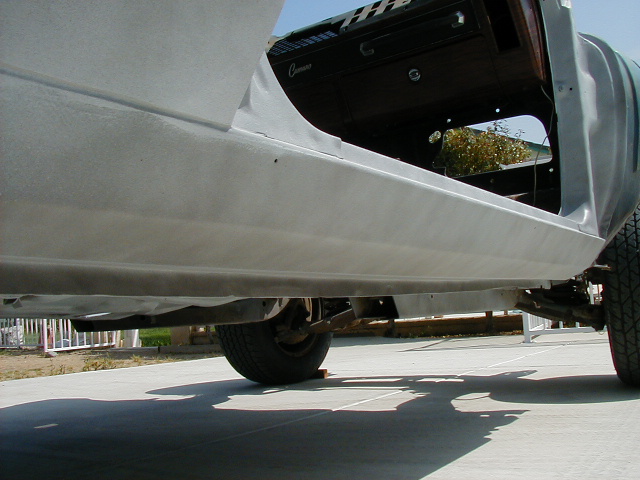
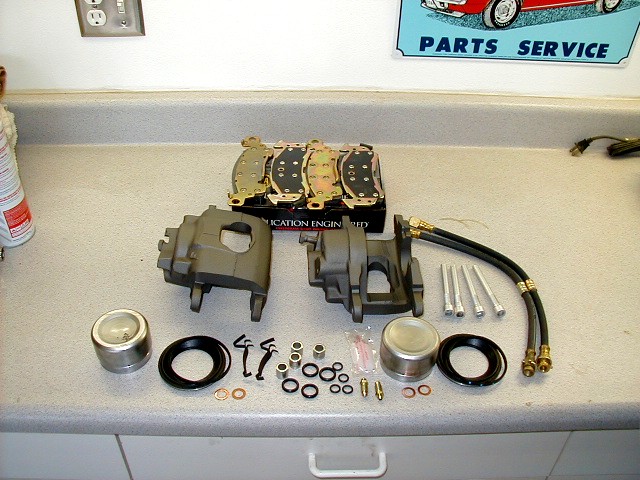
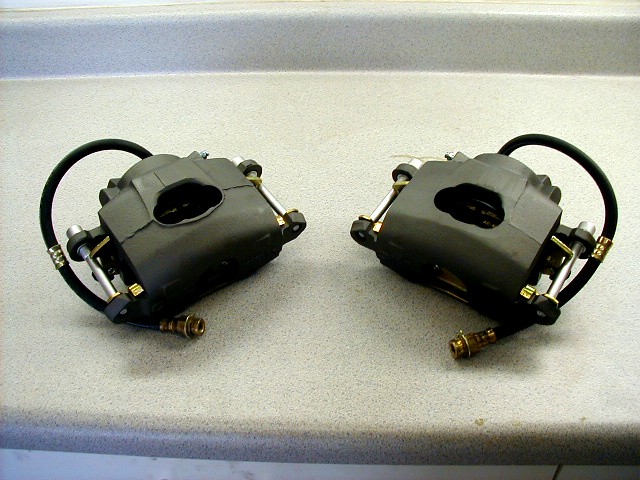
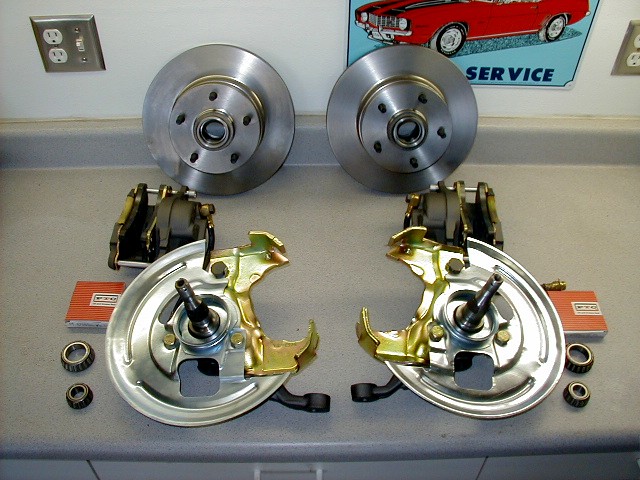
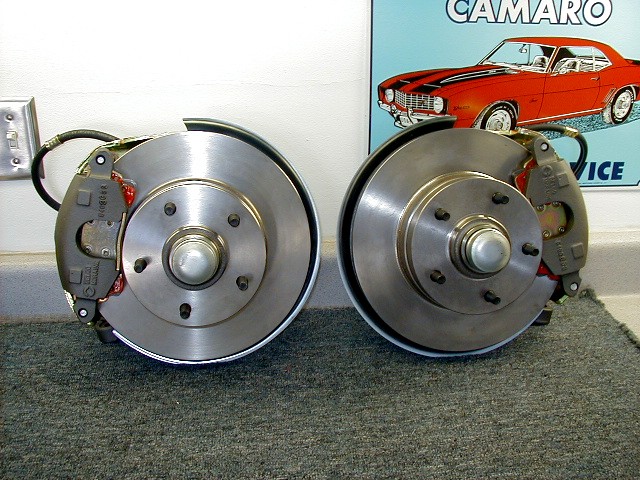
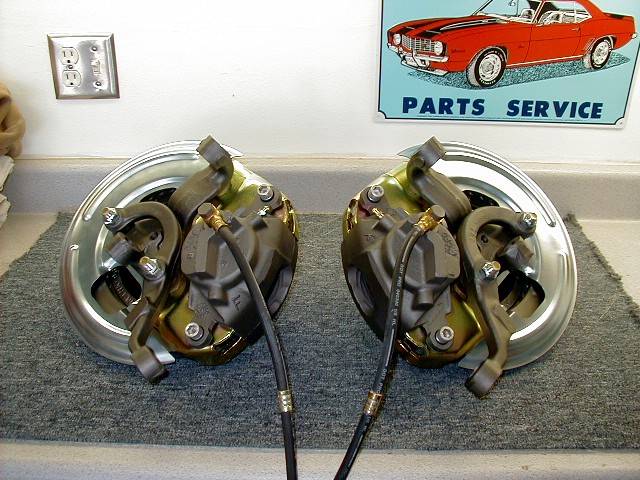
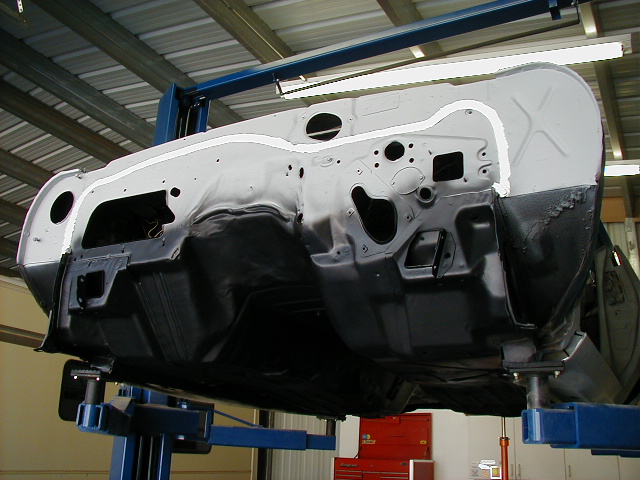
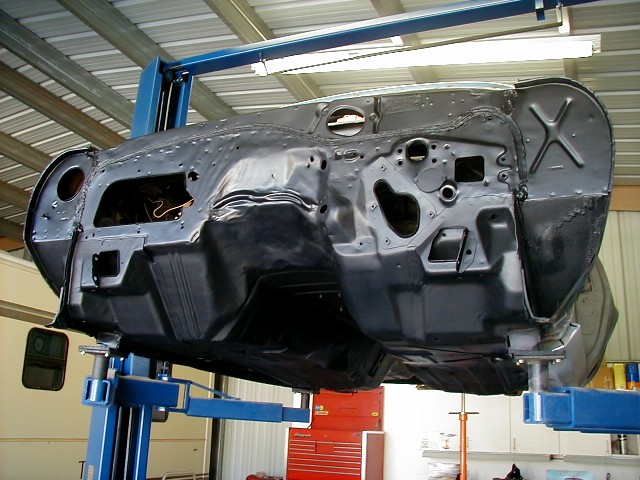
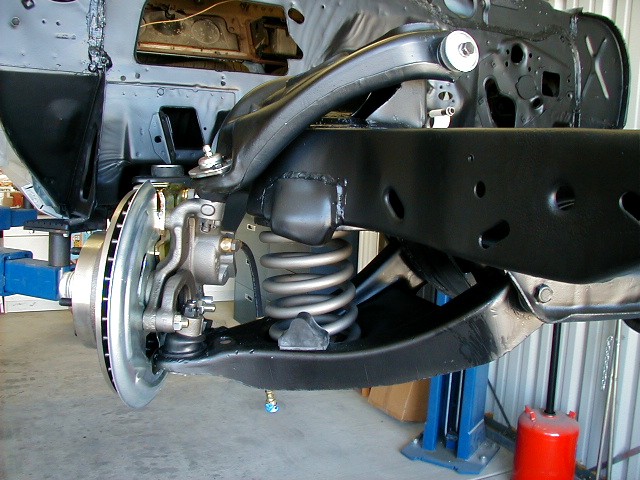
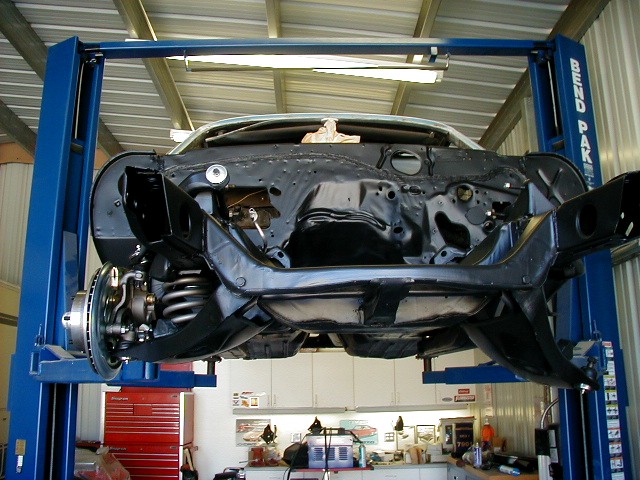
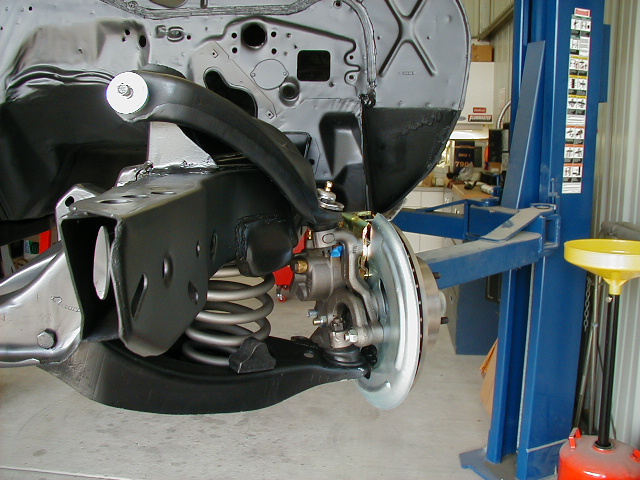
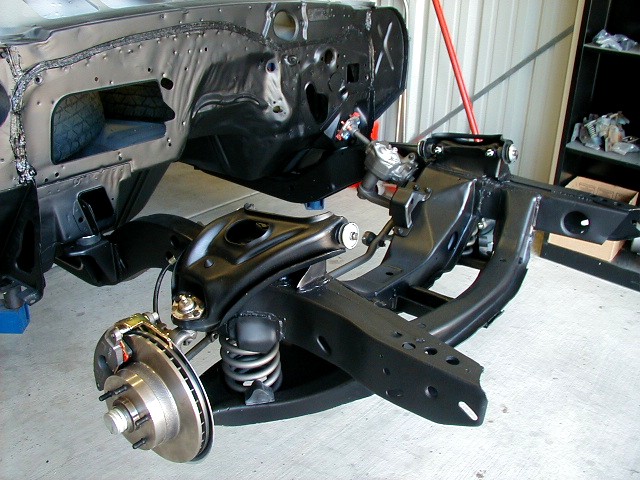
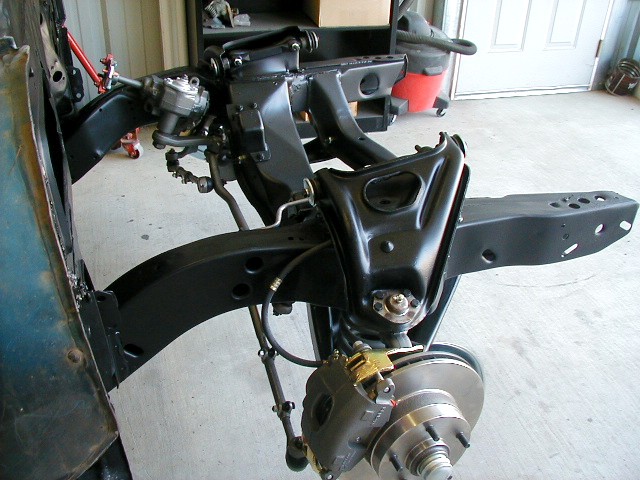
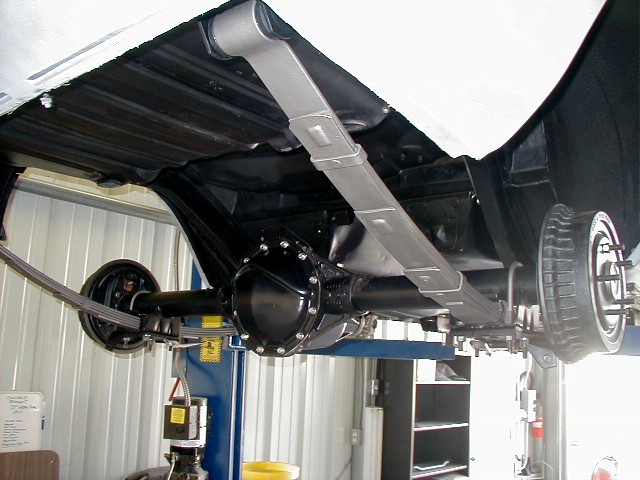
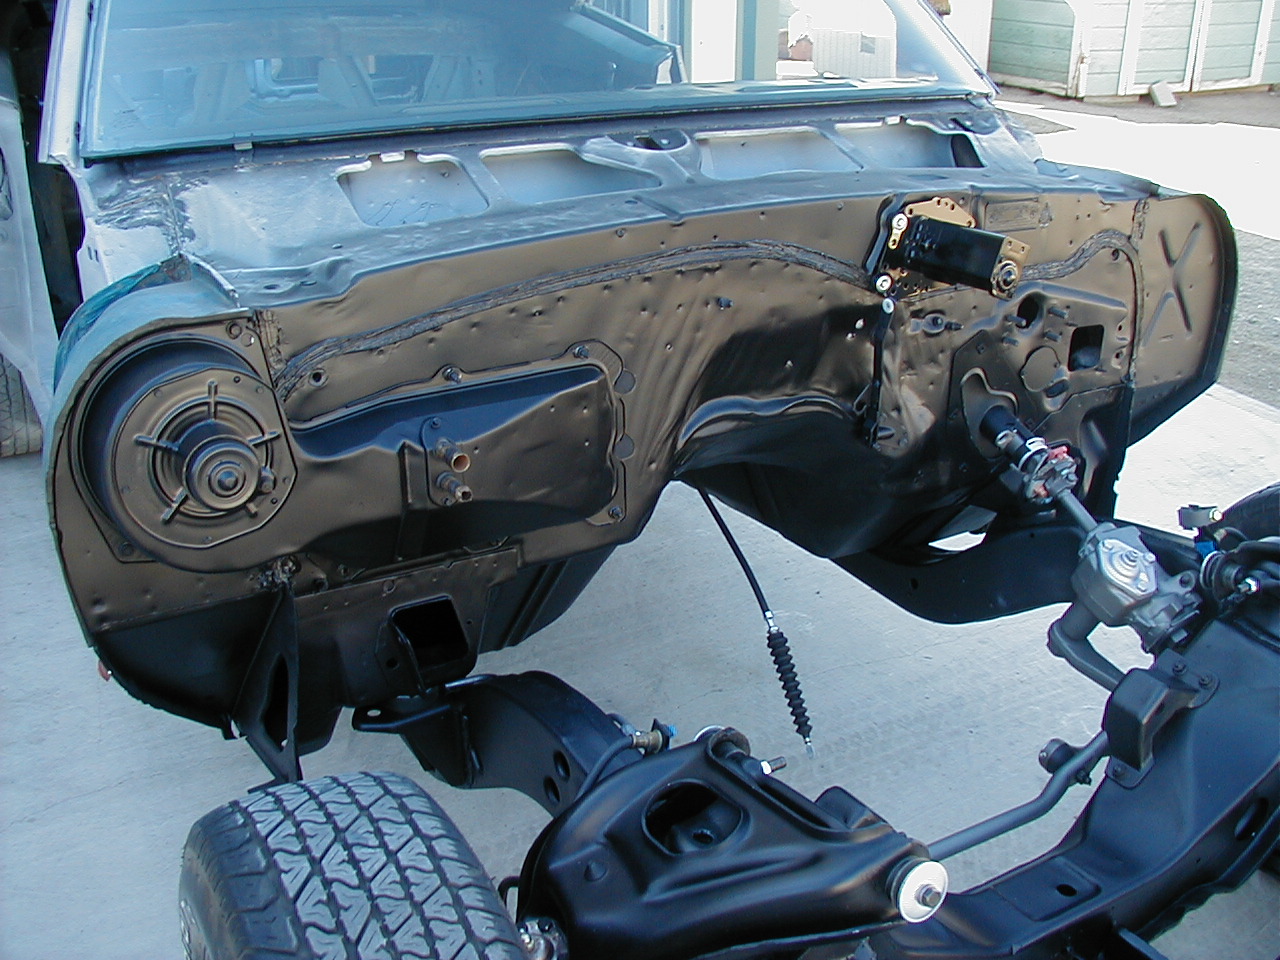
      It took about 3 hours to remove the old sub frame, front and rear suspension, steering box and column, and rear axle. Now it's time to finish up prepping and sanding the firewall and underside for a nice coat of semi flat black paint. Once done, I can concentrate on restoring and installing the new sub frame, suspension, steering, brakes, and rear end. Now It's Time To Tackle The Front Disc Brake Assemblies I started by disassembling all the components and then bead blasted all the cast iron parts and sent out the caliper brackets for replating. I purchased new backing plates and rotors because the old ones were not usable. I then assembled the calipers with new rebuild kits, and all new hardware, incuding new brake hoses and bleeder screws. After that, I put the spindle assemblies together. Next, the rotors went on with all new bearings and grease seals. I'm real happy with how they came out. The pictures don't do them justice. Now it's time to get back to the body work. Getting the underside ready for paint has taken a couple of months. There was an enormous amount of cleaning and reapair work to do to get it ready for paint. Now that the underside and firewall are painted, the fun part can begin. Assembly! All of the cleaning, bead blasting, and painting of the major components is complete. This brand new 12 bolt rear end received all new bearings, seals, 342 ring and pinion gears, new side gears, new Eaton posi unit, new axles, new pinion yoke, new brakes shoes and hardware, and new drums. I restored the leaf springs and the rear suspension recieved all new bushings, bolts, J-nuts, cushions, U-bolts, and eventually new shocks. As you can see, I have accomplished a lot this week. The car is finally able to roll now, so it's time to start on the interior and clean the inner firewall in preparation for assembling all of the under dash components. |
|

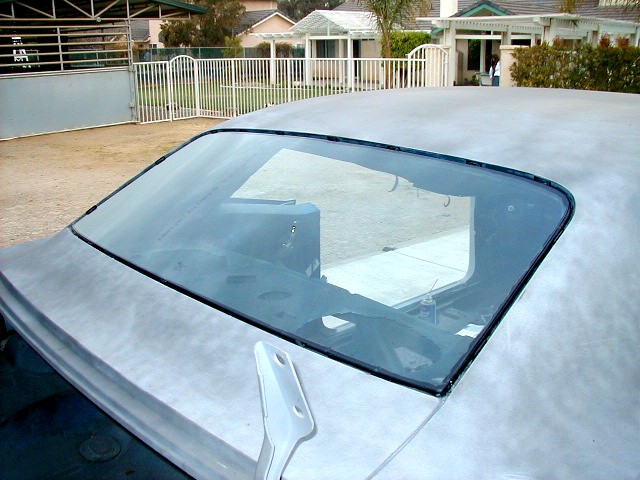
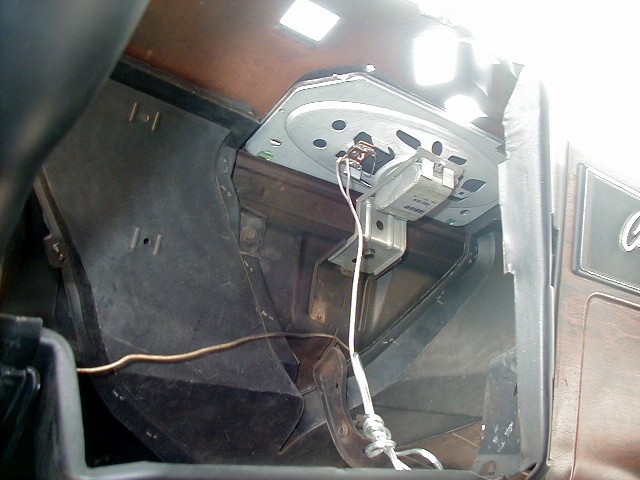
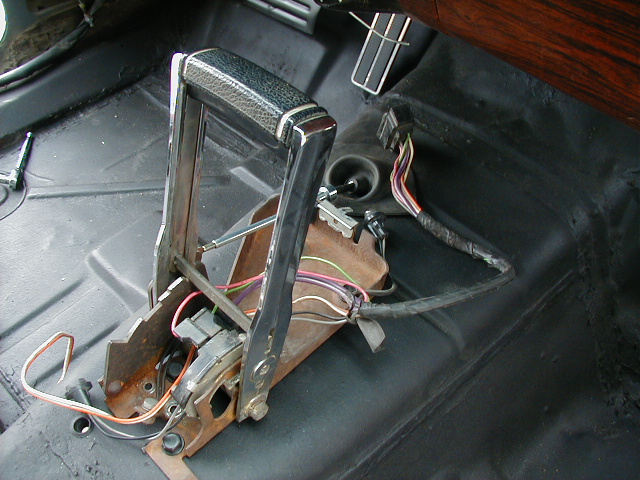
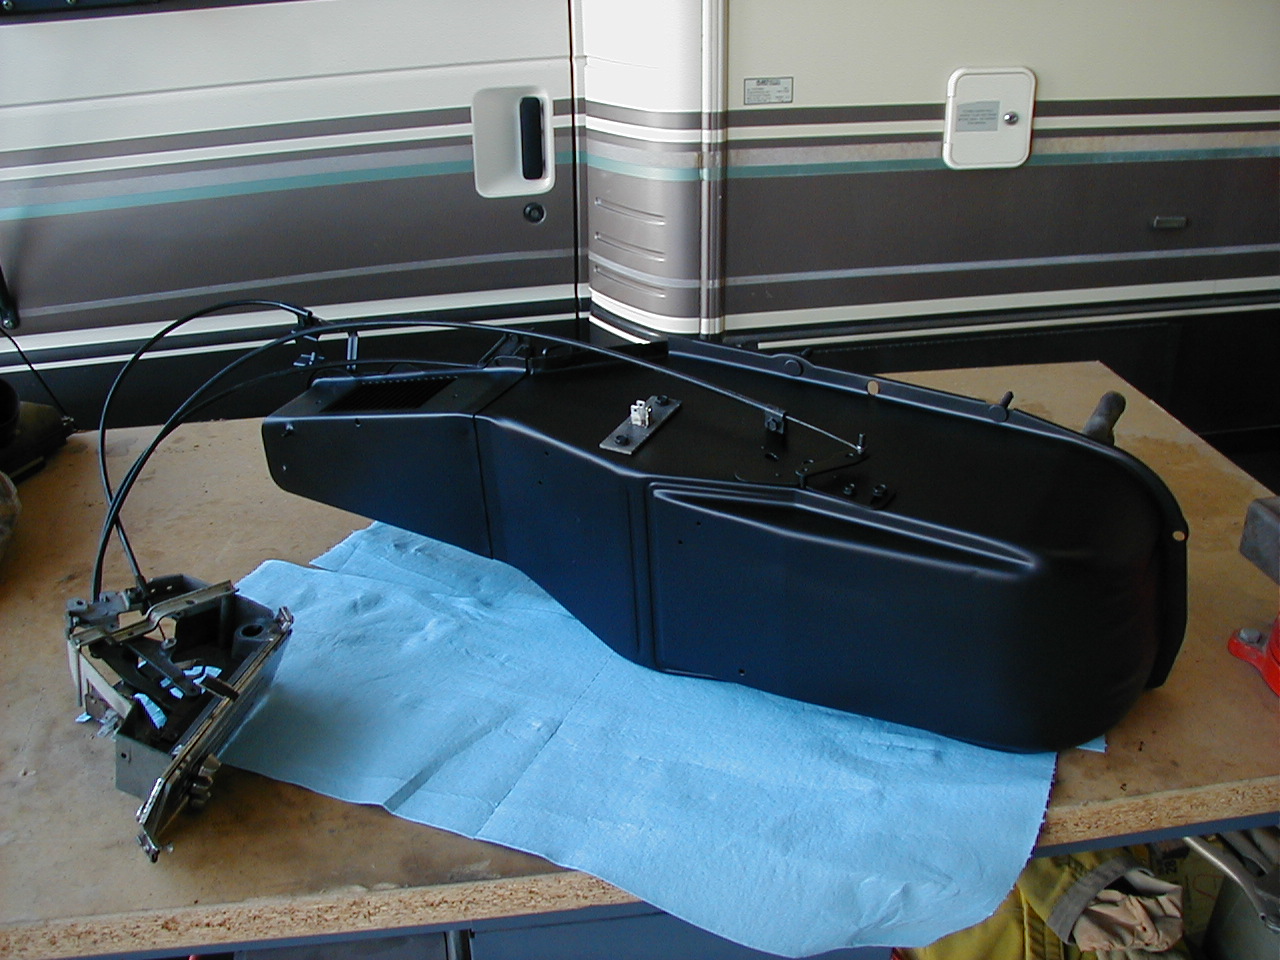
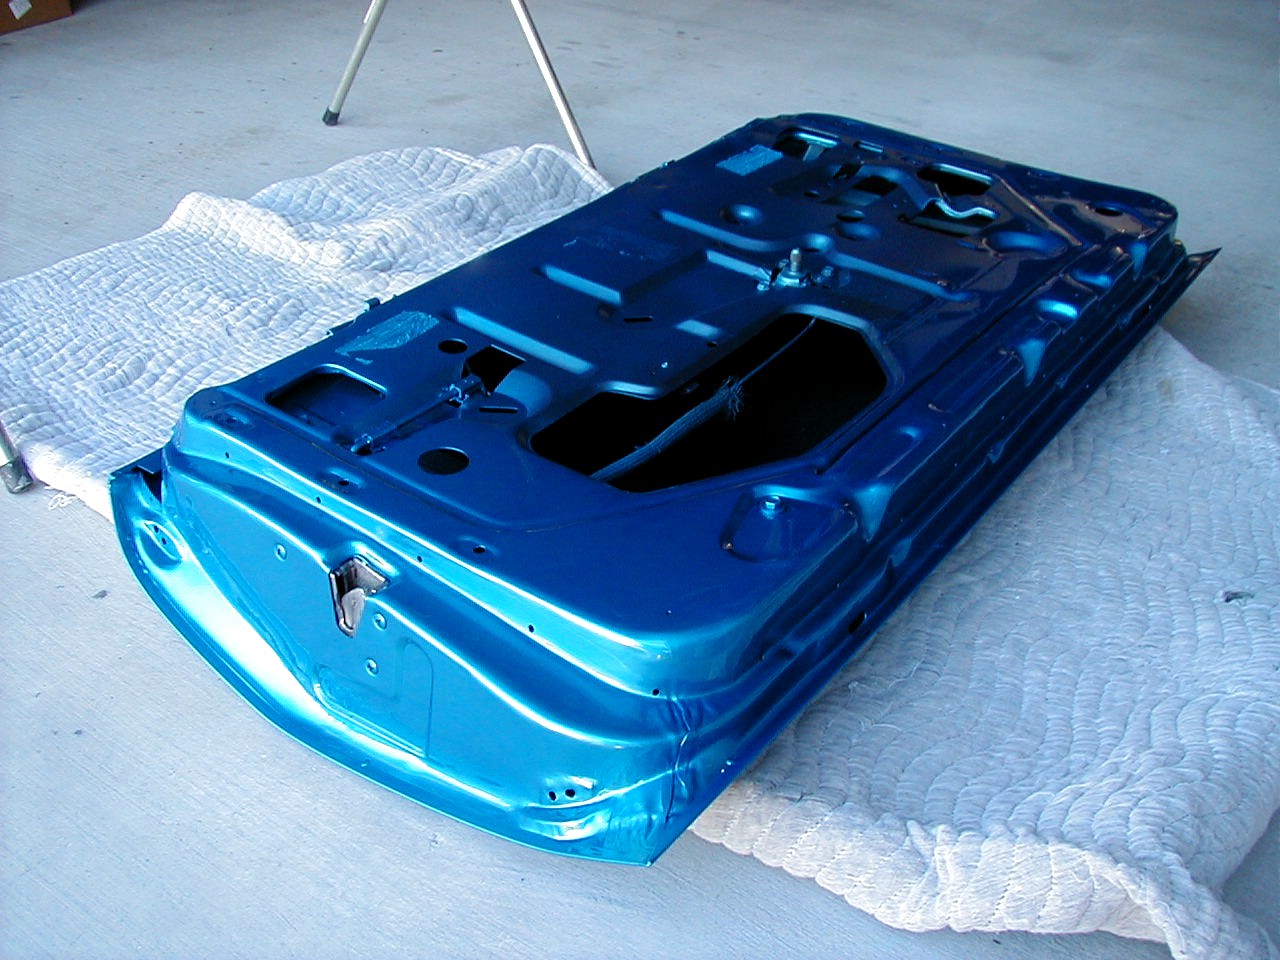
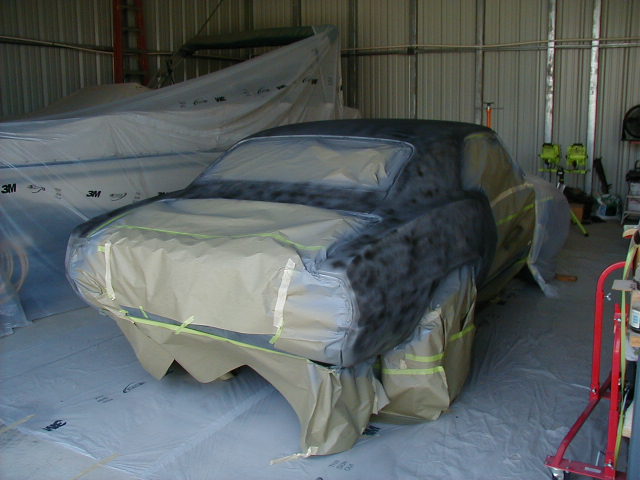
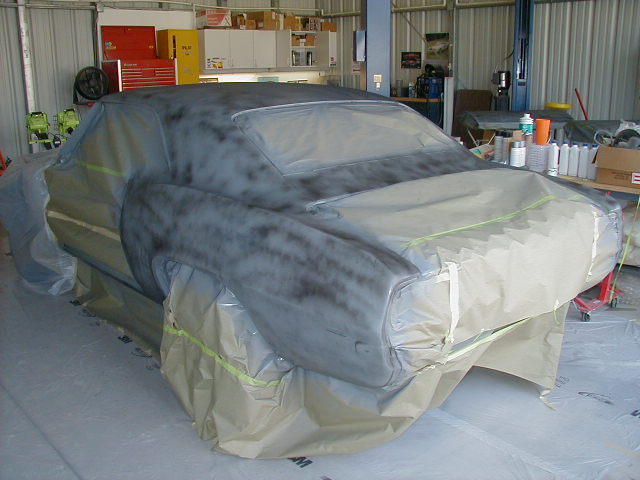
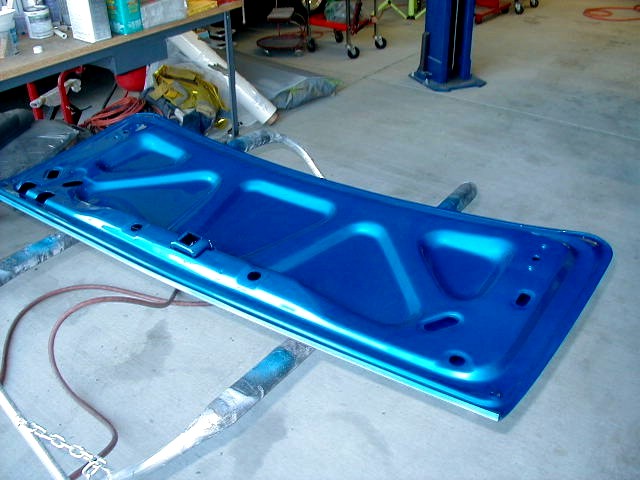
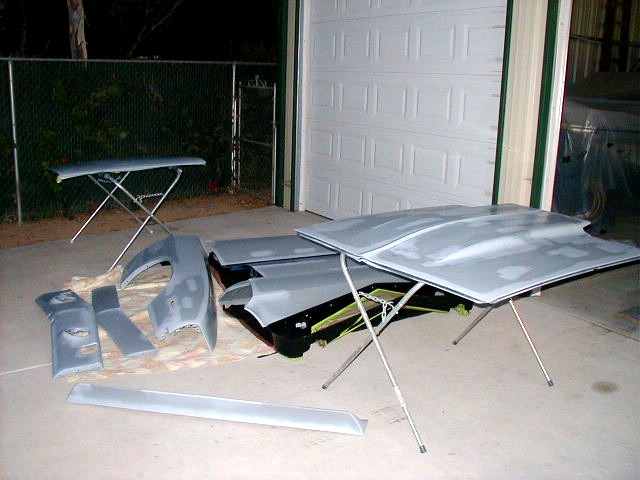
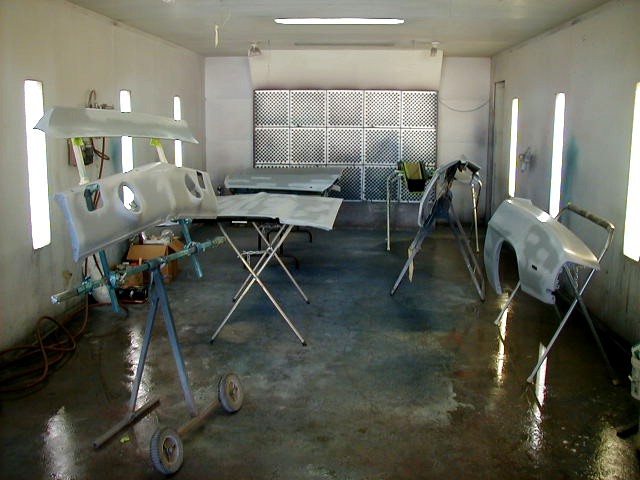
I also painted the interior metal trim under the rear window. With the painting done, I installed the front and rear window glass. This was fairly easy utilizing a special silicone mastic. I started the under dash assembly with a new fire wall pad. The reproduction pad I am using fits terribly, but unfortunately, you cannot get an NOS one, so I'm making it fit. Next, I installed the brake pedal assembly, steering column, gas pedal, new dash speaker, and defroster duct. The heater box is next and then the wiring harness. The paint is drying on the heater box so I'll install it tomorrow. I'll also wait to install the parking brake assembly until the door jambs are painted. The driver's side kick panel needs to go in before the parking brake assembly and the door jambs need to be painted before the kick panels can be installed. While waiting for the paint to dry on the heater box, I measured and punched the hole for the shifter cable and installed the shifter. I used a one and a half inch chassis punch to make the hole. I fully restored the heater box by bead blasting, painting, and re-sealing the box. I also installed good used heater cables since the originals were all broken. I also restored the original heater controls. Included in the heater resto is a new blower motor and restored original big block heater box. In preparation to paint the cowl area, door and body jambs, I had to hang the doors, adjust all the gaps, and then remove the doors leaving the hinges attached to the body. This will ensure that the hinges are painted completely and there is no chance of scratching the paint when the doors go back on. If you notice in the pictures above, the driver's door has a gap at the top and a gap at the bottom after adjustment. I am going to have to reshape the door somewhat for it to fit. After the jambs are painted, I will install the doors and adjust all the gaps in preparation for front sheetmetal mock up. We painted the cowl and jambs just to make life a little easier when we painted the body. But as it turned out, I'm going to repaint the door jambs but not the cowl. I'm worried that there will be lines in the clear that separate the jambs and the body, so they will all be repainted so there will be no lines. Lemans Blue is the hardest paint to spray correctly next to silver due to it being a very transparent paint. All surfaces had to be sanded with 800 grit wet so the sanding marks wont show through the paint. If this were a solid color such as Hugger Orange, or Garnet Red, we could have used 400 grit for final wet sanding since the solid colors cover much better with less paint. All the body panels will be painted separately, then I will install the engine and trans, then install the doors and front sheet metal. Now it's time to mock up the front sheetmetal. I'm using a combination of GM and reproduction front sheet metal. Everything went together pretty nicely, but there are some issues with the repro stuff that I have to address.Repro lower fender extensions simply do not work. They don't allow the grill to sit flush in the fender openings. So, I had to buy a GM extensions for both sides. The grill should fit fine after that. The passenger side fender and hood will need some additional work too. The fender is wavy and the hood has a high spot that needs repair. This is the big problem when using any repo parts. But they are workable, it just takes additional time to make them look and fit correctly. Now that I have replaced the reproduction passenger side fender extension with a GM piece, the grill and grill stiffener fit much better. A little more work on the hood adjustment and we are ready to disassemble everything, do the body work, block sand and prime. It is extermely important to mock up front sheetmetal pieces to ensure a proper fit prior to painting, or you may have a neverending nightmare on your hands that will cost you hundreds of dollars for repaint and body work. Then it was time to install the spoiler on the new deck lid. As you can see in the pic, there is a dent on the surface of the deck lid I need to hammer out. We're getting close, but it is still going to be several weeks before we get into the spary booth to paint the separate body panels. There are still over 100 hours of body work and block sanding until everything is ready for paint. I also need to finish drilling the holes for all the emblems prior to paint. |
|
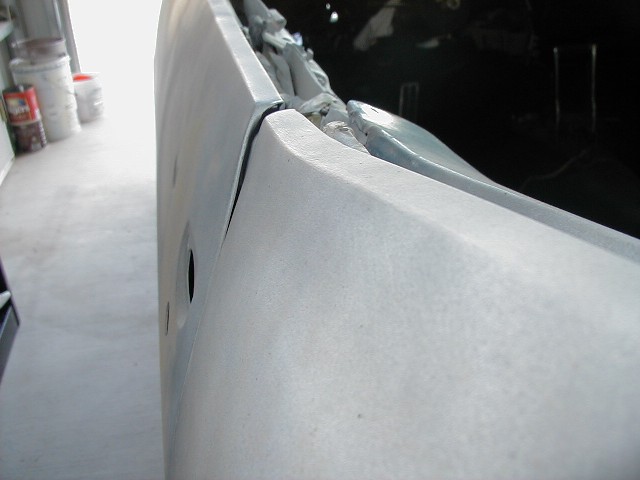
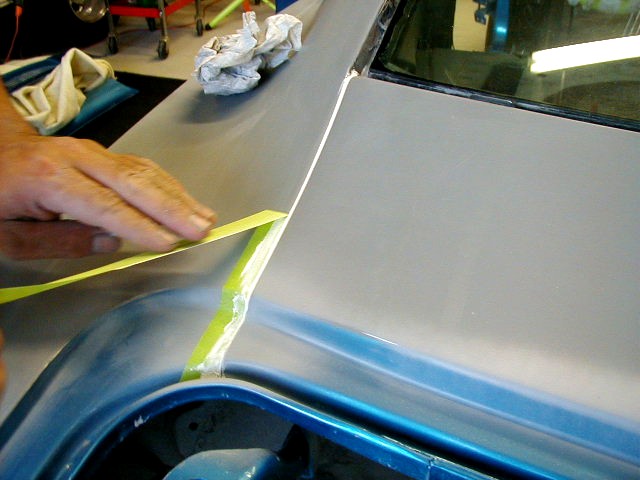
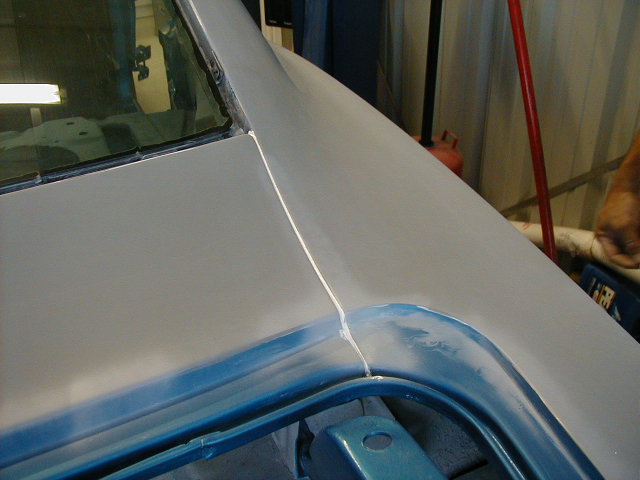
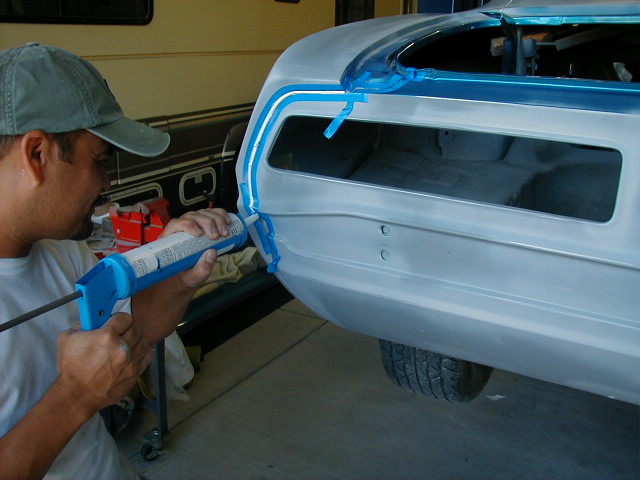
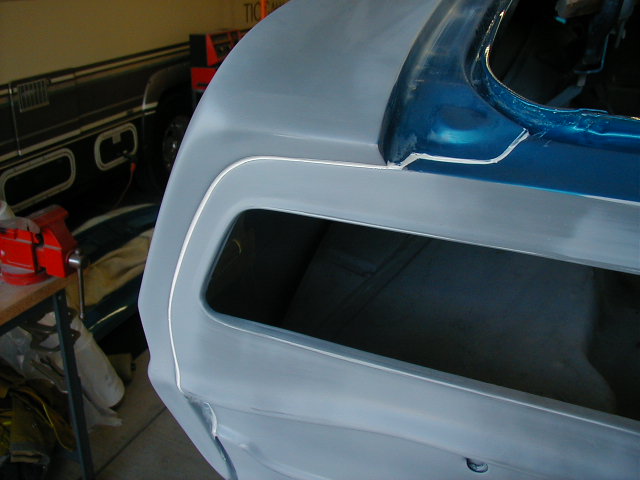
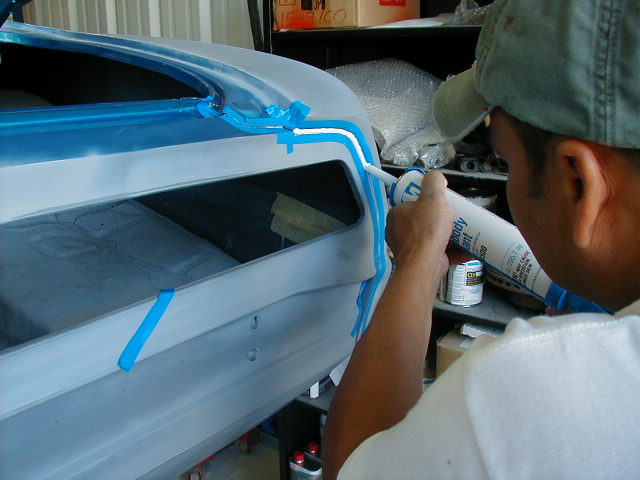
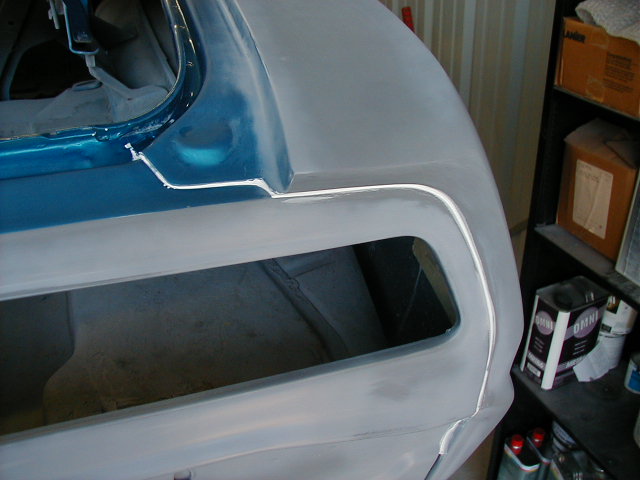
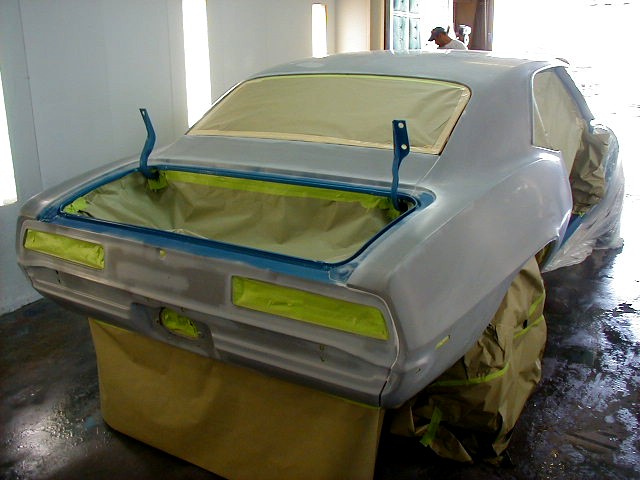
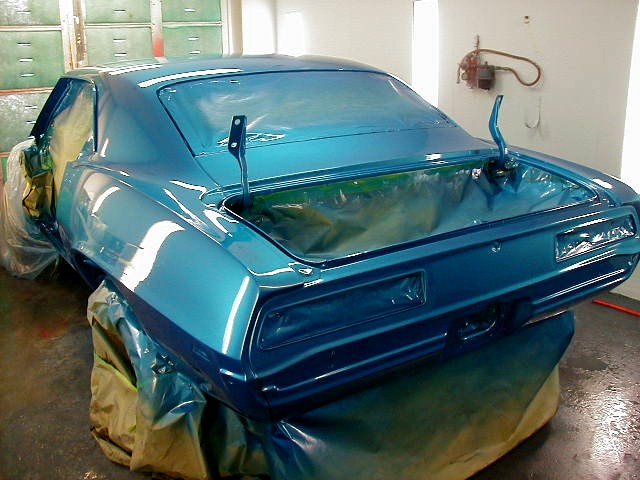
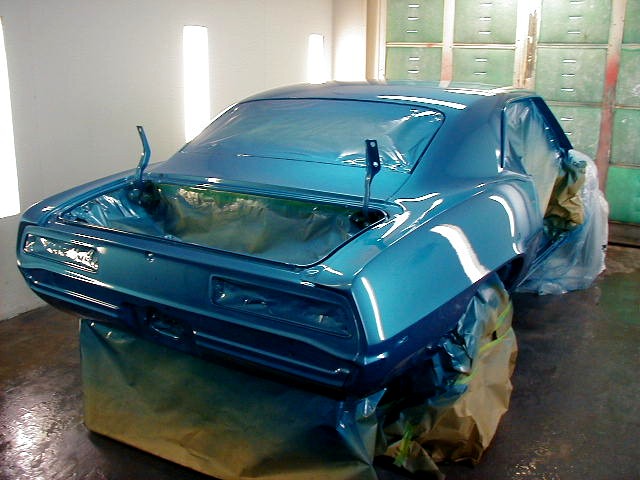
          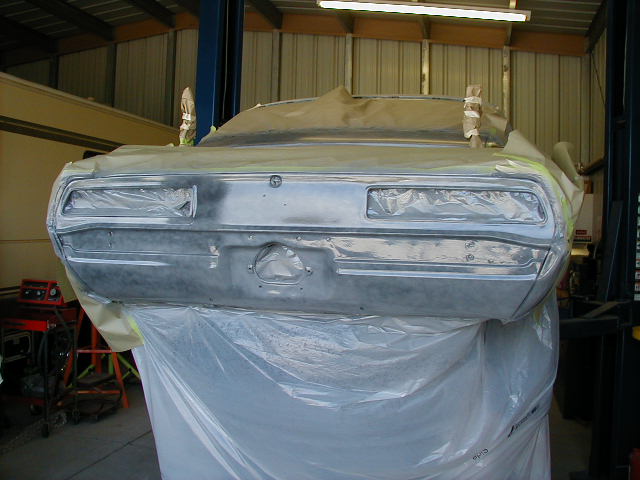  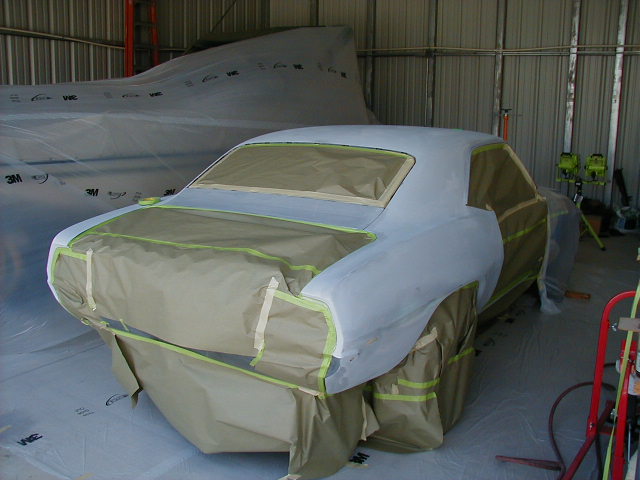 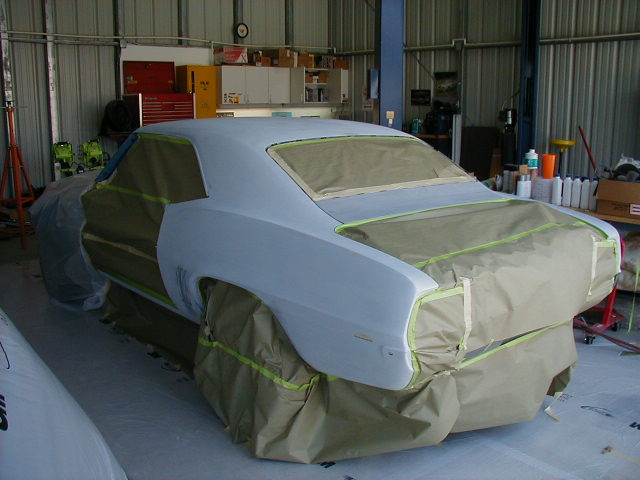        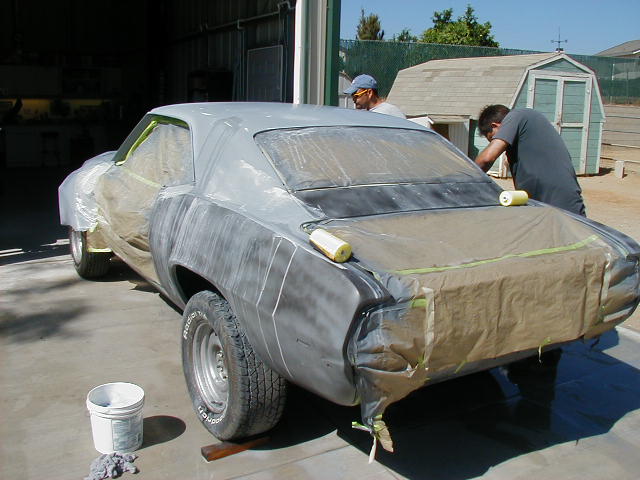       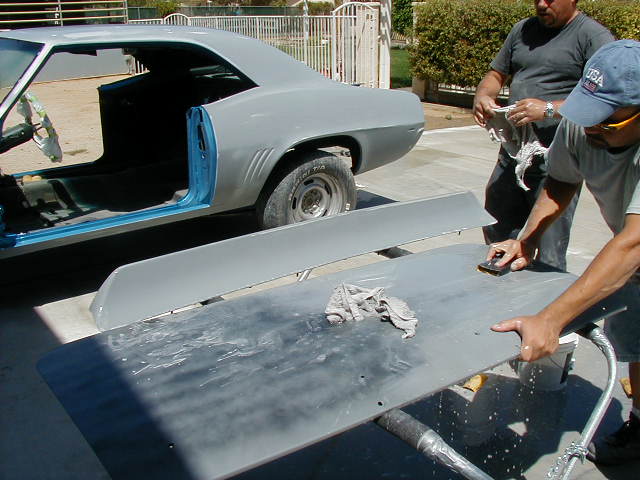               Before the body can be painted, it needs to be sealed. Camaros have seam sealer on the trunk filler panel and on the tail panel. Tape works well as a guide to make perfect joints.
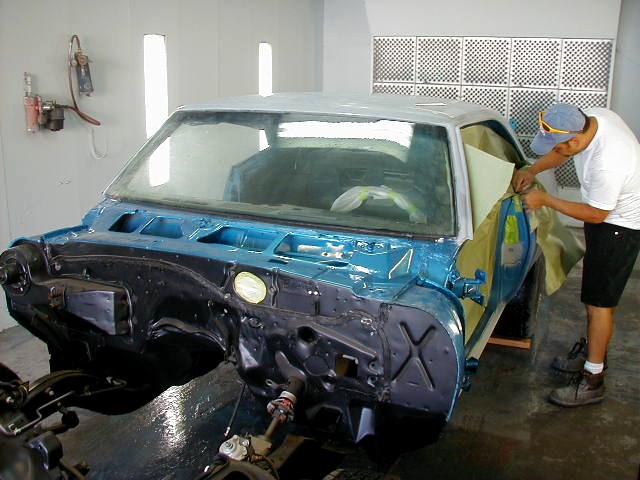
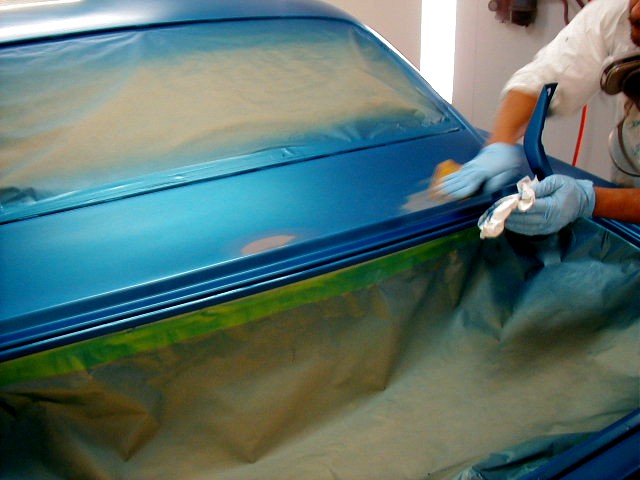
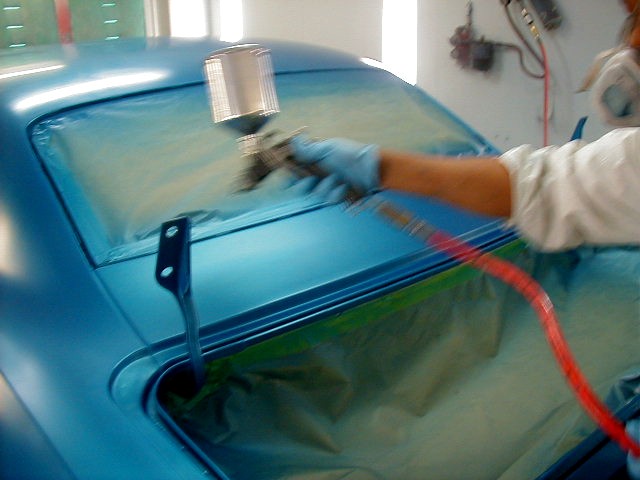
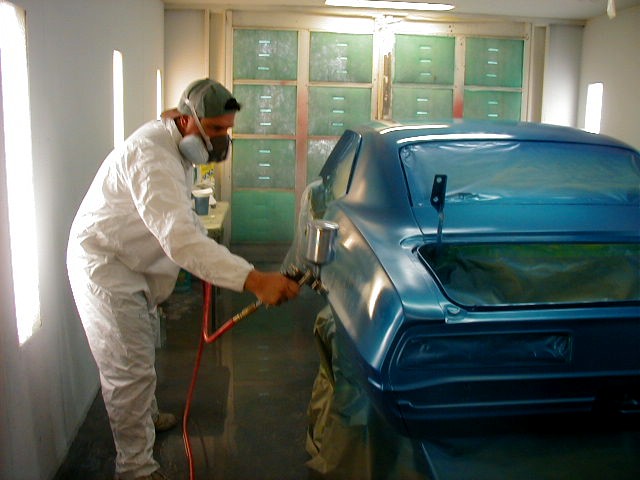
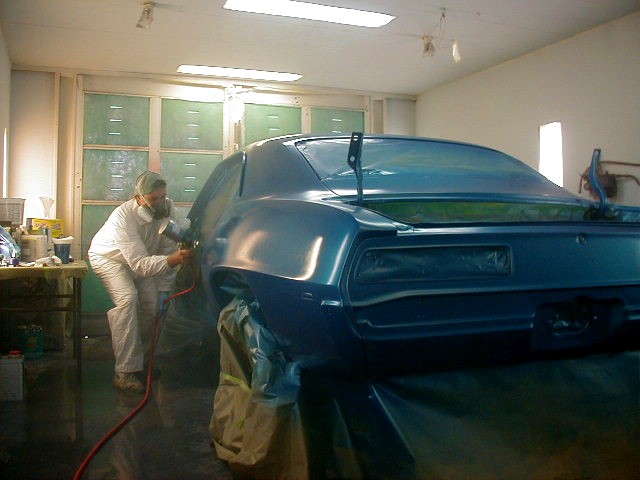
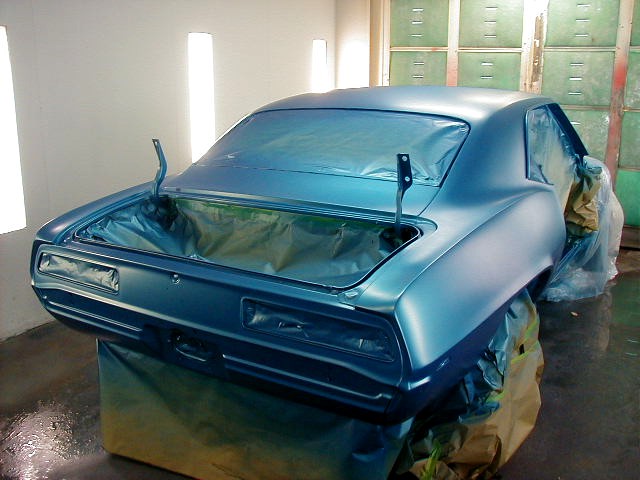
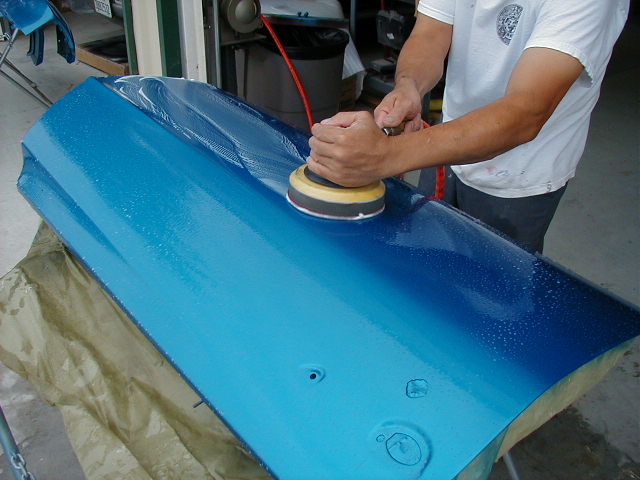
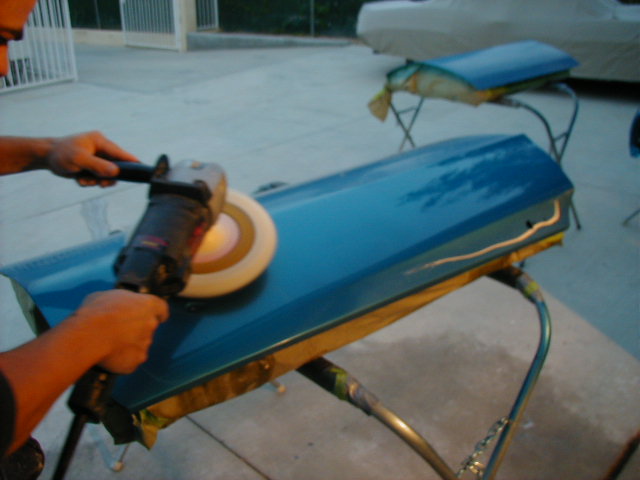
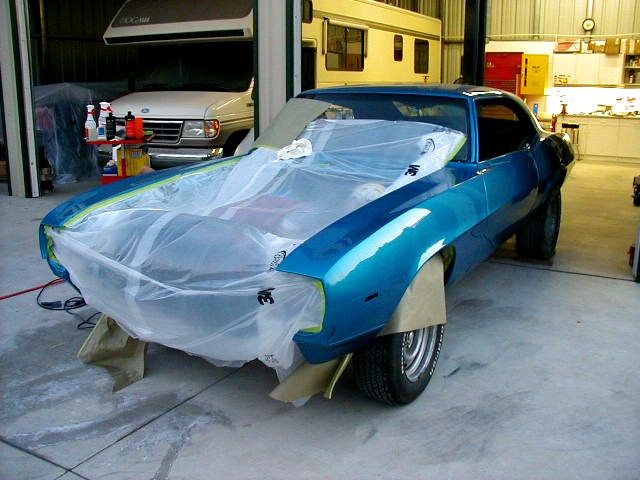
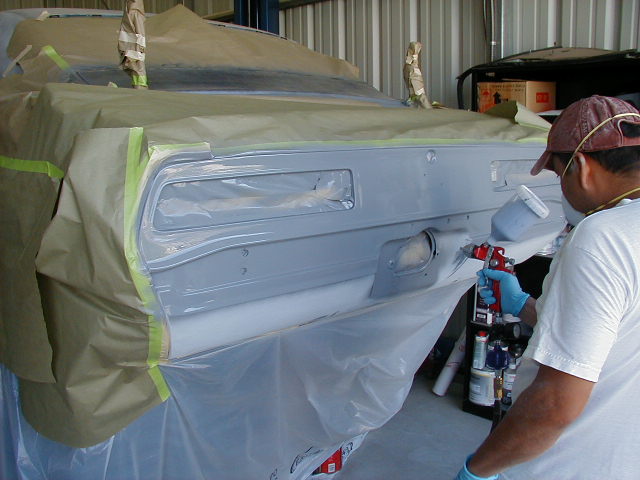
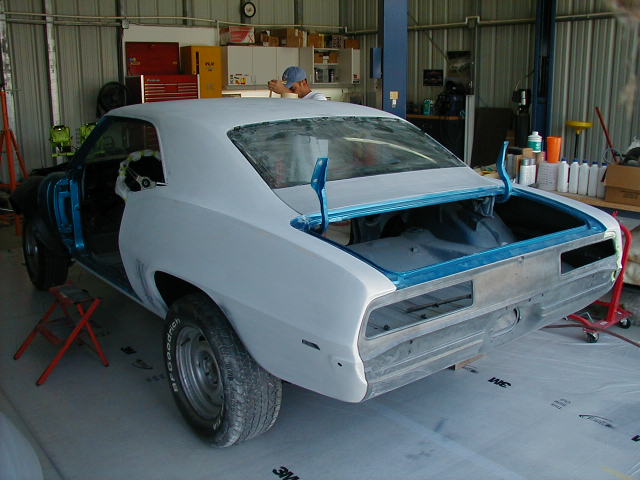
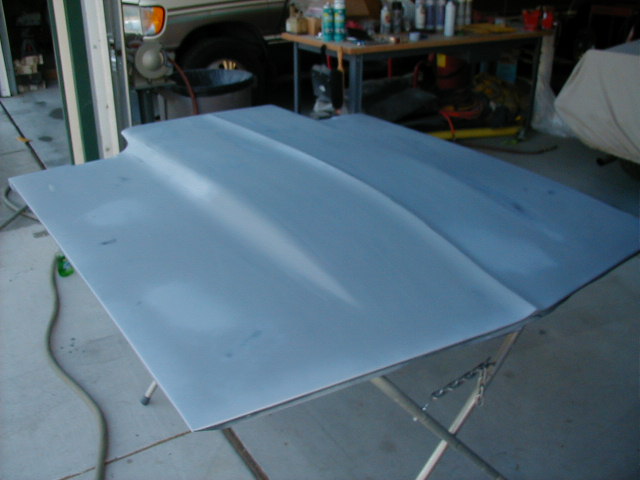
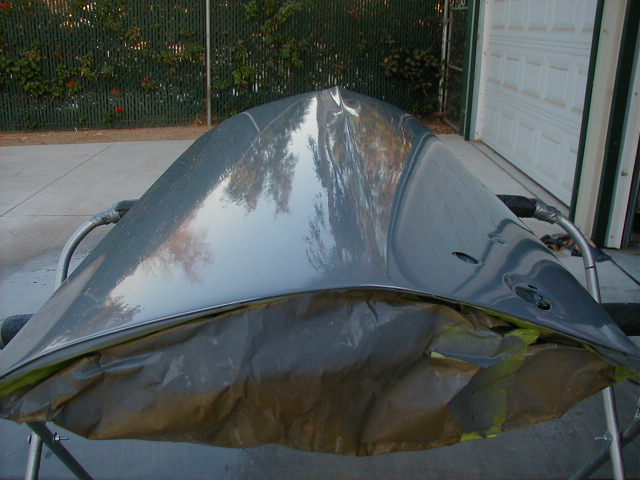
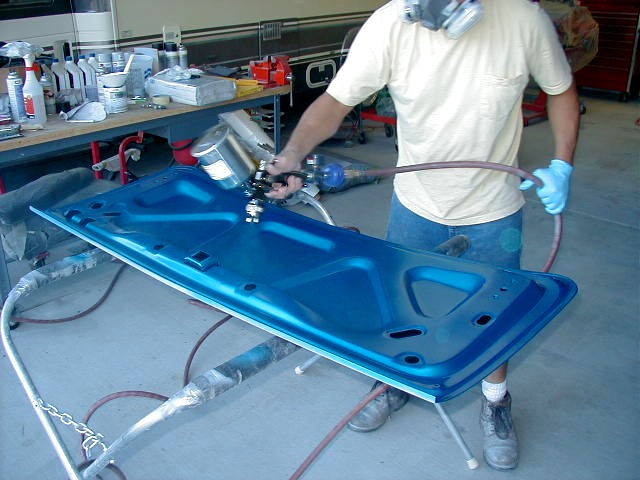
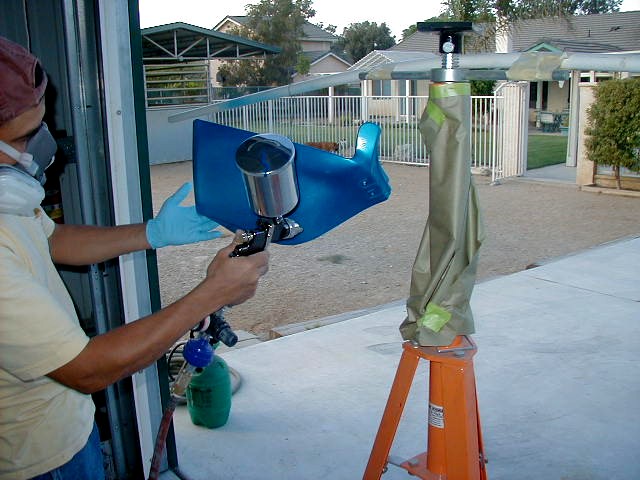
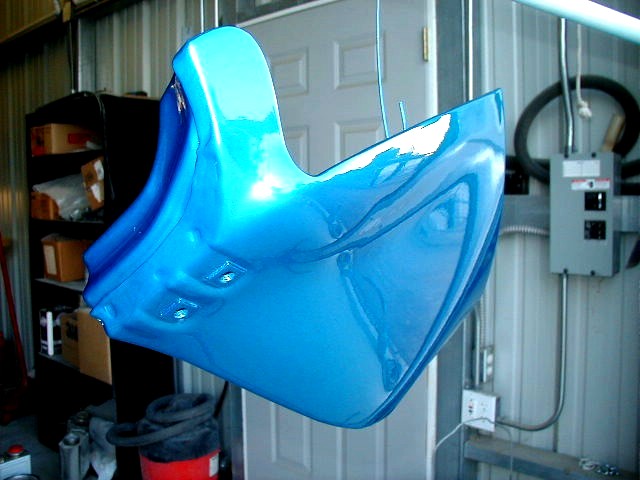
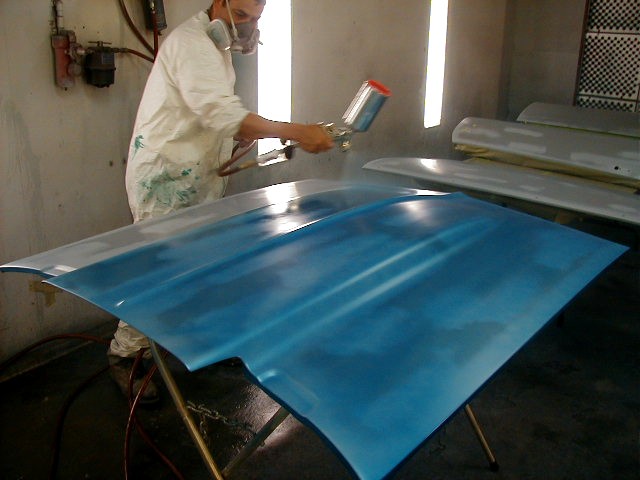
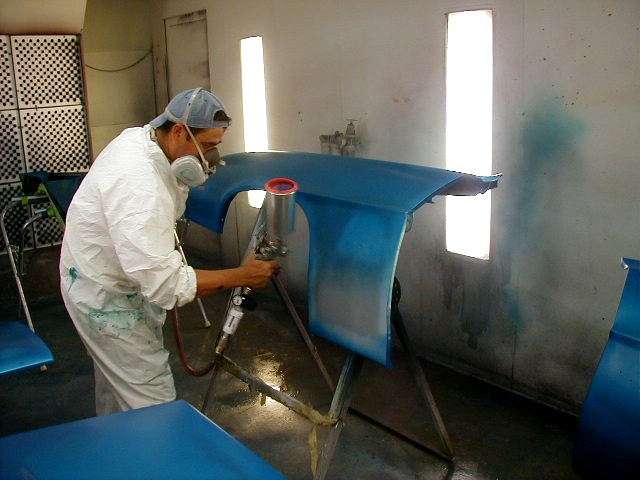
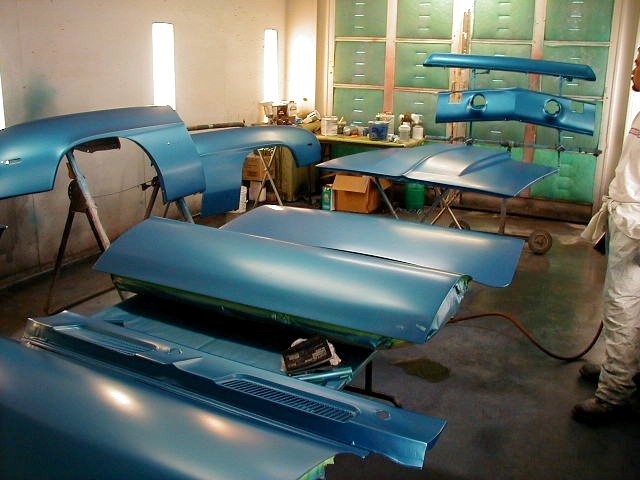
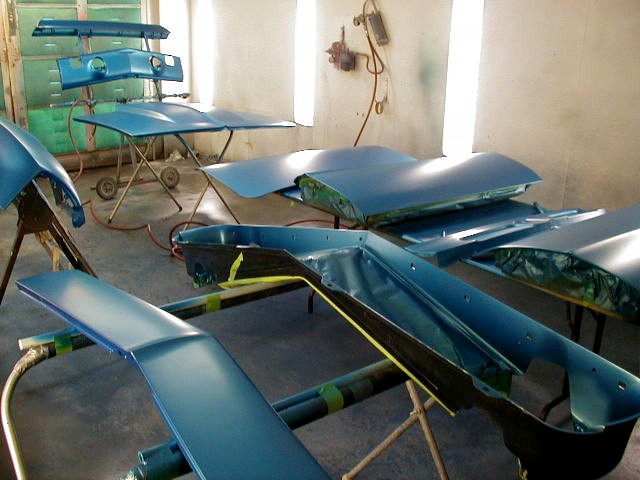
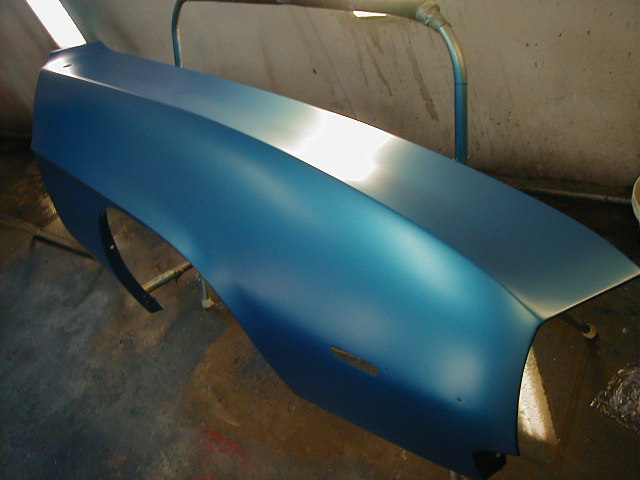
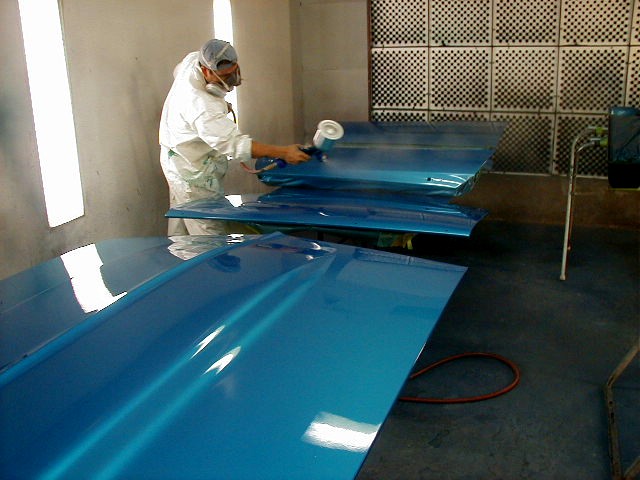
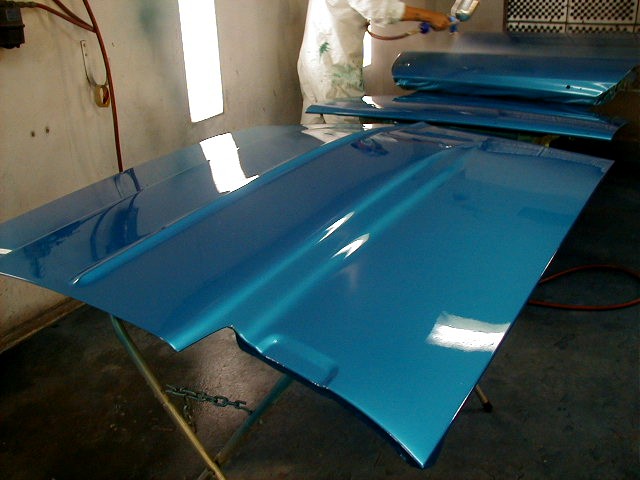
Now the body is ready for paint. It took an hour and a half to just mask the car. Then another 2 full hours to apply both the base and the clear. We started with a light fog on the base coat. Then several more medium coats were applied until we had good coverage. Then we did the final fog coat. Notice the repair we made to the base coat on the trunk filler panel. The base coat must be perfect before the clear is applied or your imperfection will not be repairable. There can't be any dirt specs, runs, or any other imperfections in the base coat. Once the imperfection was sanded with 800, we finished applying the blue base. Then it was time for 3 coats of clear. As you can see from the pics, the body came out extemely nice.
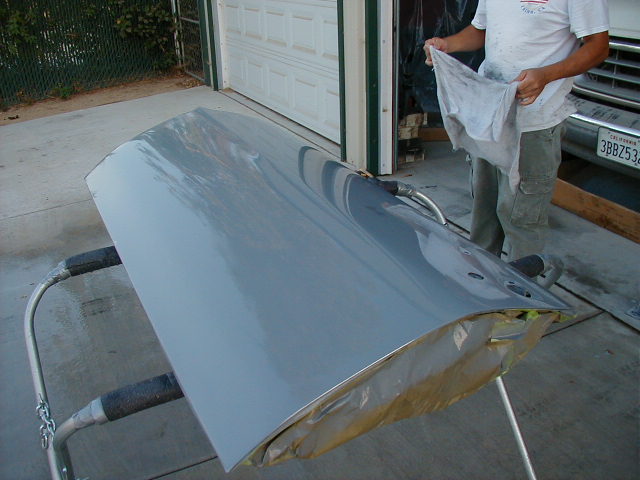
I was fortunate to get to do a lot of the painting today. That is yours truly below.
Now that the base coat is finished, it was time to apply the clear
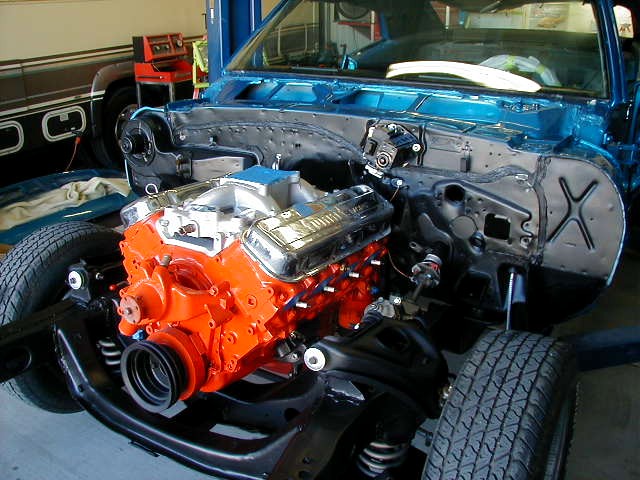
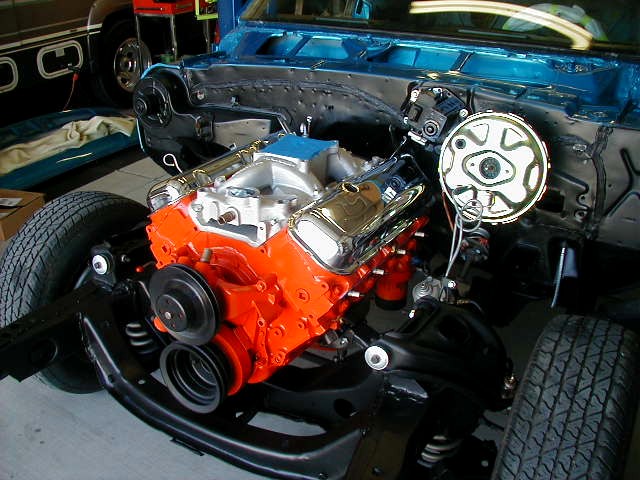
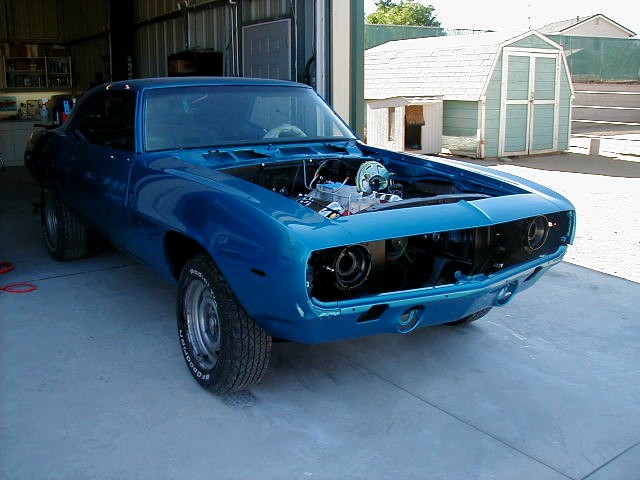
To make life easier and eliminate the chance of damaging the new paint, I installed the motor and trans before installing the front sheetmetal. I filled the torque converter with several quarts of Dexron III before bolting the trans to the motor. Then I bolted the crossmember in slid the motor and trans in as one unit. The Engine Leveler is the only way to drop a motor in.
Now, in conjunction with the color sanding and polishing, I can assemble the entire engine compartment, then hang all the sheet metal Stay tuned, now the work will really start progressing quickly. |
|
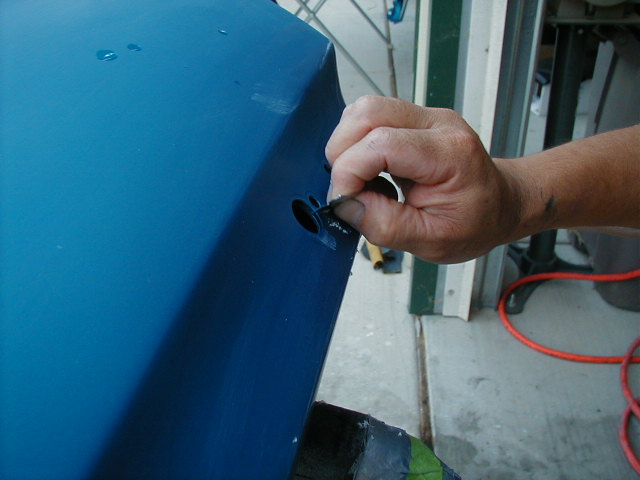
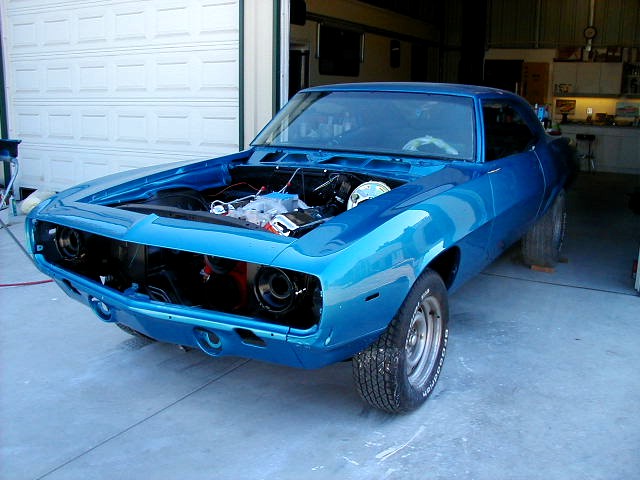
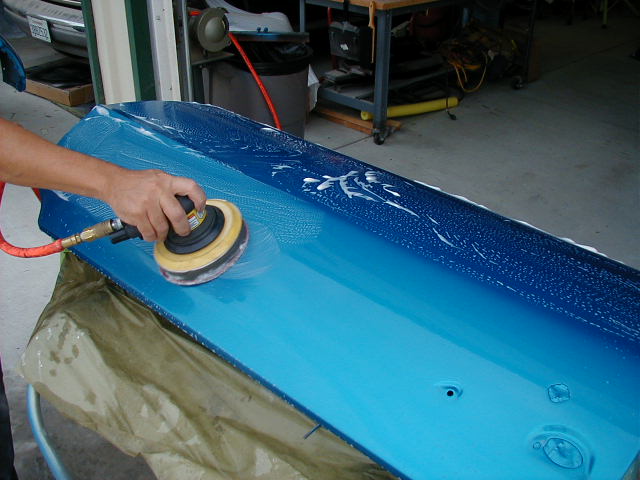 When repairing a run in the clear coat, use a new razor blade and bend it slightly, then scrape the run until it is flush with the surface. Now it is ready for sanding and polishing. Now that the doors are installed and all the gaps are properly adjusted, I could install the inner fenderwells, radiator core support and the front fenders. It was easier to color sand and polish the fenders on the car. Installing the fenders requires the installation of the radiator core support and inner fenderwells at the same time. This is a difficult task, but I did it by myself. I just taped all the edges off so I wouldn't scratch the paint during installation. 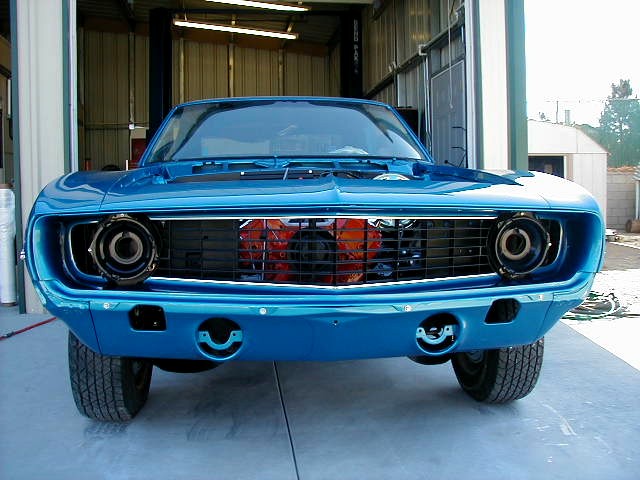 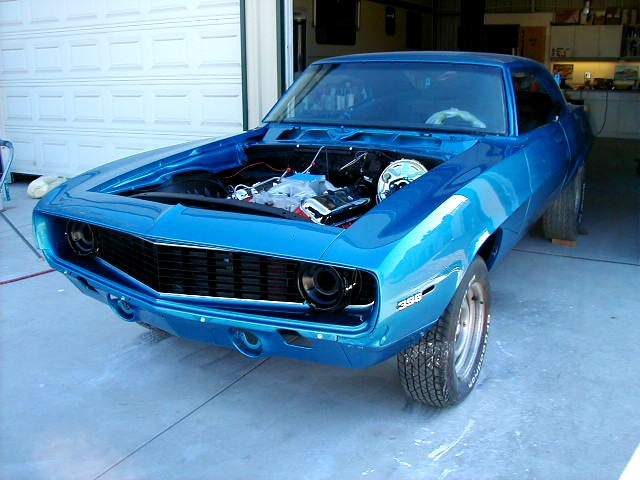  We also color sanded and polished the header and valance panels off the car. That made for less mess in the new engine compartment. Now it's finally starting to look like a Camaro.
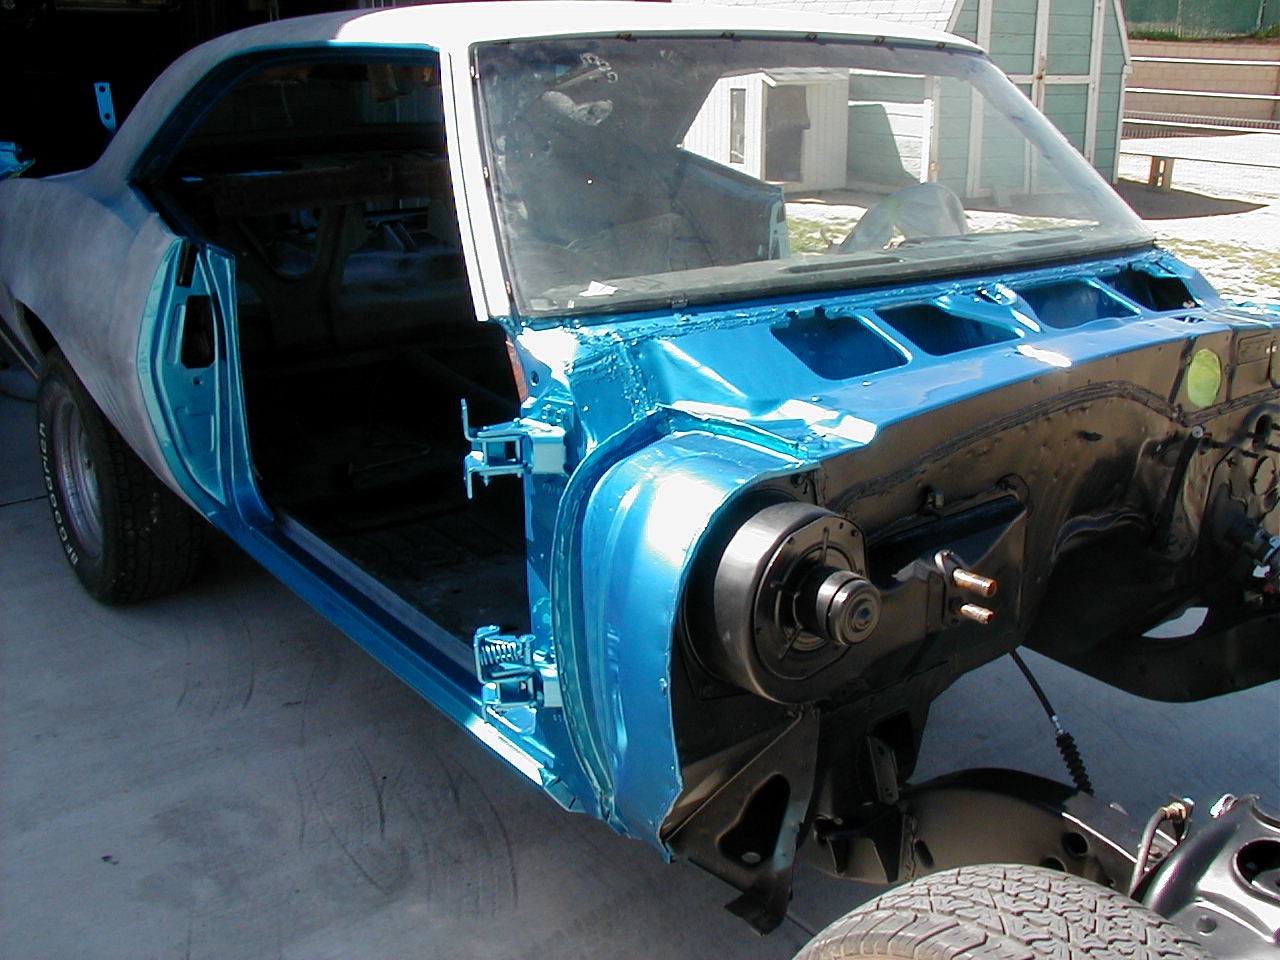
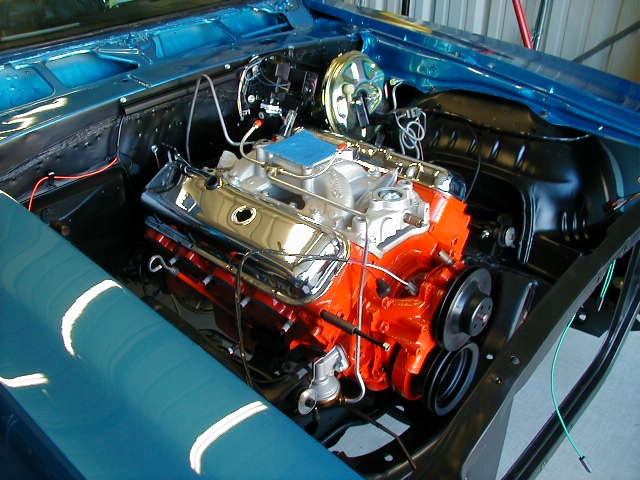
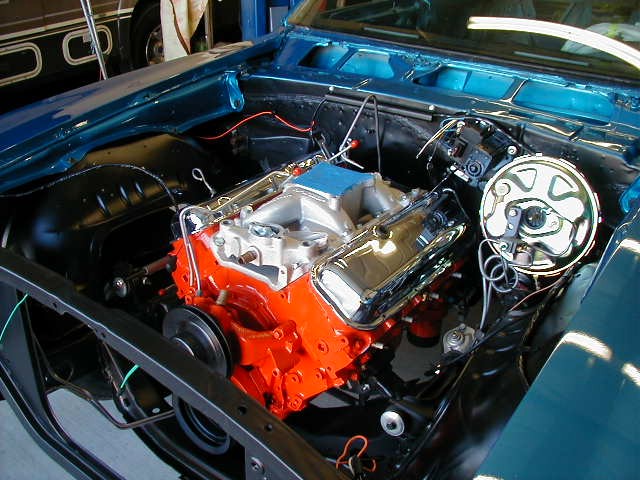
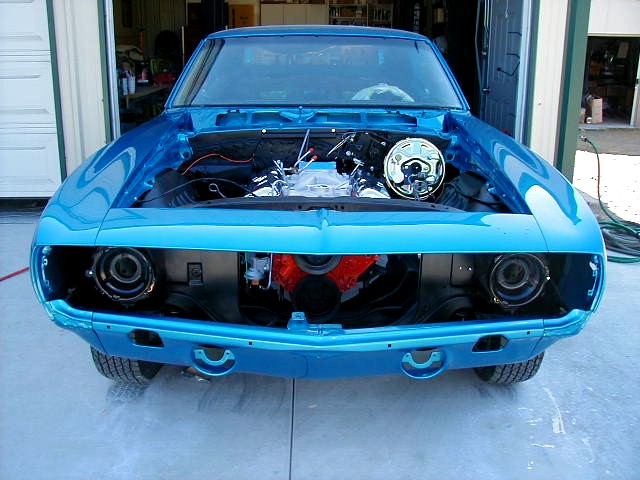
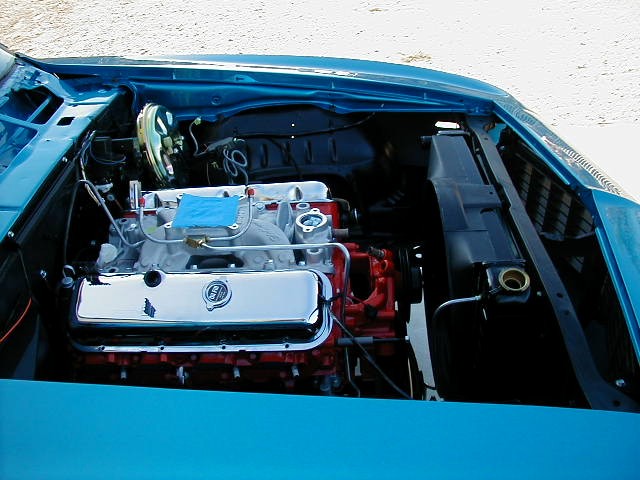
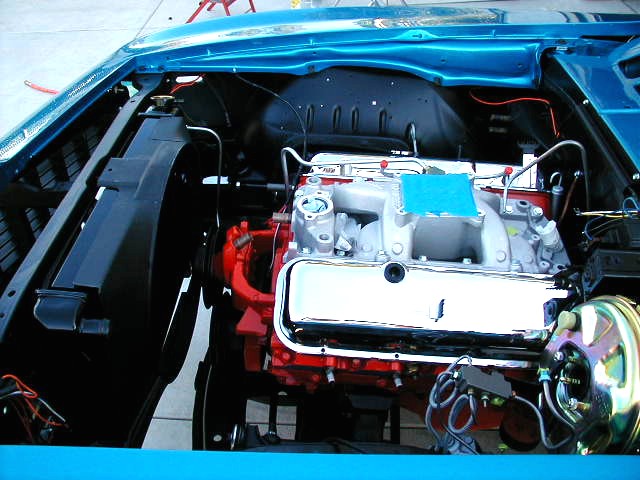
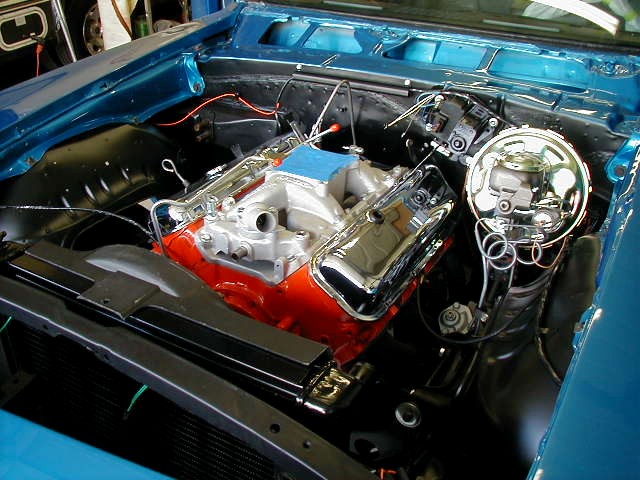
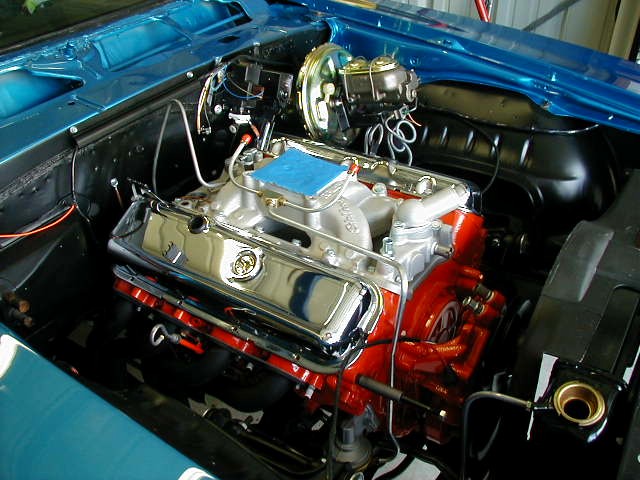
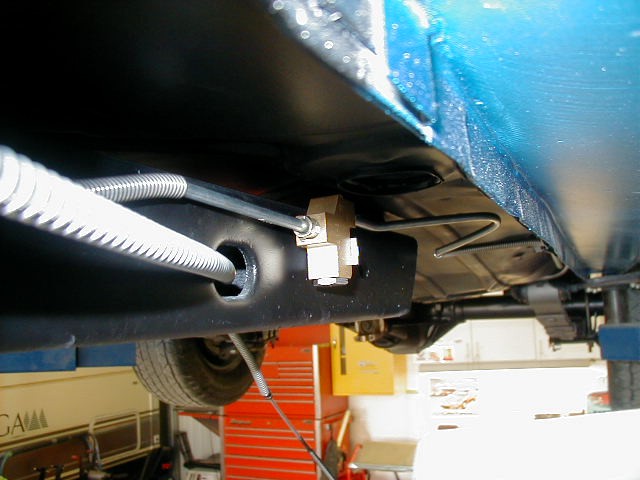
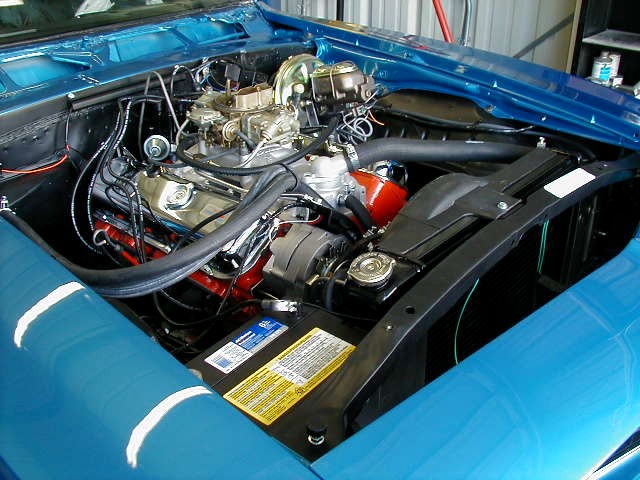
The fun is continuing with the engine compartment assembly. Installed are the radiator and shroud, complete power brake set up and brake lines. Note the correct proportioning valves at the master cylinder, and under the driver's side floor. Also installed are the headers, starter, wiring harnesses, horn relay and voltage regulator. I still have the distributor, plug wires, carb, alternator, hoses, battery, and cables to install. Then we will be ready to fire this thing up and break in the cam.
The engine compartment is about 99 percent complete. There are a few small things to do, but it is ready to fire up. Before I can start the motor, I have to assemble the dash carrier and connect all the wires under the dash.
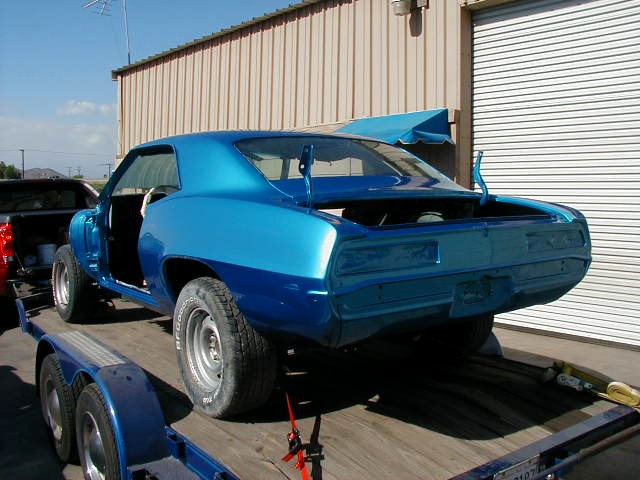
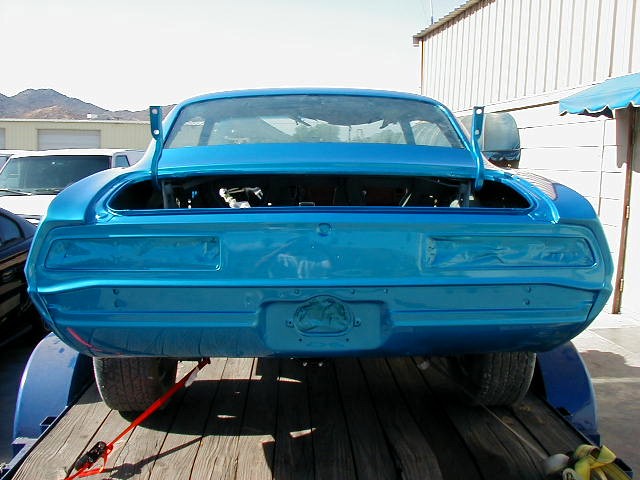
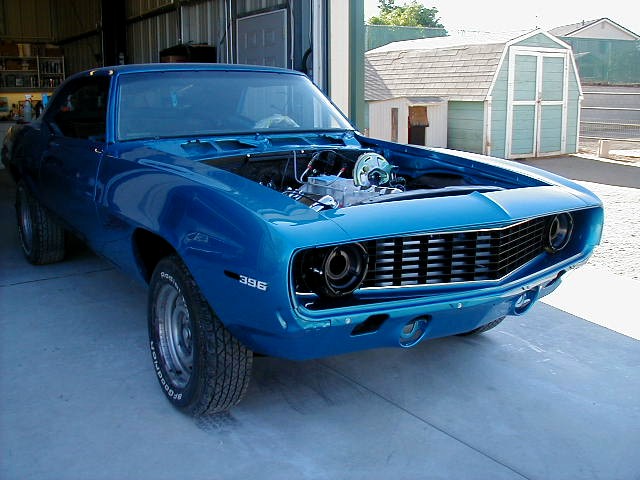
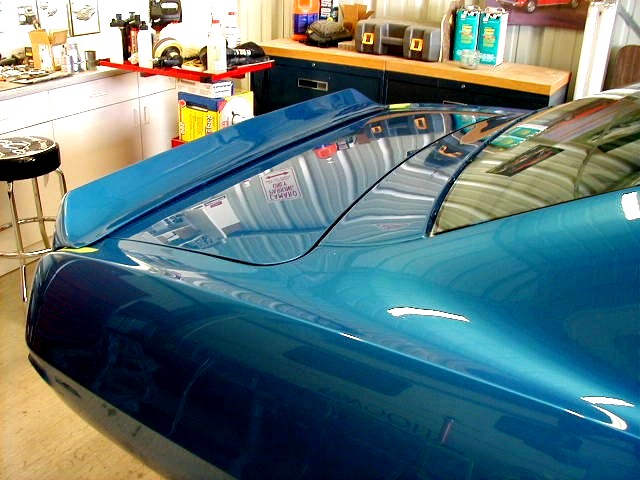
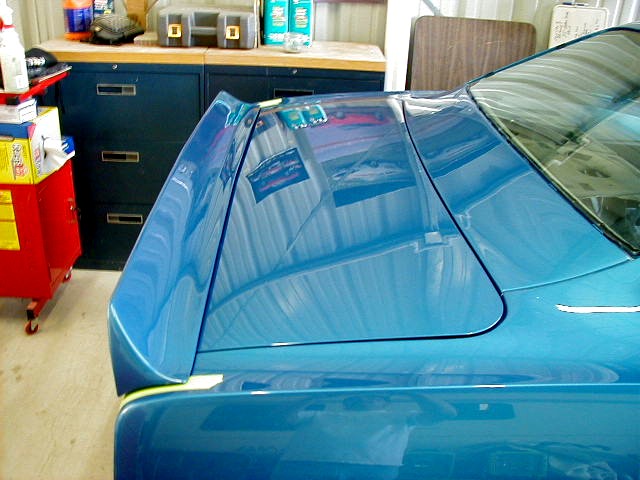
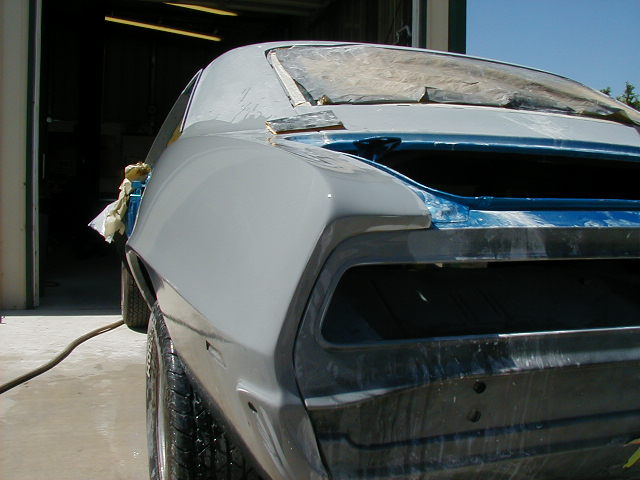
The color sanding and polishing is nearly complete. The hood and deck lid are done. The cowl panel is the last piece. Note the short spoiler. This car has an October, 1968 build date. The larger spoilers were installed in late November, early December. Chevrolet used the 1968 spoilers until the larger spoiler was developed. Since October 5, 2002
|