This Part Of The Process Was Actually The Easiest
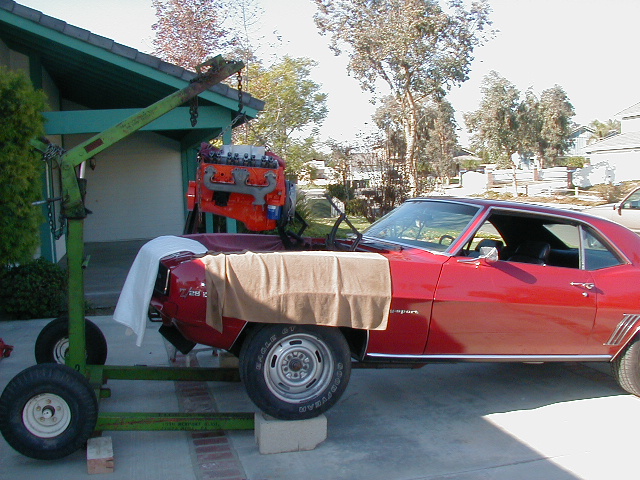
I wanted to tackle the engine installation all by myself, mainly to see if I could do it without any help. Well, I went down to my trusty rental yard, picked me up an engine hoist, and about three hours later I had the engine, bellhousing, and trans installed.
Note: Use Plenty Of Towels To Protect The New Paint In The Engine Compartment |
|
I'll Break Down The Sequence Into Three Steps...
Step One:
I had to prep the engine before I dropped it in the car. On the engine stand, I installed the oil filter, added oil, and primed the oil pump with a large screwdriver. I also installed the left side exhaust manifold, spark plug wire shields, dipstick tube and motor mounts. With the engine on the hoist, I installed the clutch. Oh, and don't forget the pilot bushing.Click images to enlarge.
|
Step Two:
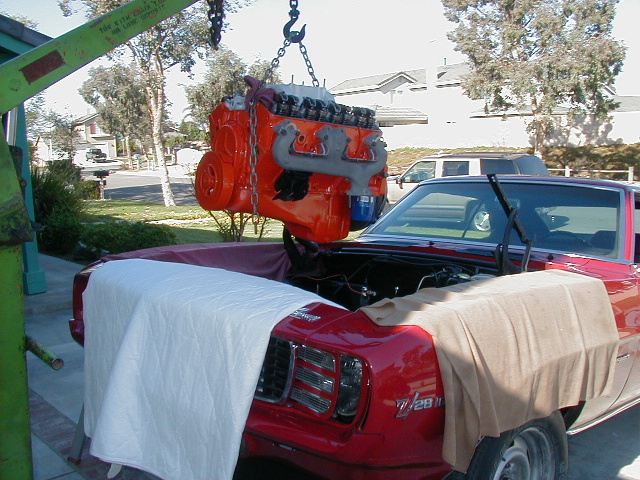
Ready To Lower It In...
Installing the engine was very easy. I was very patient and lowered very slowly so I wouldn't scratch or chip the fresh paint in the engine compartment. |
|
|
|
Step Three:
In Goes The Bellhousing And Transmission
Once the motor mounts were lined up, I slid the bolts in and used the hoist to support the motor while I installed the bellhousing. Using a floor jack to raise the trans, it took about 20 minutes to get the trans lined up with the clutch. I pulled the trans the rest of the way in with the 4 mounting bolts and bolted up the crossmember. While I was under the car I installed the driveshaft, flywheel cover and starter. I also hooked up the speedo cable. |
Now For The Bolt-Ons...
After about 3 hours of work, I was set. Now I was ready to start assembling the puzzle. I refered to Jerry MacNeish's Difinitive 1969 Z28 Fact Book, 1969 Chevrolet Assembly Manual, 1969 Chevrolet Chassis Service Manual and a few other restoration manuals for reference on exact location, routing, and placement of all bolt on parts, brackets, wiring, hoses, and cables. |
|
|
|
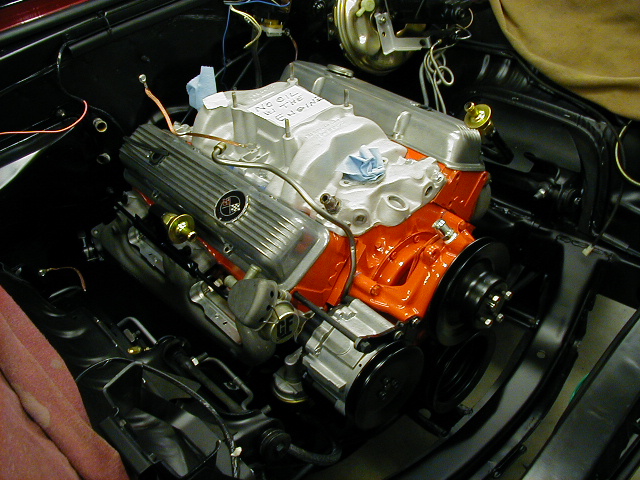
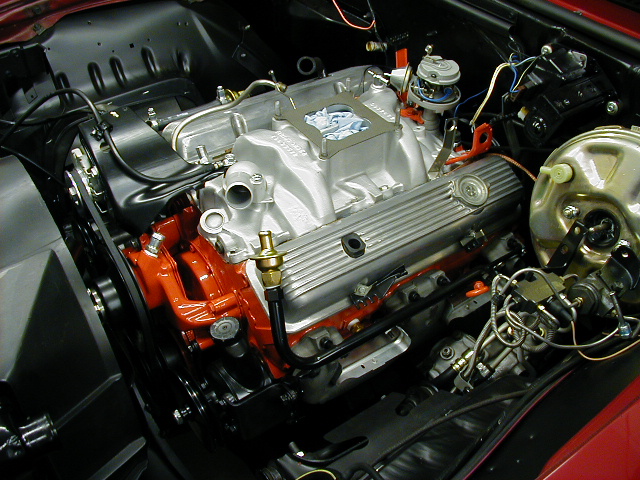
Water Pump And Pullies...
The first parts that went on were the fuel pump, pump to carb fuel line, water pump, and crankshaft pulley. |
Next, The Smog System...
Next, I installed the passenger side exhaust manifold. But prior to that, I hooked up the starter wires, positive battery cable, and starter support bracket. No gaskets are necessary with good, flat manifold surfaces. Then I put on the smog tubes, smog pump & brackets, diverter valve, and pulley. |
|
|
|
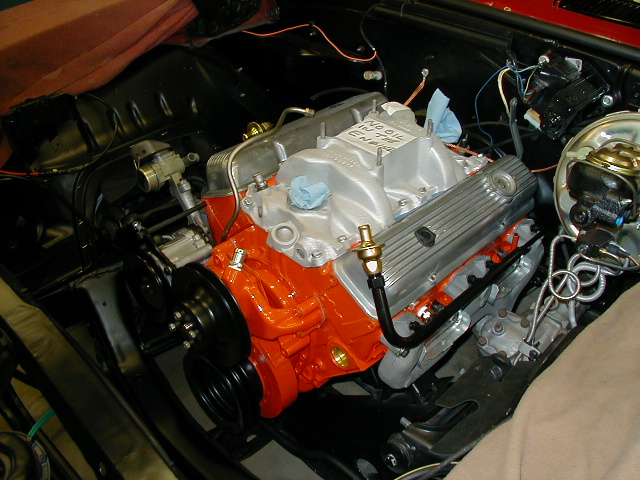
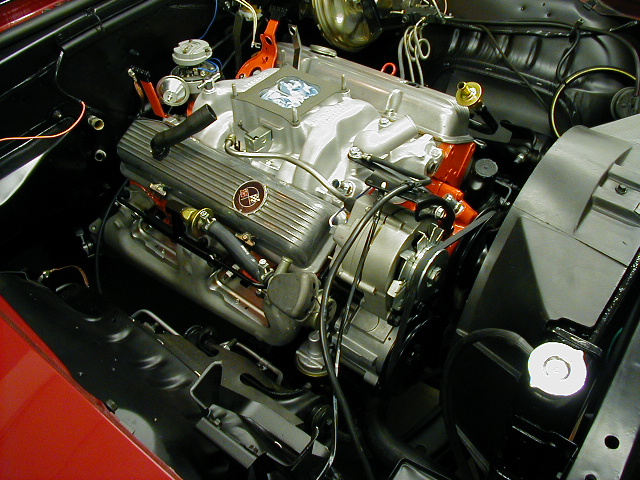
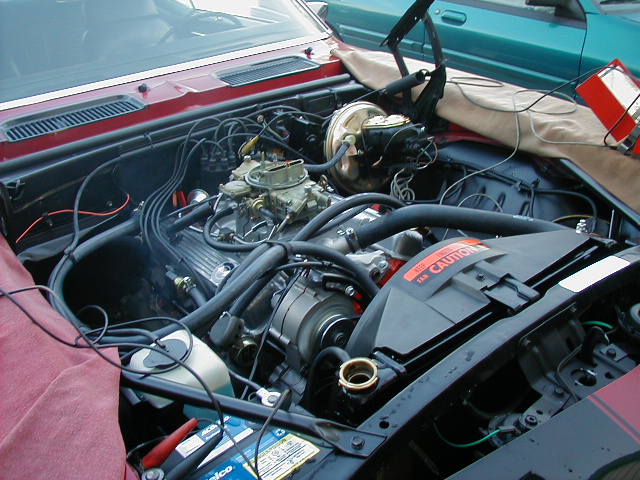
It's Starting To Look Real Good!
Next, came the thermostat housing, alternator & wiring, upper bracket and negative battery cable. The radiator, clutch fan, fan shroud, and power steering pump & hoses and belts came next. |
Distributor Installation
Installing the distributor can be easy if you follow these steps: Pull the number 1 spark plug and rotate the engine until you feel the compression on you finger. Then line up the balancer mark with the 0 on the timing cover mark. Next, while dropping in the distributor, postion the vacuum advance just to the right of the spark plug wire tower. When the distributor is all the way down, the rotor should be positioned just to the right of the vacuum advance on the cap. That is the number 1 plug wire position. You may have to turn the oil pump shaft with a screwdriver so it seats in the bottom of the distributor. |
|
|
|
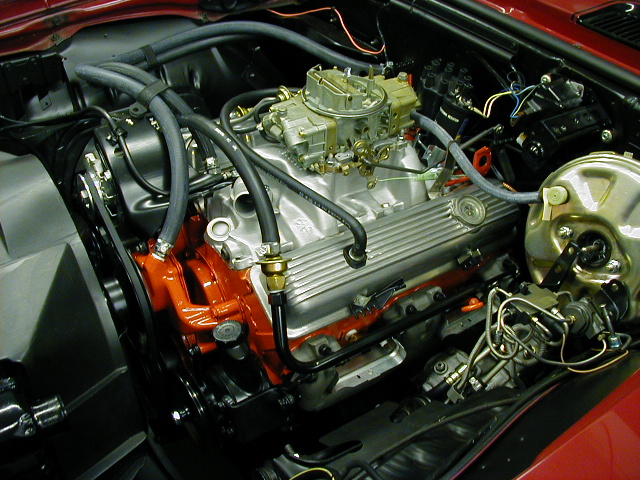
Carburetor Installation
Now it's time for the carb. Using the new base gasket that came with the carb kit, bolt on the carb and install the fuel block and lines, vacuum hoses, and PCV valve and hose. At this time I also installed the power brake hose, heater hoses, lower radiator hose, and connected the vacuum hose the headlight canister. |
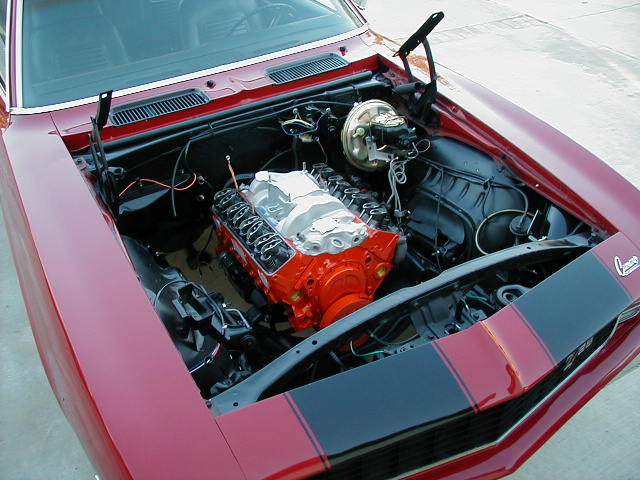
It's Gettin' Close!
At this time I installed a new group 24 Delco battery, upper radiator hose, and added coolant and power steering fluid. I'm almost ready to fire it up and break in the cam. |
|
|
|
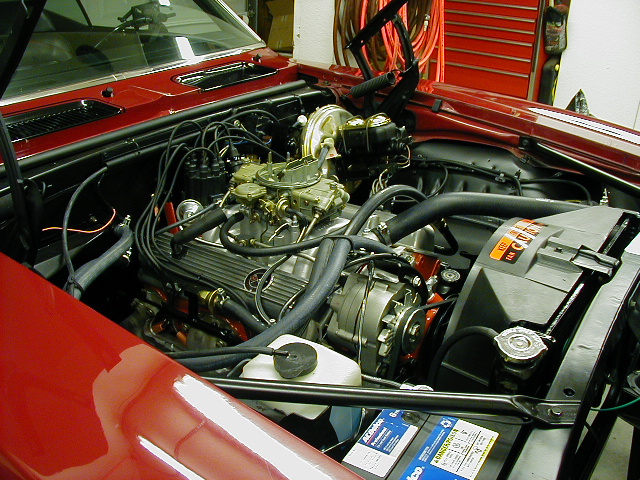
The Finishing Touches...
A few of the last things I did before starting it up were, placing the decals, installed the windshield washer bottle & hoses, bolted on the fender to radiator support bars, and bled the brake system. Let's fire it up, shall we? |
Breakin' In The Cam
Starting an engine for the first time always concerns me because most catistrophic failures usually occur when the motor is first started. I primed the fuel system first. by cranking the motor over until I had gas at the carb, turned on the iginition, and it fired right up. I ran it up to 2300 RPM for about 25 minutes, all the time, monitoring the coolant and checking for any major leaks. It all went very well. |
|
|
|
Dialing It All In
After the break-in, I brought it down to idle and checked the dwell (30 degrees), set the timing, and adjusted the fuel mixture, and finally the idle. The engine was running very well and sounded great!!! |
The Finished Engine
And now it's time to run it around the block for a test drive and see what this high powered mouse can do! This is the fun part!!!
 |
|

 Finally, Dropping In The Engine!!!