The Following Will Describe, In Detail, How To Overhaul Your Holley 780 DZ Carburetor
  At first glance, the Holley DZ Carburetor looks pretty intimidating, but it is actually not too bad to overhaul. When you see the components and understand how they work together, most anyone can do a great job at rebuilding this carburetor. Some of the tools you will need are, phillips and flat screwdrivers, 5/16" socket and driver or ratchet, needle nose pliers, regular pliers, flat pocket screwdriver, 15/16" combination wrench, and 5/8" and 1/2" flare nut wrench. Finally, I purchased a one gallon can of carburetor/parts dip by Berryman.Click Images To Enlarge
|
|
|
Finding The Right Overhaul Kit
The complete overhaul kit for the 4053 DZ Holley carburetor is part number 37-1539 (Holley Trick Kit). Be aware that this kit is for a few different carbs, so be sure to save the old parts so you can correctly match them with the new parts. Another shocker is this kit costs a wopping 85.00. So, bring your check book! |
|
|
Disassmebly
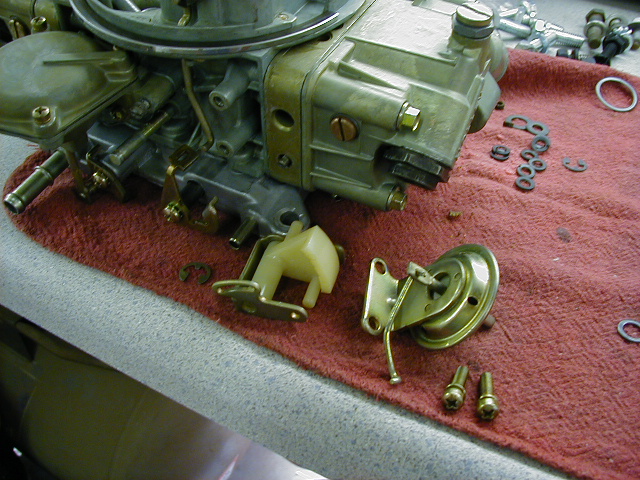
The first step is to remove the choke pull-off, fast idle cam, then remove and disassemble the vacuum secondary diaphram. Do not soak the choke pull-off or fast idle cam in the carb cleaner. You can now remove the base plate and accelerator pump squirter. I had to pour the carb cleaner in a large pot so all of the larger parts could soak.
|
|
|
Float Bowl Parts And Components
Next, remove the 4 bolts that hold on each float bowl and remove the bowls and metering blocks. Remove the floats, needles and seats, and fuel filters from both bowls. Don't forget the accelerator pump assembly. Now remove the jets, power valves and idle screws from the metering blocks and soak all parts, except the floats, power valves and accelerator pump diaphram in the carb cleaner. Don't forget to remove the cork gaskets for the idle mixture screws. A good tip is to use the blue float bowl and metering block gaskets, during assembly, since they are reusable if you want to change jets later. |
|
|
Fuel Filter Replacement
The DZ carburetor uses two porous brass internal fuel filters which is the reason there is no fuel filter between the gas tank and carburetor. Be sure to install the spring and replace the o-ring for the filter nut. Also, make sure the filter nuts are tight. These tend to leak easily and you wouldn't want an engine fire to destroy your new restoration.
|
|
|
Accelerator Pump And Housing
During reassembly, start by installing the throttle plate to the main body. Install the accelerator pump squirter. Then, install the jets and new power valves in the metering blocks. The numbers on the side edge of the power valve indicates how quickly it will open upon acceleration. A #55 opens fairly quickly while a #85 has a stronger spring and opens much slower possibly causing a hesitation. Stock jets are #68 primary and #76 for the secondaries. Jerry Macneish advised me to use #72 jets for the primaries and my car runs much better with the larger jets. Next, install the needles and seats and adjust the float level according to the instructions (11/32"). Last, install a new accelerator pump diaphram. The spring goes between the carb and diaphram. Install the fuel mixture screws (don't forget the cork o-rings) and adjust them to 1 1/4 turns out. |
|
|
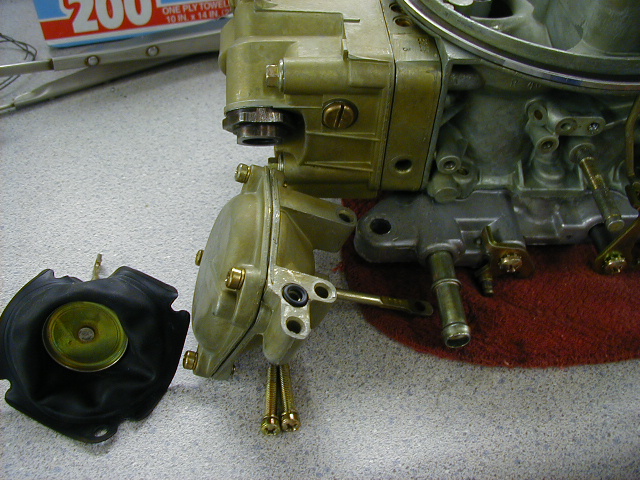
Vacuum Secondary Diaphram And Choke Assembly
Finally, install the new vacuum secondary diaphram and spring in the housing. Be very careful not to tear the diaphram and make sure it is correctly oriented in the housing. Then, install the housing to the body. Don't forget the o-ring between the housing and the body or your secondaries will not open due to a vacuum leak. Finally, you can install the fast idle cam, and choke pull-off. We are now ready to install on the engine.
|
|
|
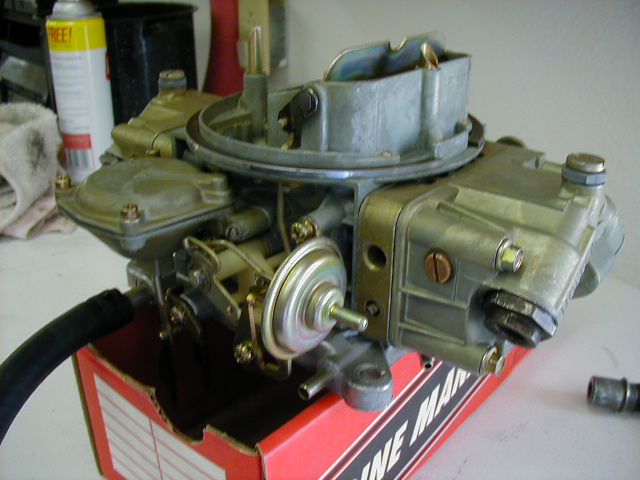
Ready To Install
Before setting the carb on the intake, match the old base gasket to the numerous new ones in the kit. Bolt down the carb evenly, hook up the fuel lines, choke linkage, connect all vacuum lines and PCV valve. Connect and check the throttle linkage adjustment. Install the throttle spring and you are done. Crank the engine over for a few seconds to fill the float bowls with fuel. Pump the gas once or twice and fire it up! The fast idle should automatically be set for about 1300 RPM on the highest setting. Let the engine get to operating temperature, kick down the choke and set the idle for 900 RPM. Now adjust the fuel mixture using a vacuum gauge to the highest obtainable vacuum, then re-adjust the idle if necessary. |

 Holley DZ Carburetor Rebuild